
This image guide will show you how to build a router jig that will allow you to make your own radiused sanding blocks. You’ll be able use them for resurfacing during re-fretting and building fretboards, and even fret dressing if you don’t trust yourself with a straight bar. Just take care not to screw up any compound radius transitions. Videos included below.
Note: This jig may be better suited for smaller routers / dremels (in spite of the images showing a huge R2D2 looking router). If you’re worried about stability and seating the router, you can use the same design with a wider router mount on the swing and a little more reinforcement connecting the swing to the base.
Parts Checklist
Wood:
(2) – 26” x 8” x .5”
(1) – 24” x 8” x .5”
(1) – 8” x 8” x .5”
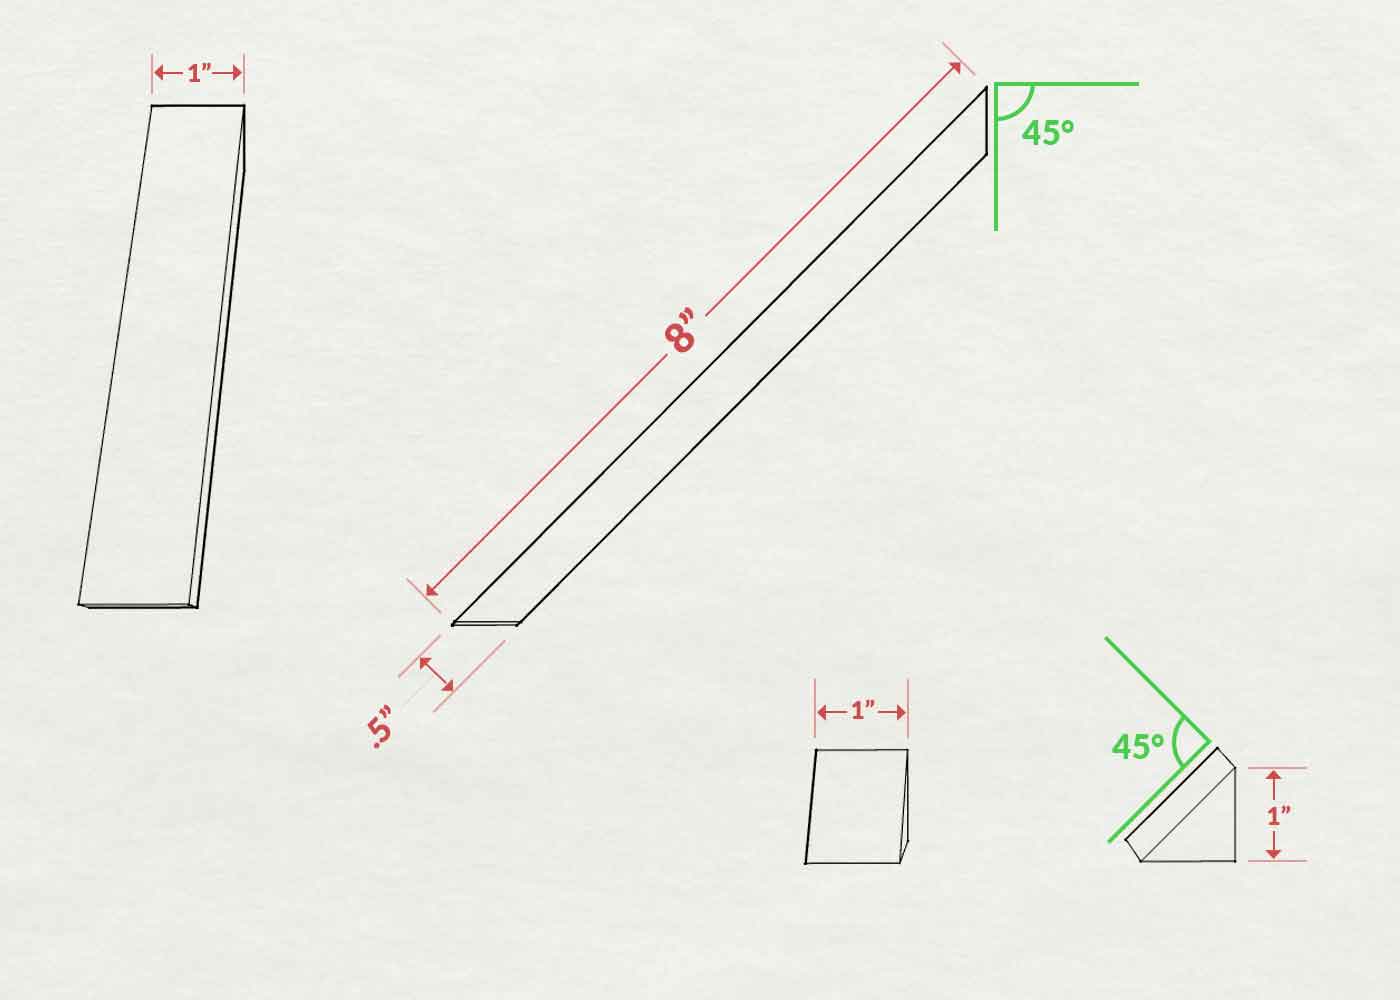
(6) – 8” x 1” x .5”
(2) – 6” x 1” x .5”
(4) – 1” x 1” x 1”
Hardware:
(3) – .25” bolts (~3” length)
(6) – .25” washers
(3) – .25” wing nuts
Others:
(1) – .25” router blade
(1) – .25” drill bit
Finished Router Jig


Base Construction


Swing Construction


Completed Jig Function


Radius Sanding Block-Making Videos
These videos are not using the same exact jig, but similar concepts. One is a bit more sophisticated than mine, and the other is a simpler version (that allows for more error if you don’t take care).
Apologies for the crappy music in both of them.
For anyone interested in creating compound-radius fretboards, I recommend you check out this Dremel/router jig to be used in conjunction with this compound-radius calculator.
Also, check out this simple router jig for another method of cutting circles / radii.
")


![Best Metal Guitars Under $500 [2020]](https://www.electricherald.com/wp-content/uploads/00-Best-Metal-Guitars-Under-500-Dollars.jpg "Best Metal Guitars Under $500 [2020]")