

This is an in-depth pictorial guide detailing the process of drawing a full-scale, 2-dimensional guitar template. This method requires intermediate abilities in Adobe Illustrator, but beginners will be able to follow along regardless. If you are a beginner, you should take some time to master the Pen Tool before attempting to trace a guitar template.
Part I – Guitar Tracings vs. Photos / Measuring Tools
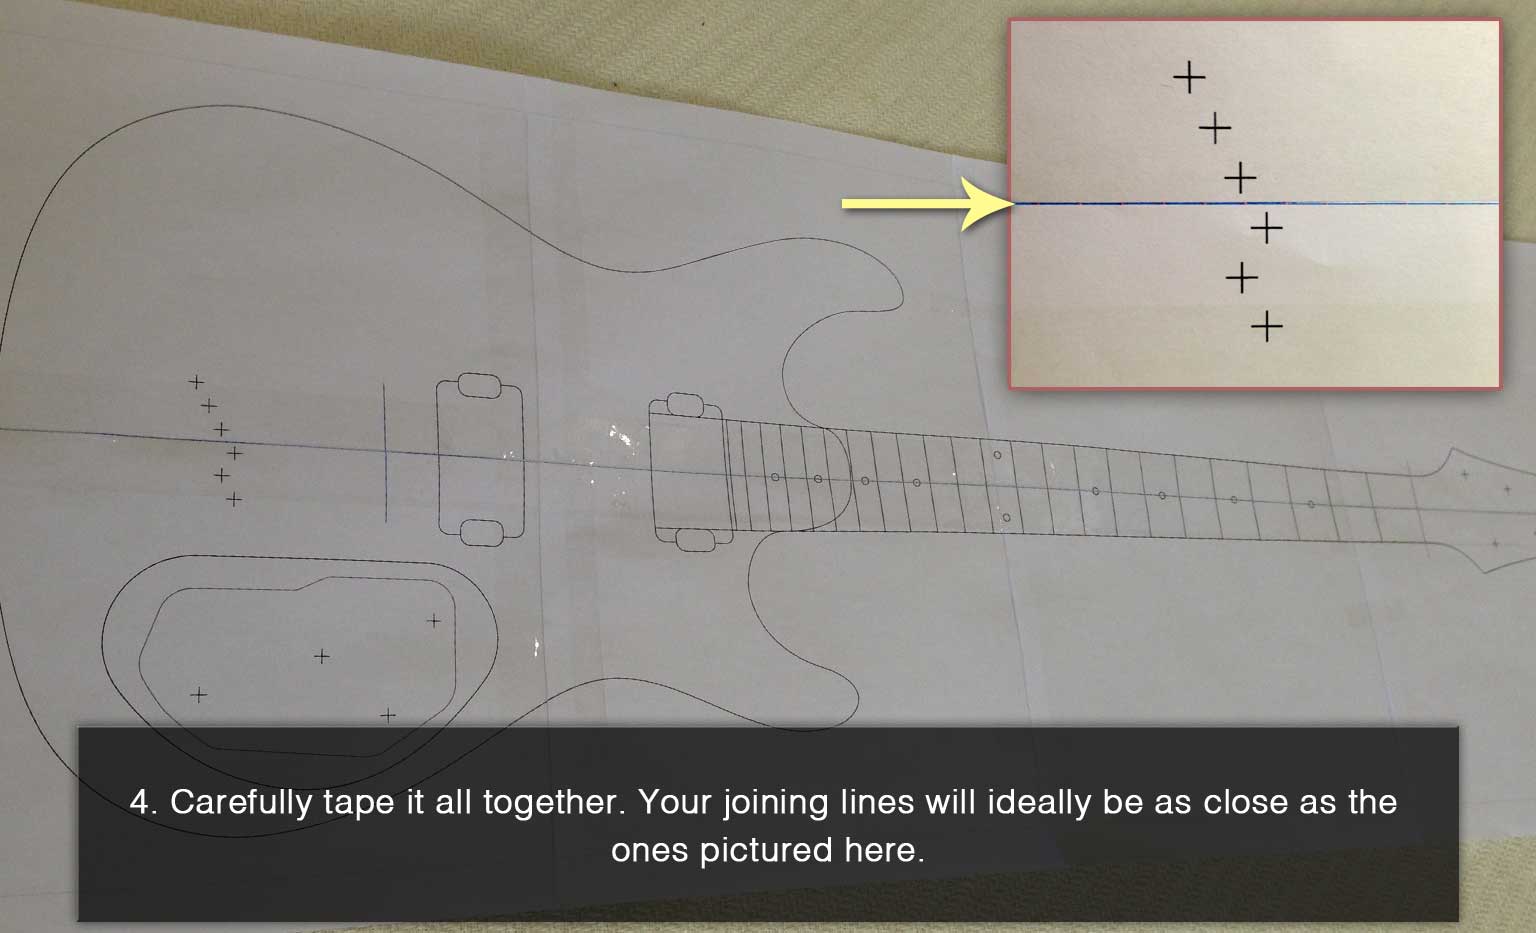
As usual, there’s more than one way to approach this process. The traditional way to make a guitar template is to manually trace an outline of the guitar onto a piece of paper. For those of us without a giant scanner, the paper can then be cut into A4 sized pieces, scanned on a standard scanner, then re-assembled in photo-editing software.
The method outlined below is for people who don’t have a scanner at all. It also takes you through the process of measuring and placing components that can’t be traced. People who decide to cut and scan a tracing will still benefit from reading through these steps.
A guitar tracing will always be more accurate on the first pass, but you will still want to take reference measurements and scale/position everything correctly afterward (something else you’ll see done here). Under any other circumstances, a photo is unreliable for use – lens distortion and perspective distortion can have a significant effect on the guitar’s appearance and dimensions.
If you are going to use photos, you need to have the guitar on hand to take reference measurements and correct the distortions. If you don’t have the guitar directly in front of you whilst doing a photo tracing, you can’t trust that the template will be accurate.
If you’d like to see an example of how NOT to make a guitar template, feel free to watch this video. Raster images, no reference measurements, thick stroke lines…no. We are going for accuracy. Adobe Illustrator is a vector-based program, all of the lines and positions are calculated rather than pixelated. That just means you can scale your work and not lose any quality and turn out a template with flawless lines.
The only tools needed are some measuring instruments:

- Ruler (millimeters preferred) – keep in mind that guitar bodies are usually over 12 inches wide (which is the size most rulers come in). That doesn’t mean you can’t use a 12-inch ruler, just that you can’t take cross-body measurements at once – this tutorial uses a 12-inch ruler, so it’s not a deal breaker.
- Thickness Calipers (1) – there are two types of thickness calipers listed here – this type is the best for measuring the neck thickness since they can reach the center of the fretboard easily and won’t leave any scratches. They don’t have to be digital (like the photo), but you’ll want to work in millimeters.
- Thickness Calipers (2) – this type is great for measuring hole diameters (you’ll use the outward facing hands on the back side for that), hardware, headstock, and body thicknesses.
- T-Square – This can be substituted with a small square or some variation that will be able to fix onto 90° angles in tight spaces. Working with perfectly perpendicular references for your measurements is the best way to maintain accuracy.
- Protractor – For times when you don’t have a perpendicular point of reference, this is the next best way to ensure your lines are correct.
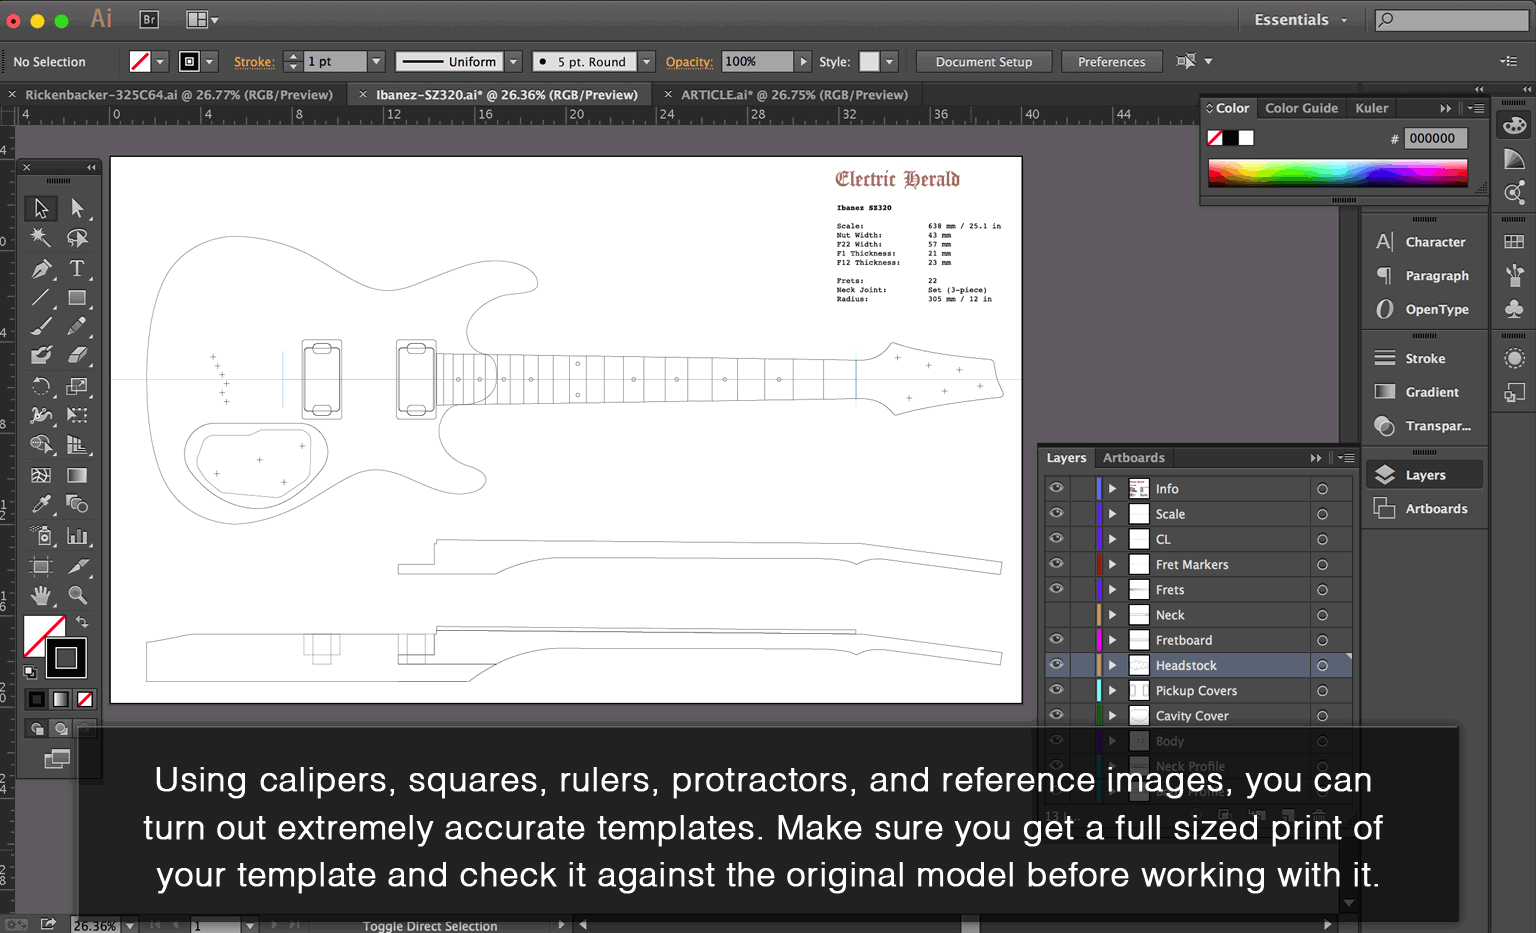
The reference images are of all the pertinent areas: body top, body rear, headstock, rear cavity, and cavity cover. You’ll notice that the fretboard was left out – this is because it’s more accurate to build it from measurements and calculated fret lines.
When you are taking the photos, you want to have the camera dead centered over the subject and looking straight down. For this example, rather than using a larger lens, an iPhone camera was used. This will ensure that there’s some more significant distortion to correct.
The biggest issue is going to be perspective distortion – take multiple photos and choose the one that’s most perfectly parallel with the plane of whichever face you’re aiming at. This will do the most for minimizing your edits.

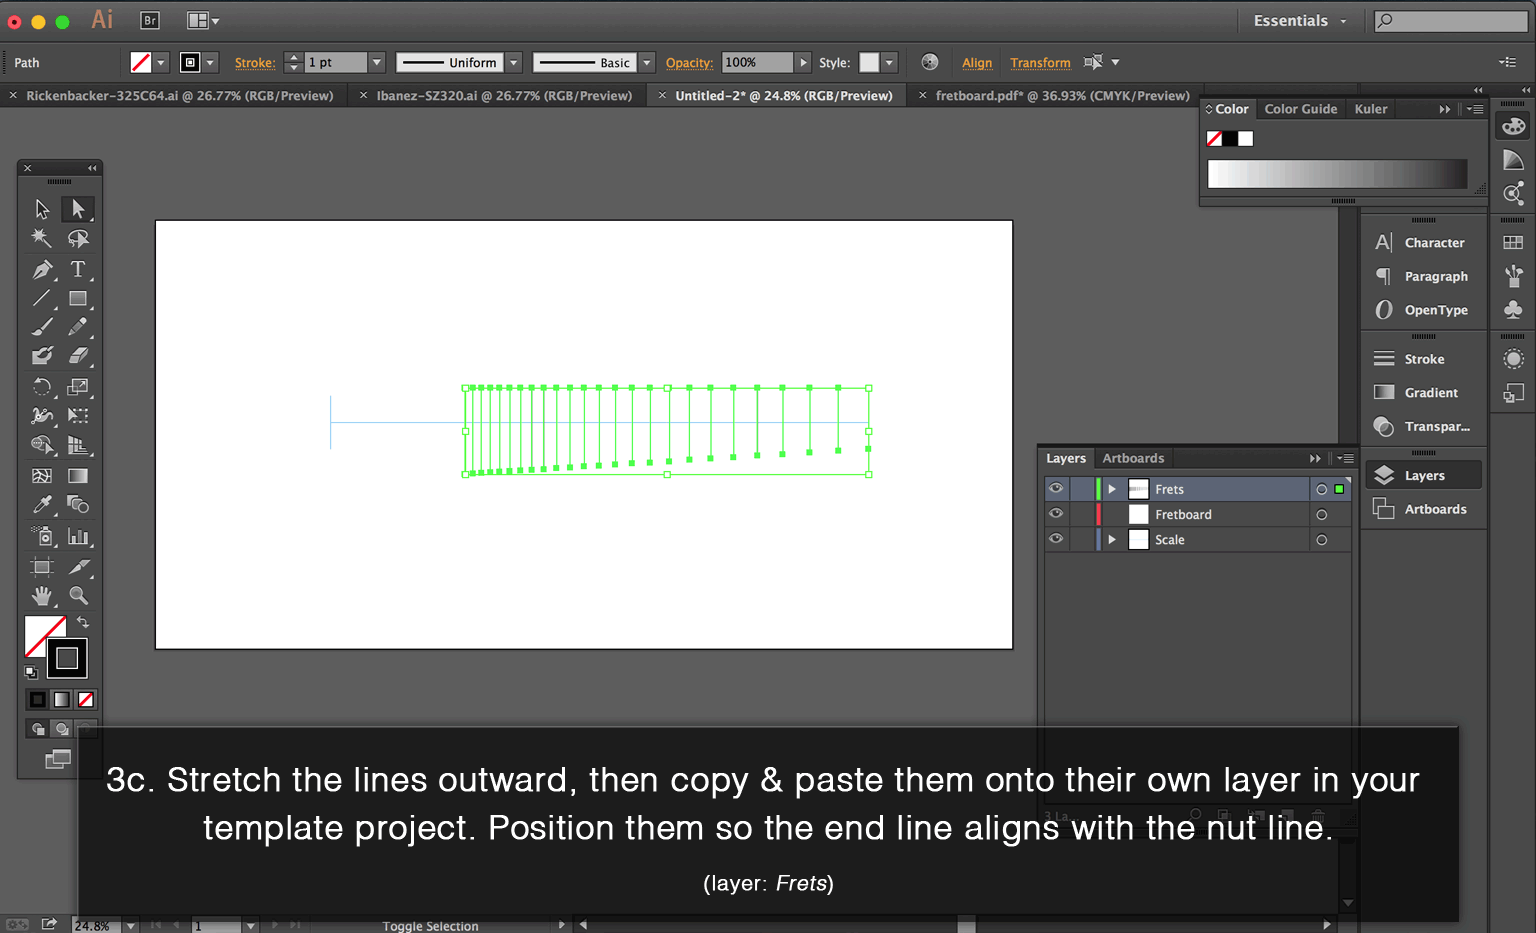
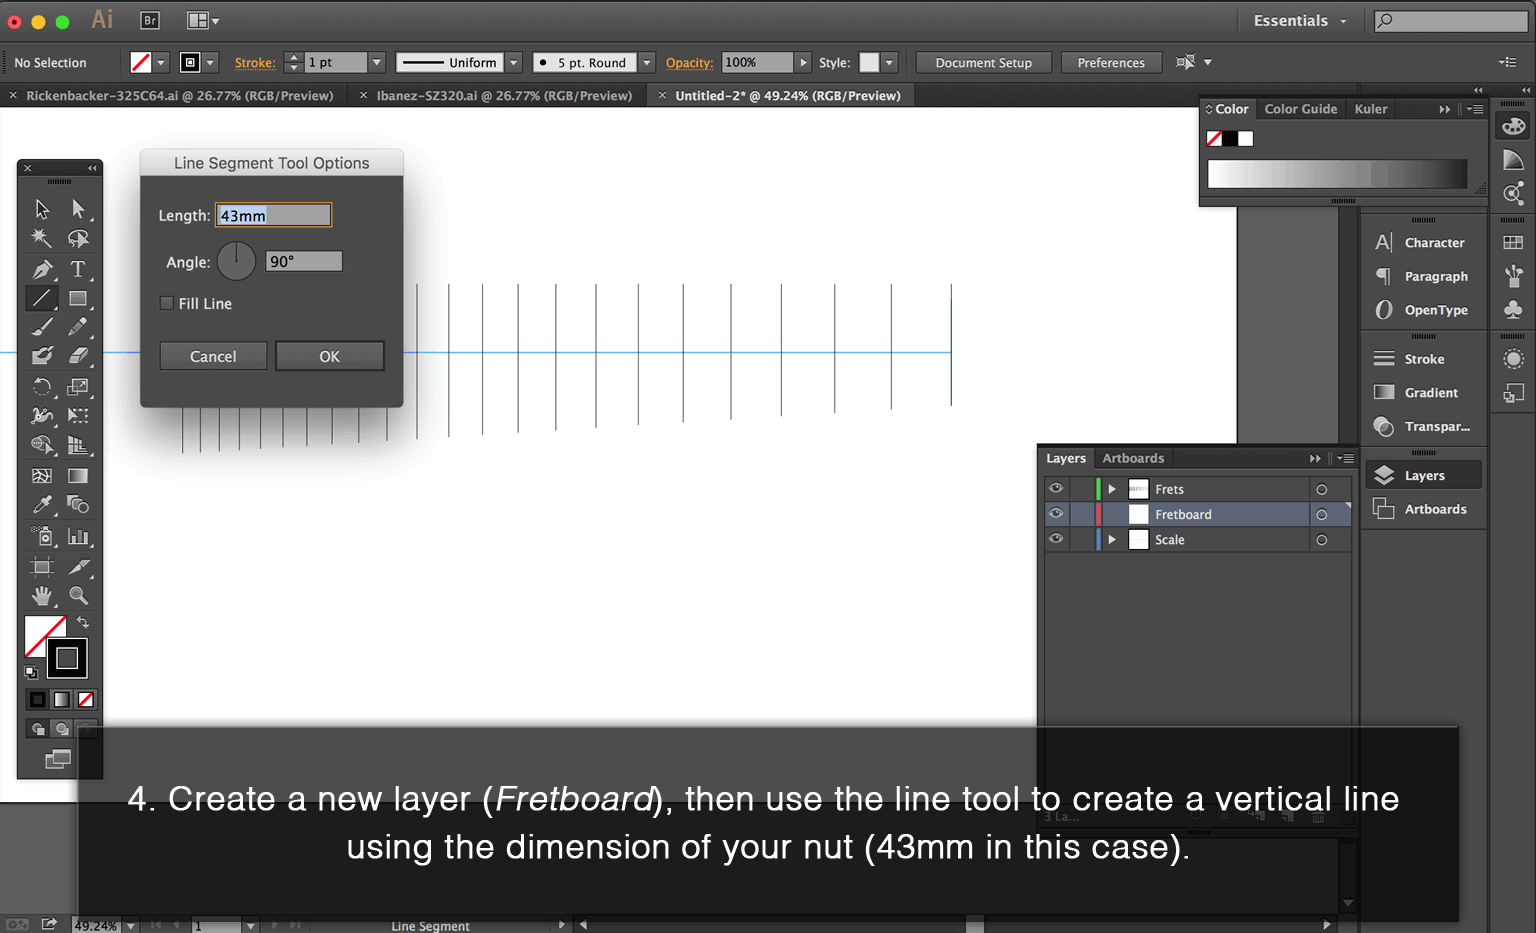
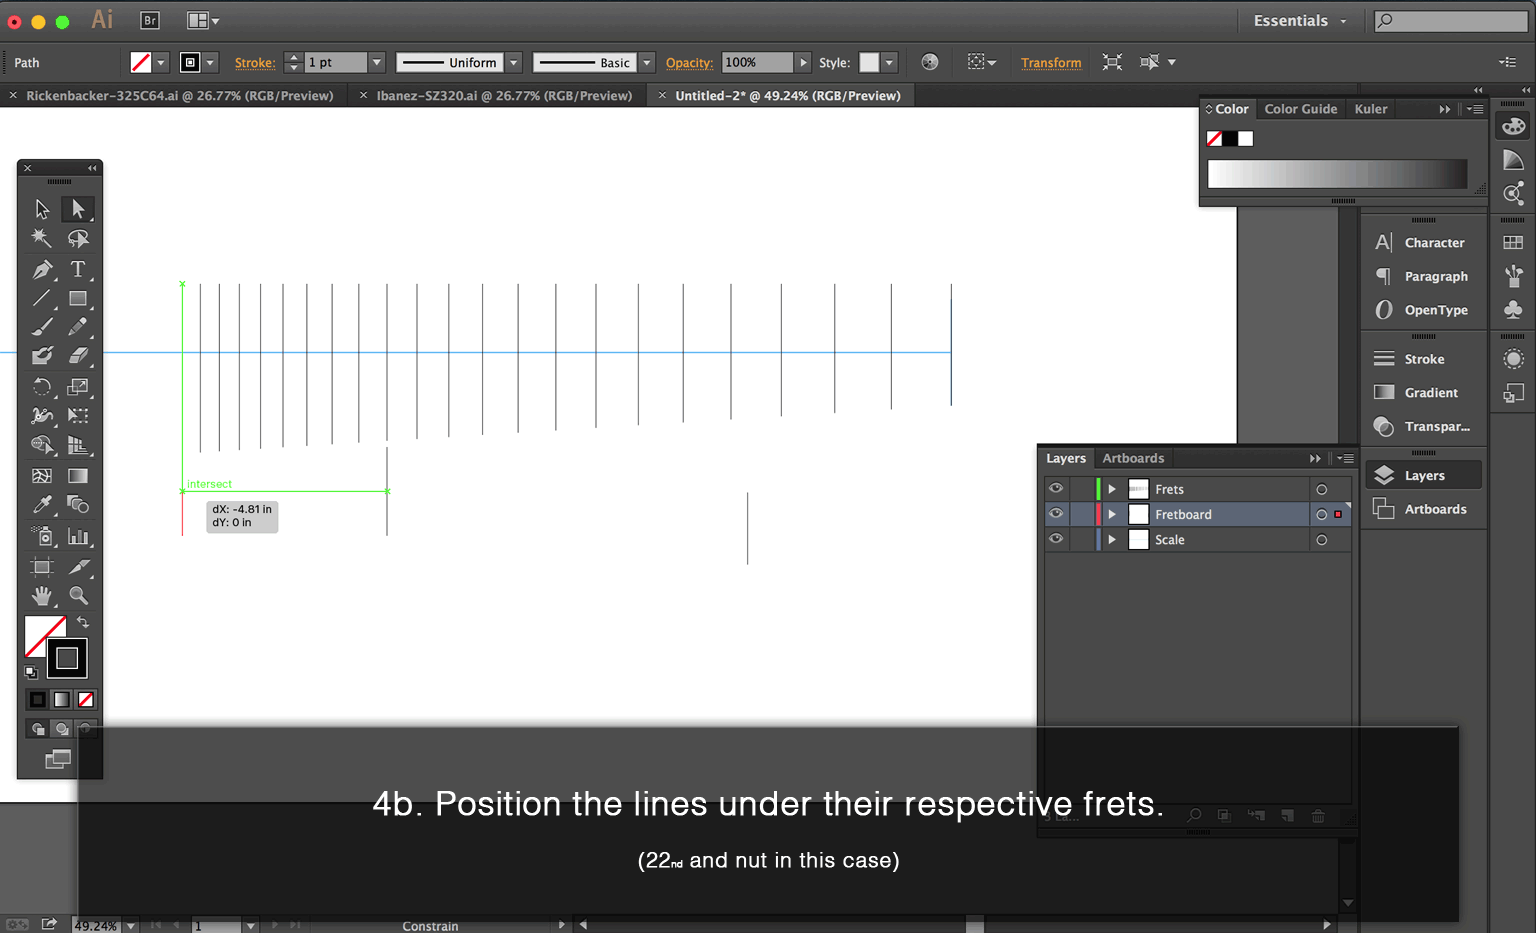
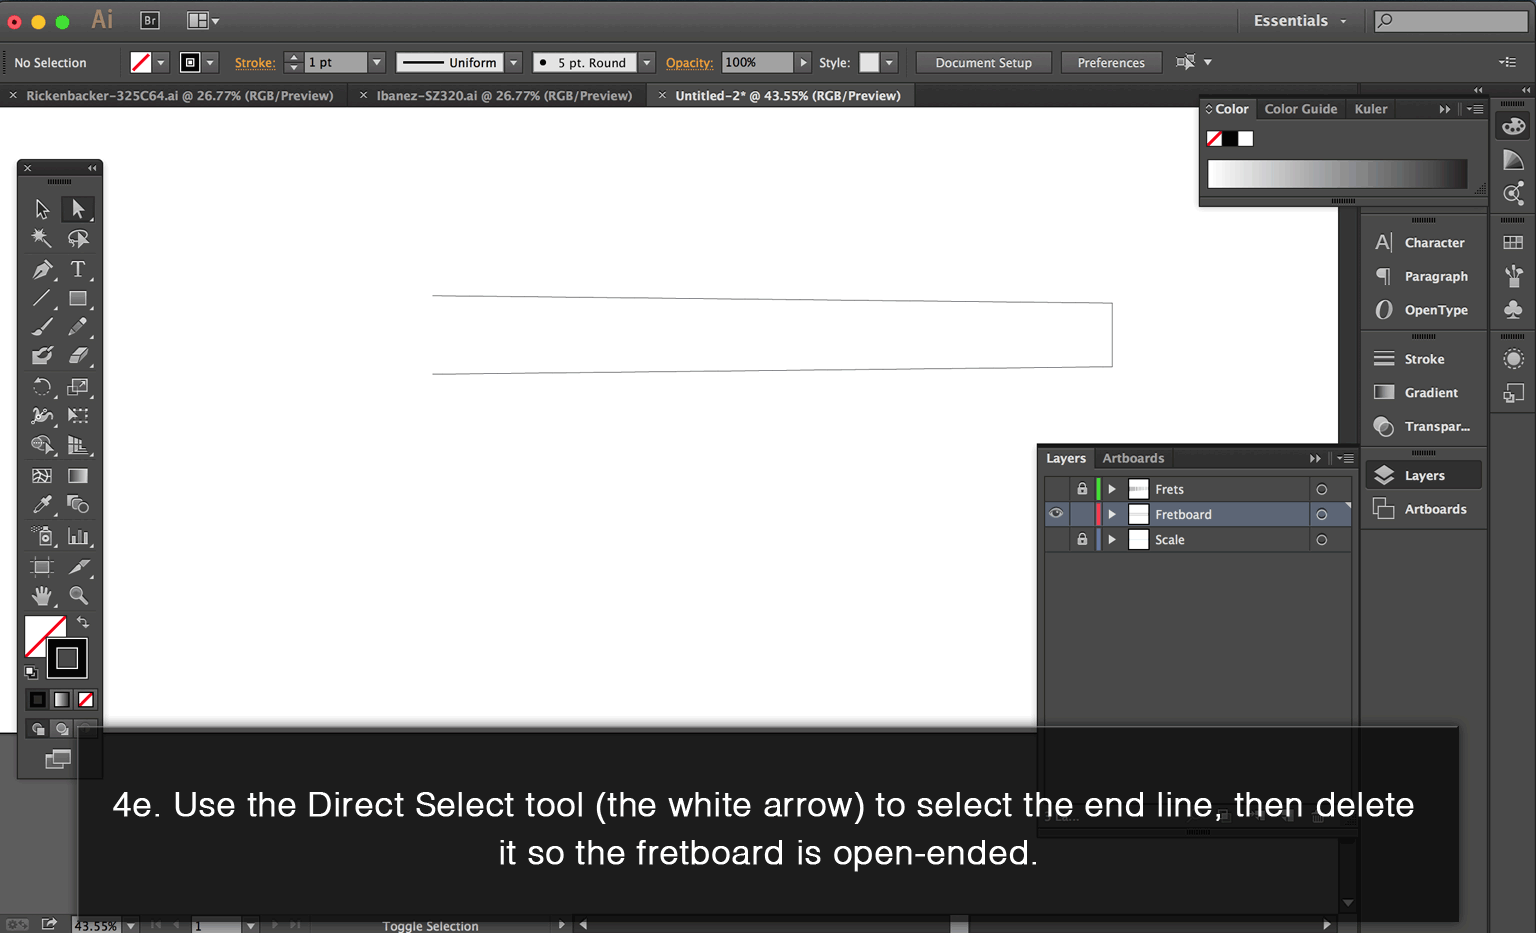
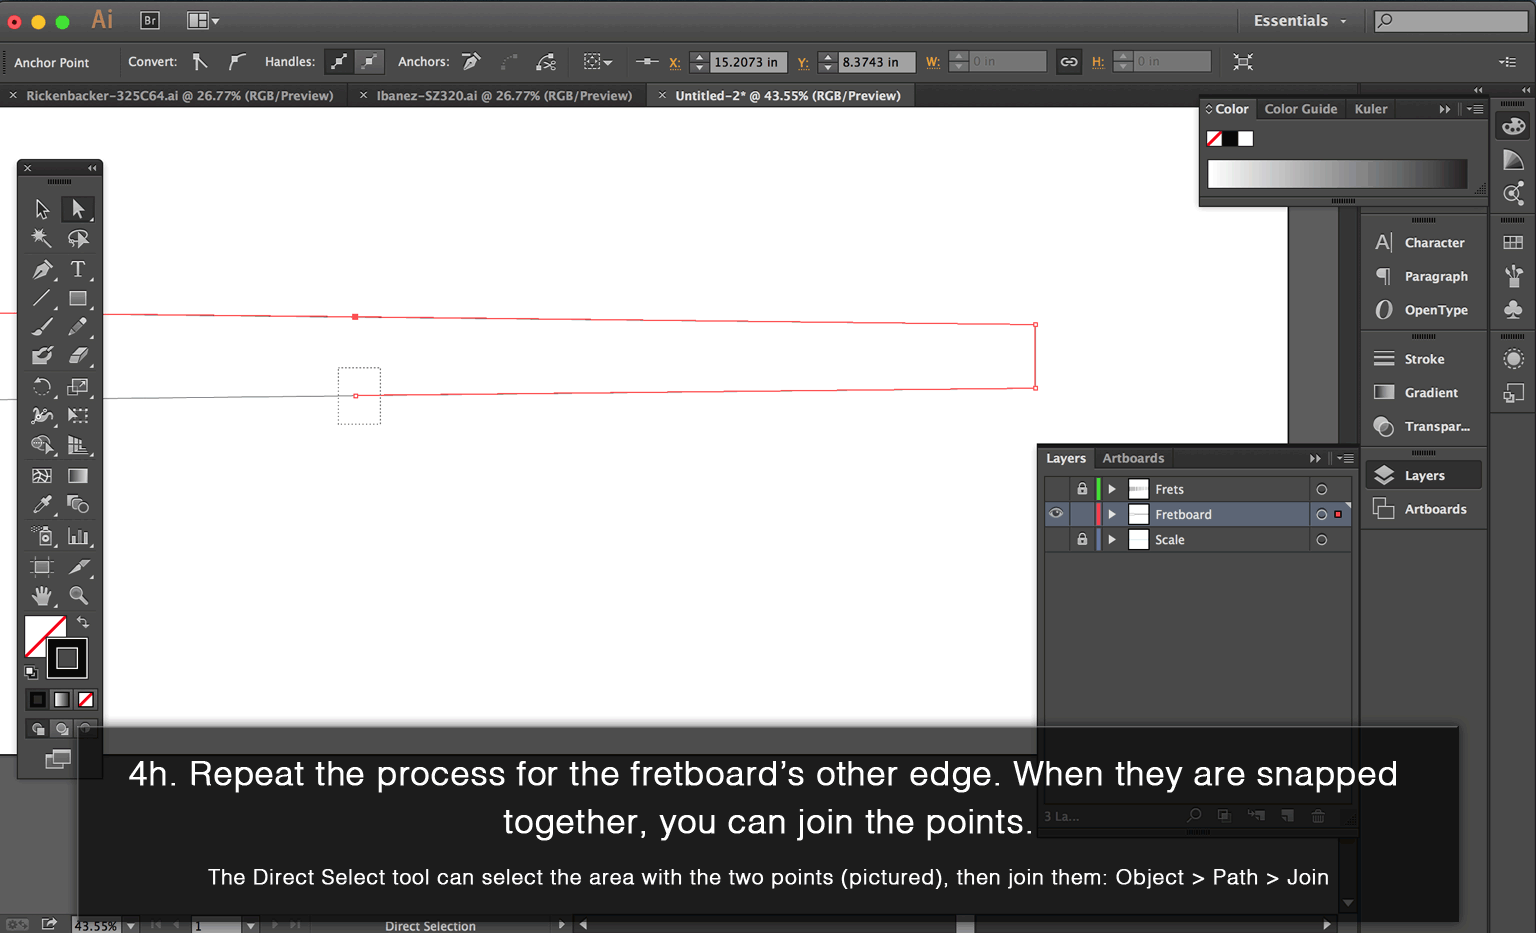
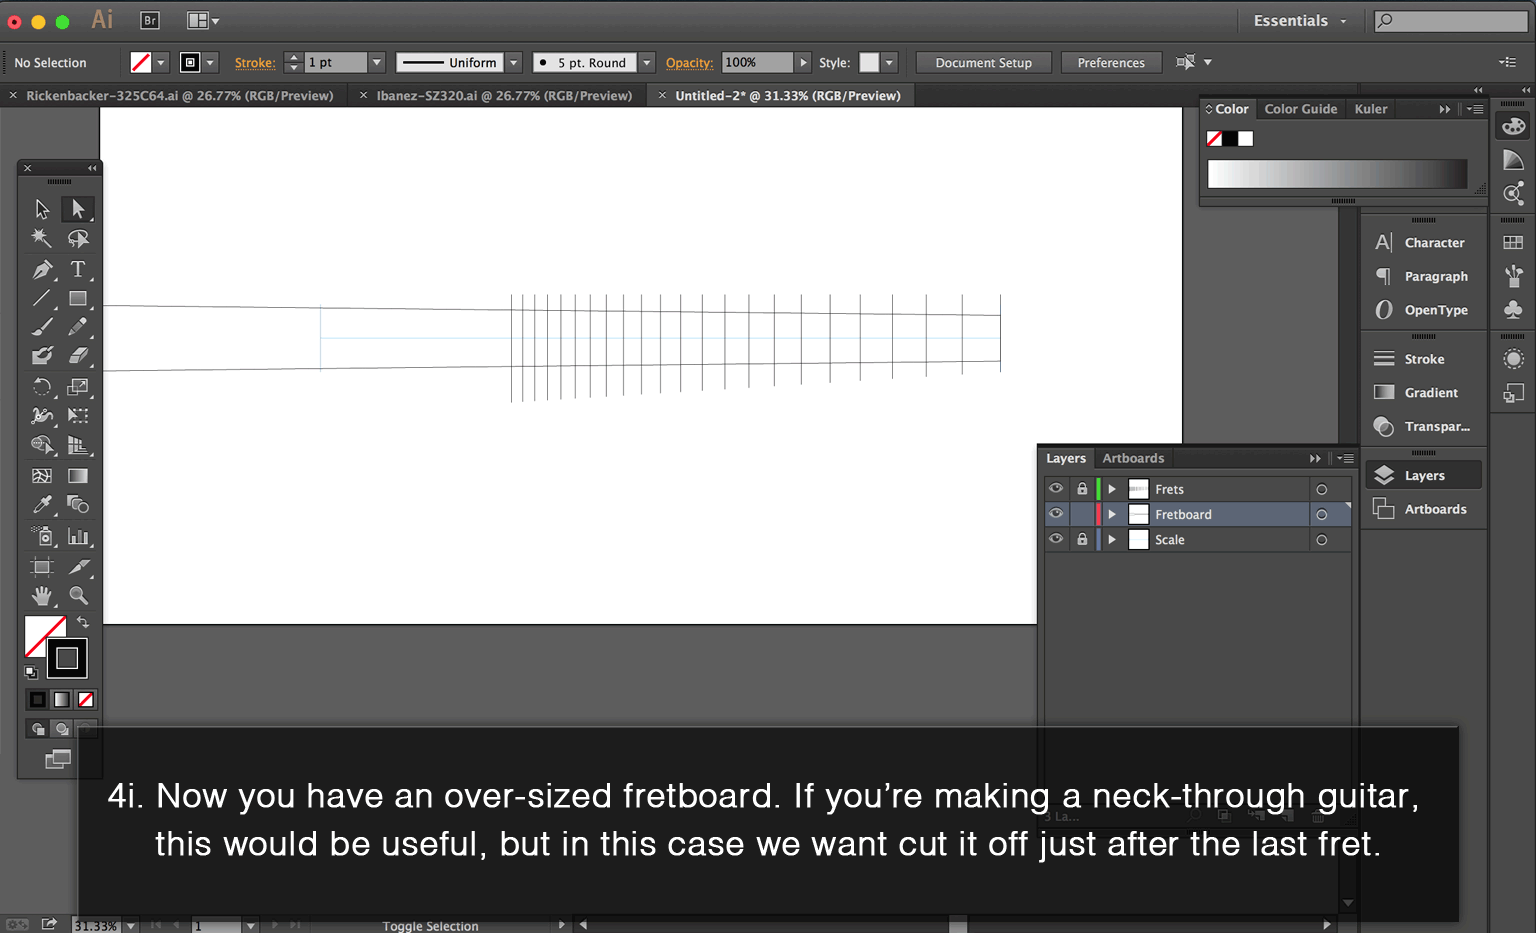
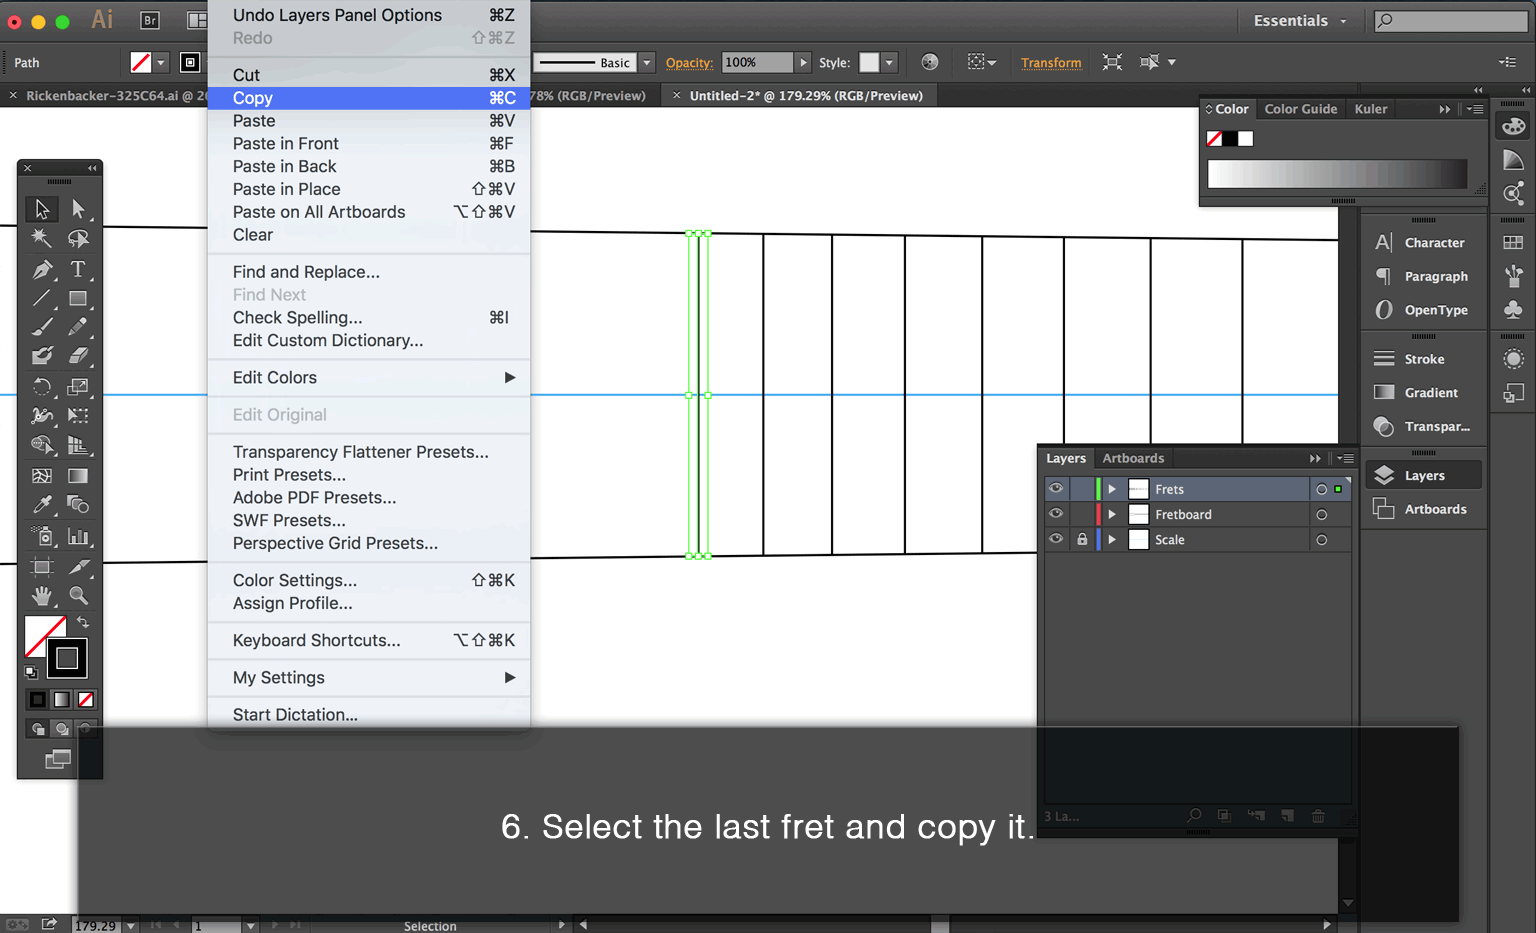
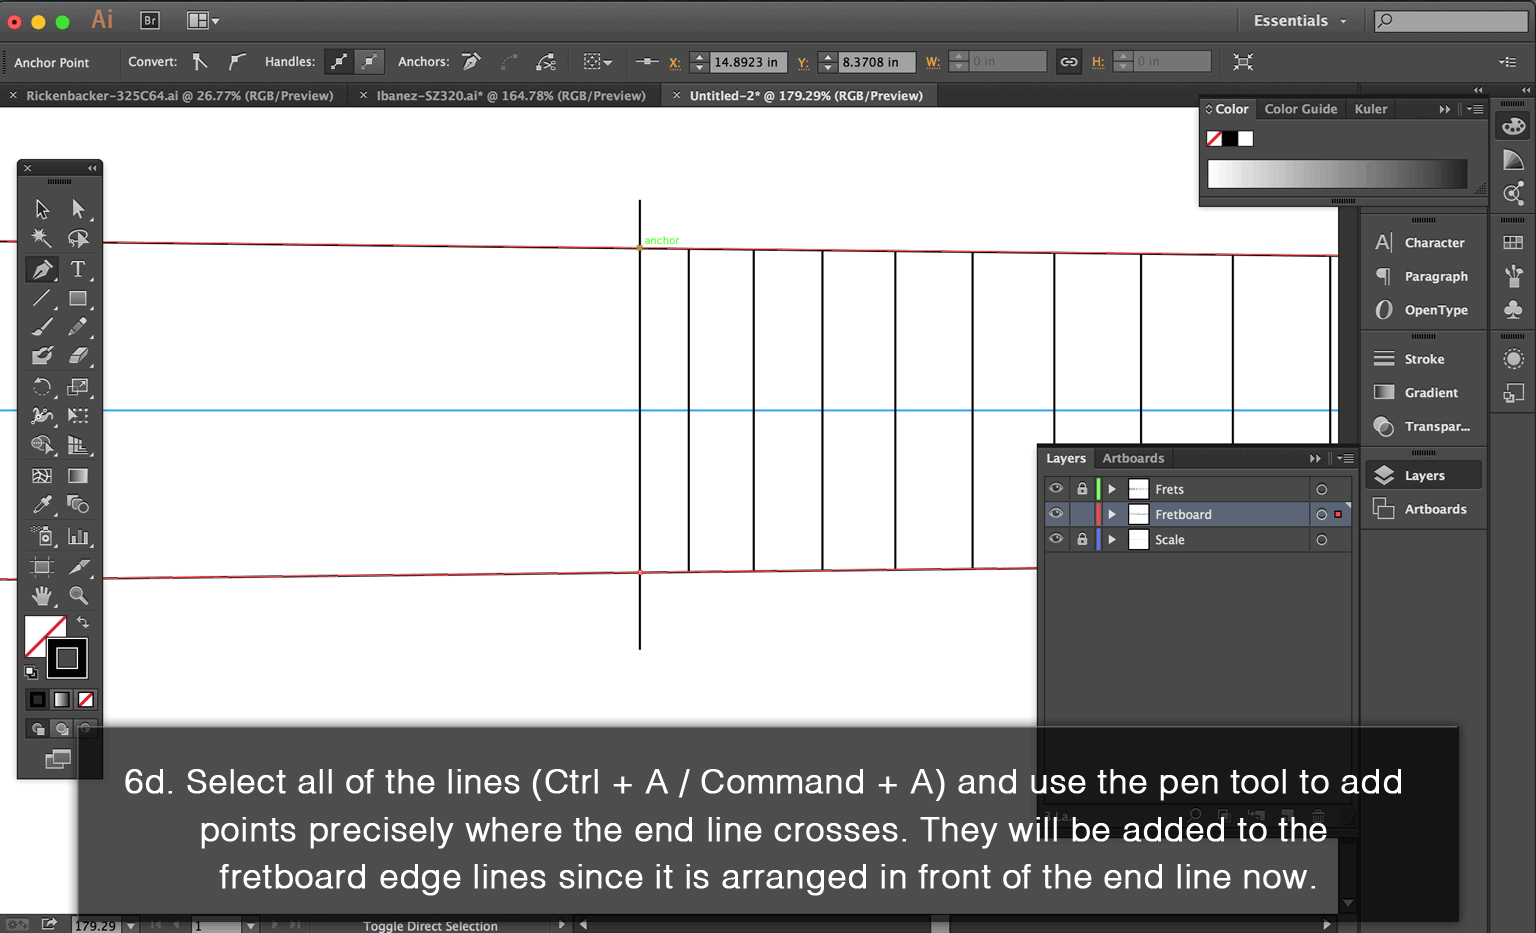
Part II – Building the Fretboard
This is the only part of the process where you’ll be working without photos (unless you’re tracing fancy inlay shapes). The main template is going to be an overhead view of the entire guitar, but each of the parts will be laid out on a flat plane (no neck / headstock pitches).
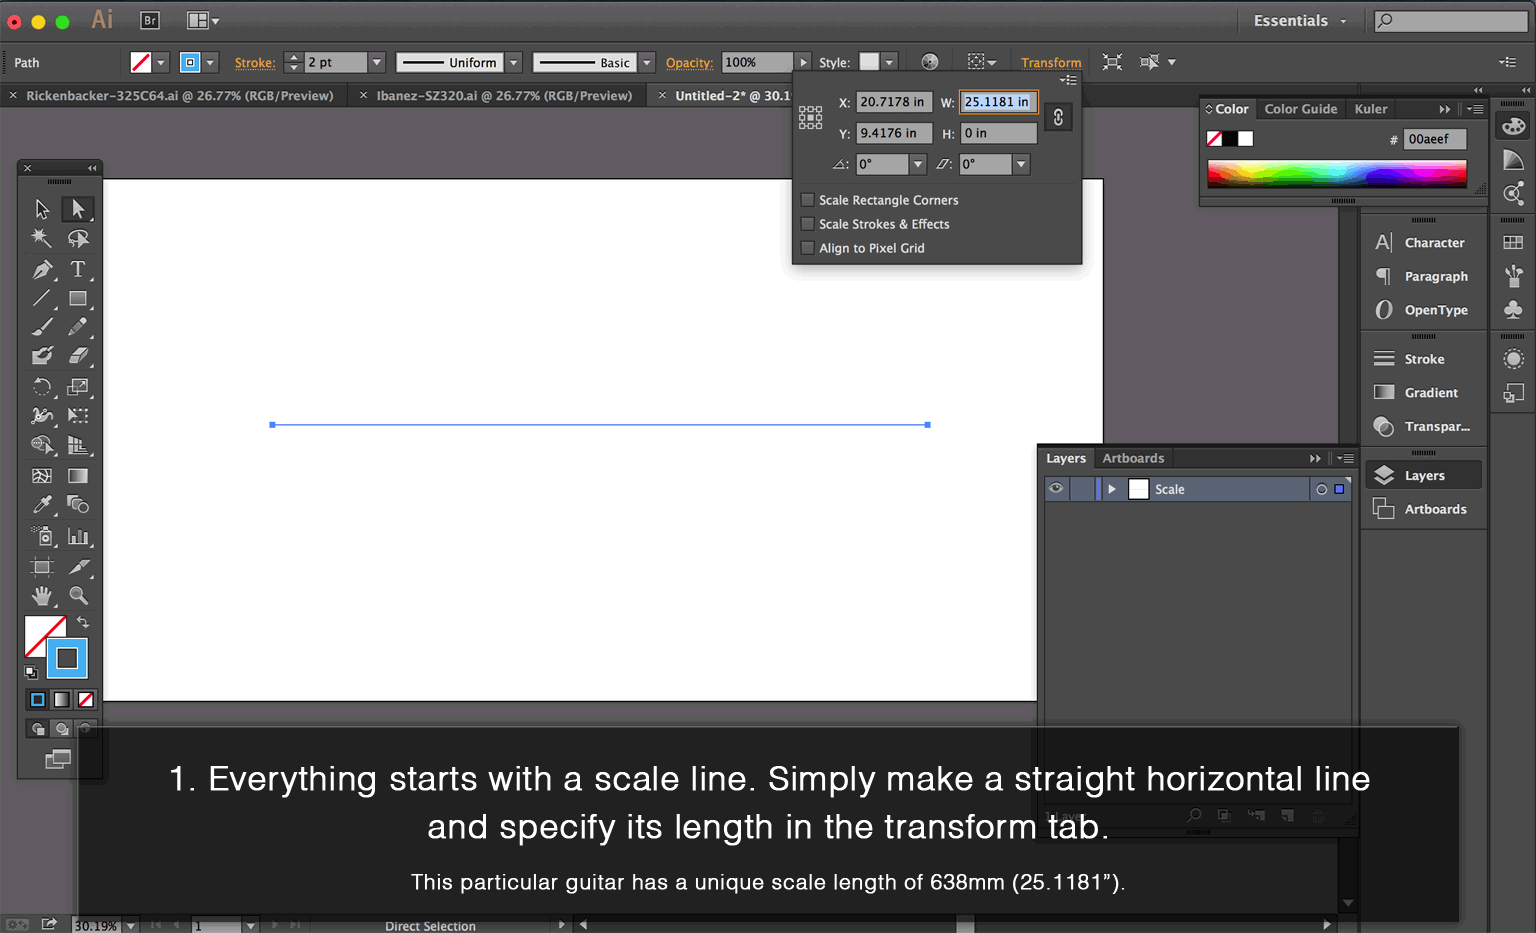
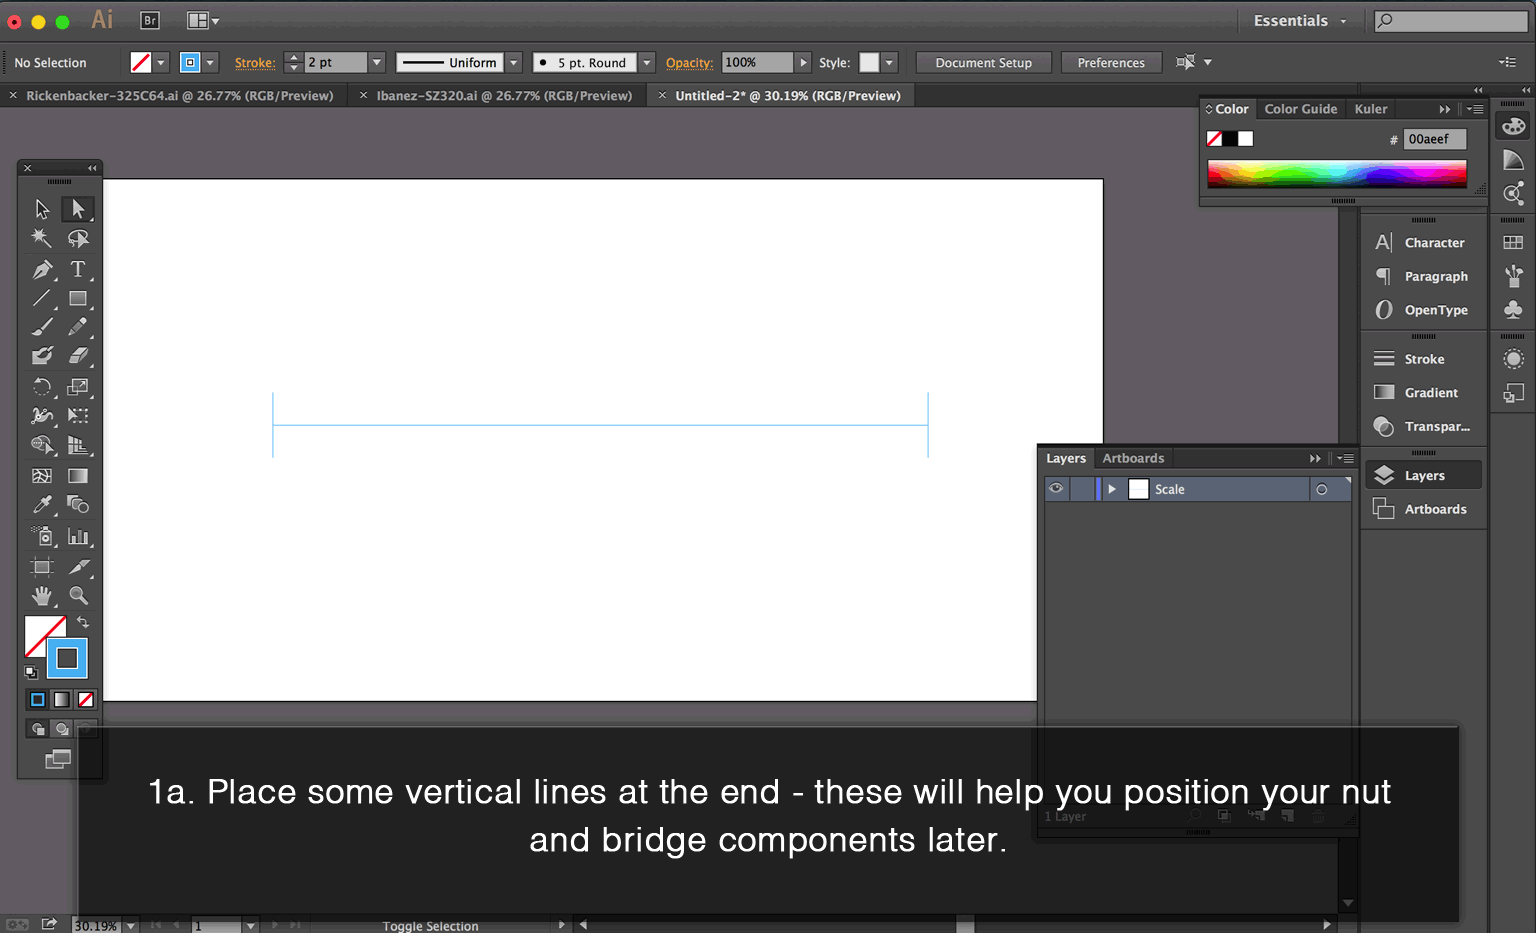
Because the fret positions and scale length (nut & bridge positions) are so critical to the process, it’s much more accurate to build them in the program with precise measurements. The slightest perspective distortion on an image will make the guitar un-playable if you were to trace the fret/scale positions.
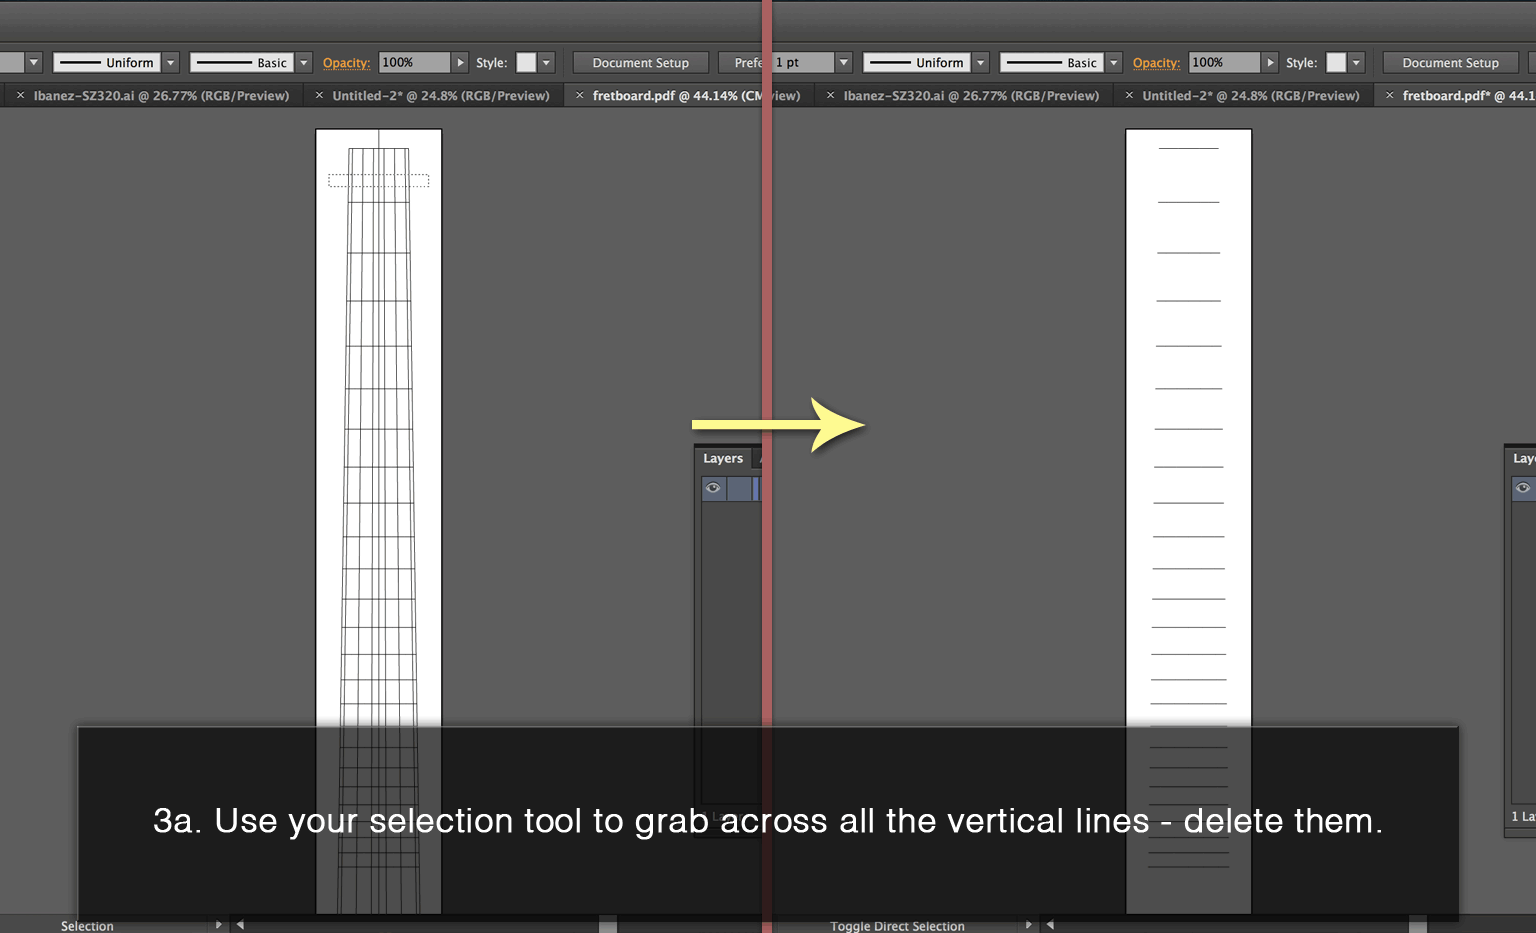
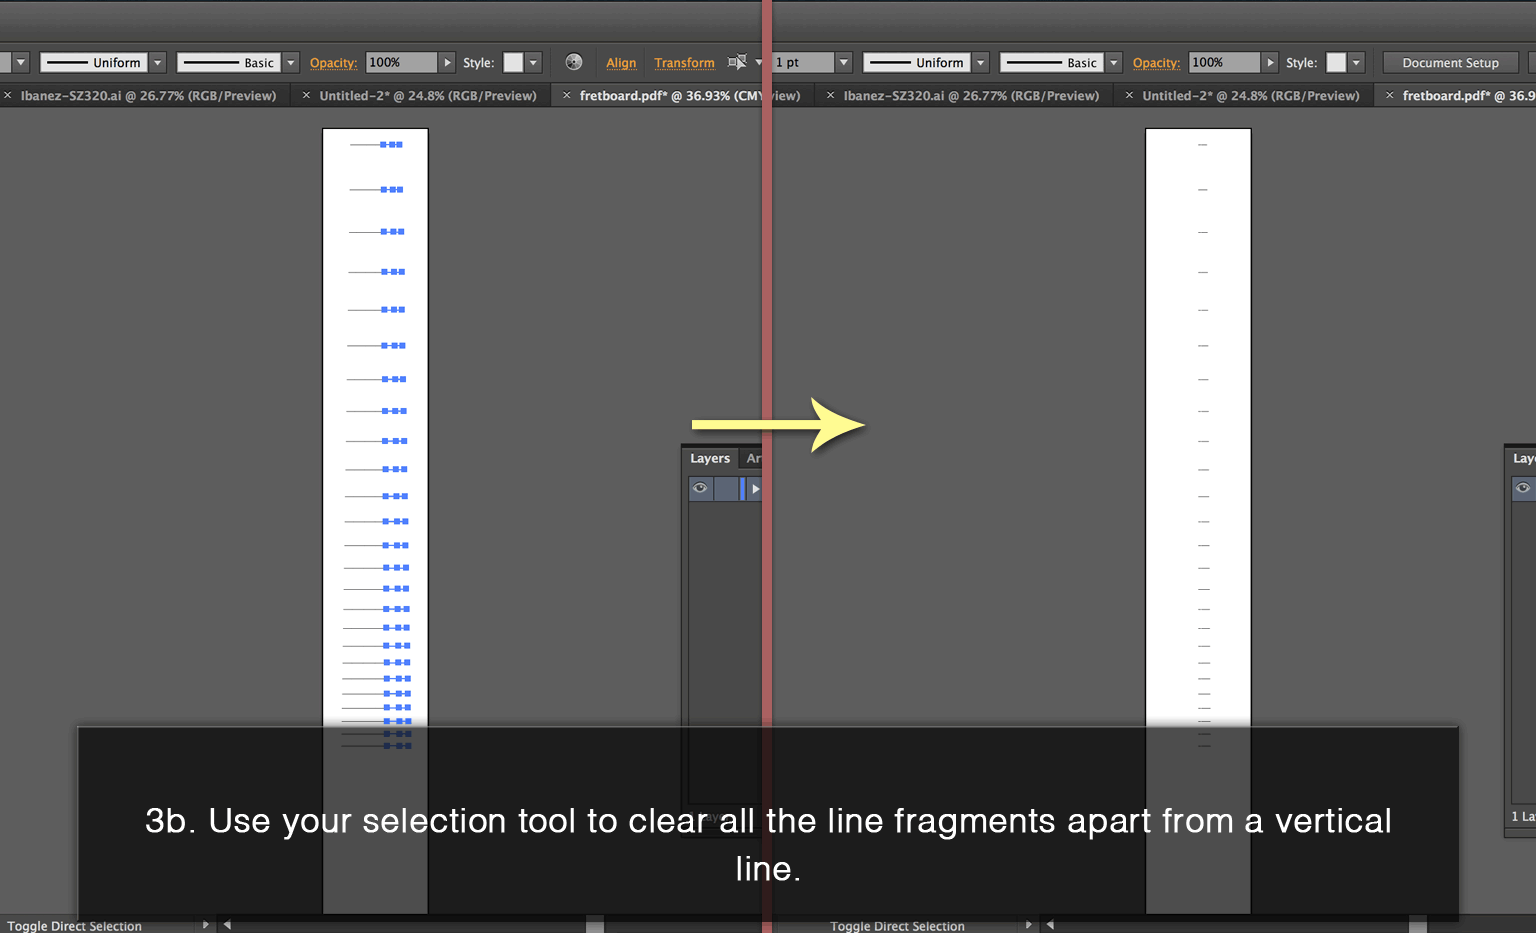
The Fusion 360 Fretboard article outlined a method for building fretboards using our fret distance calculator tool. This time we’re going to simplify the process by using an off-site resource, FretFind2D. This web-application uses Flash, which is not Chrome-friendly. Use Firefox if you have problems downloading the generated PDF.
Note: in various steps, the word “equation” is used improperly to describe a formula.
To view the tutorial, click on the first image in the gallery and cycle through them with the arrows on screen, or with the arrow buttons on your computer.


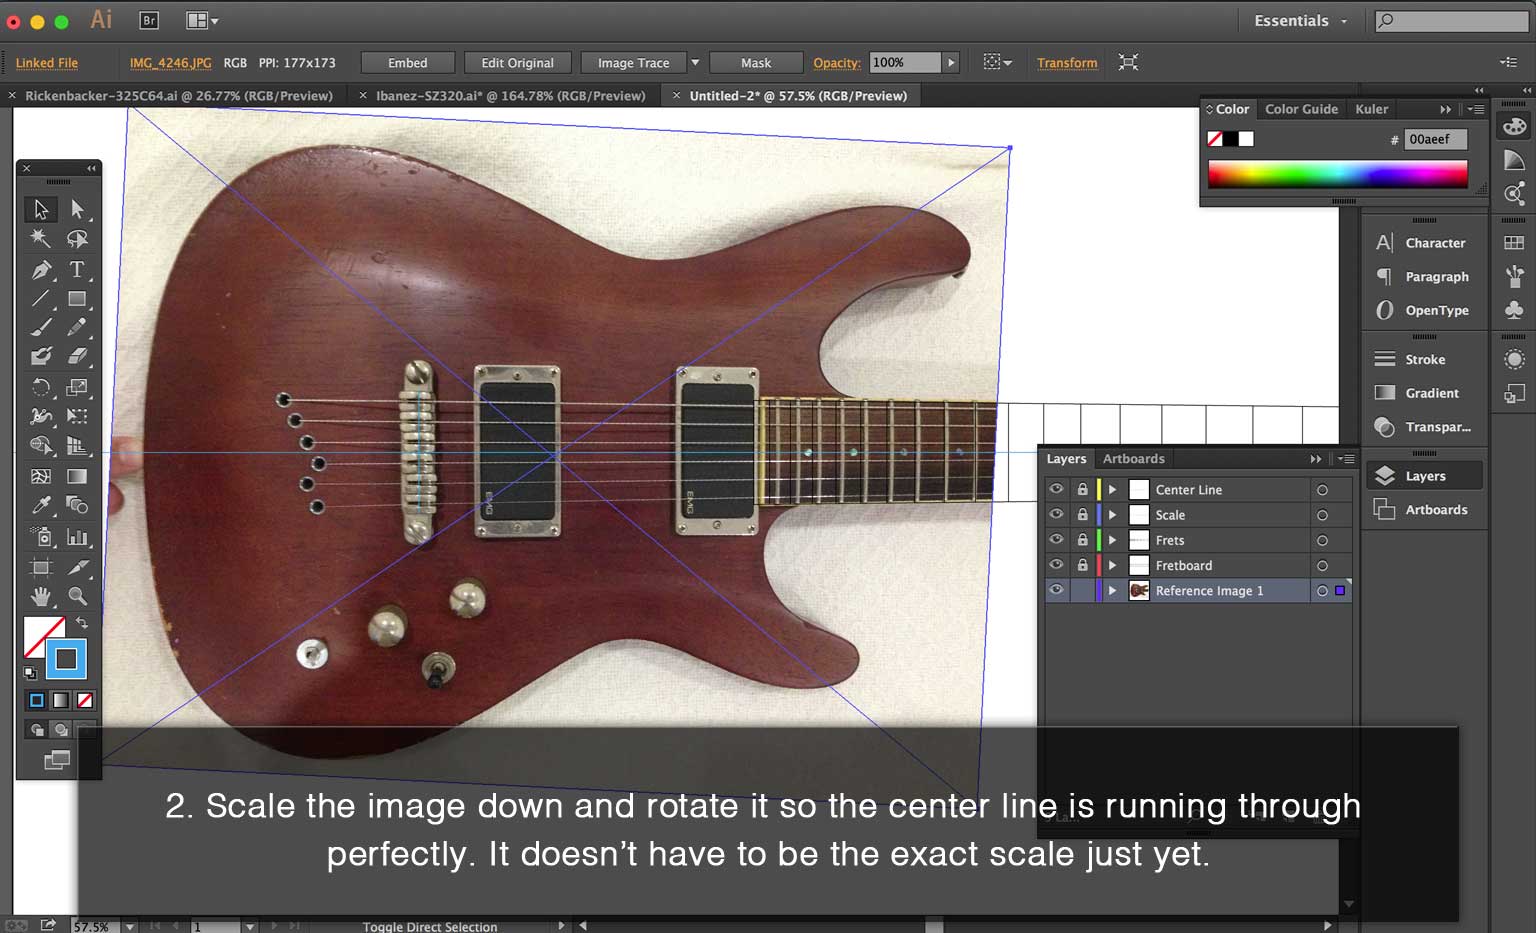
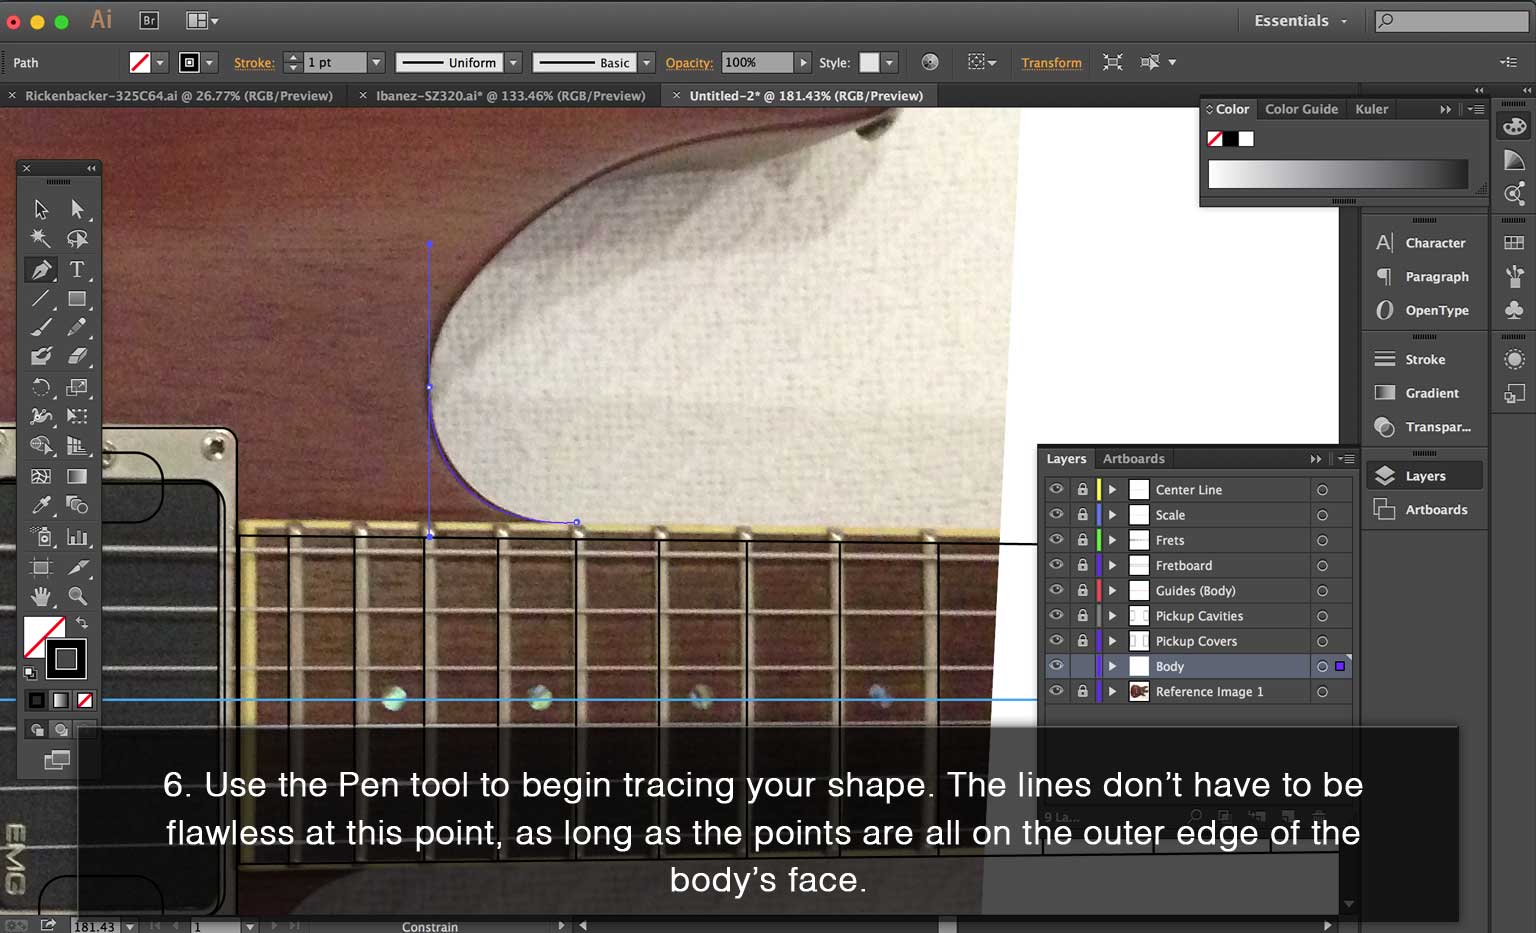
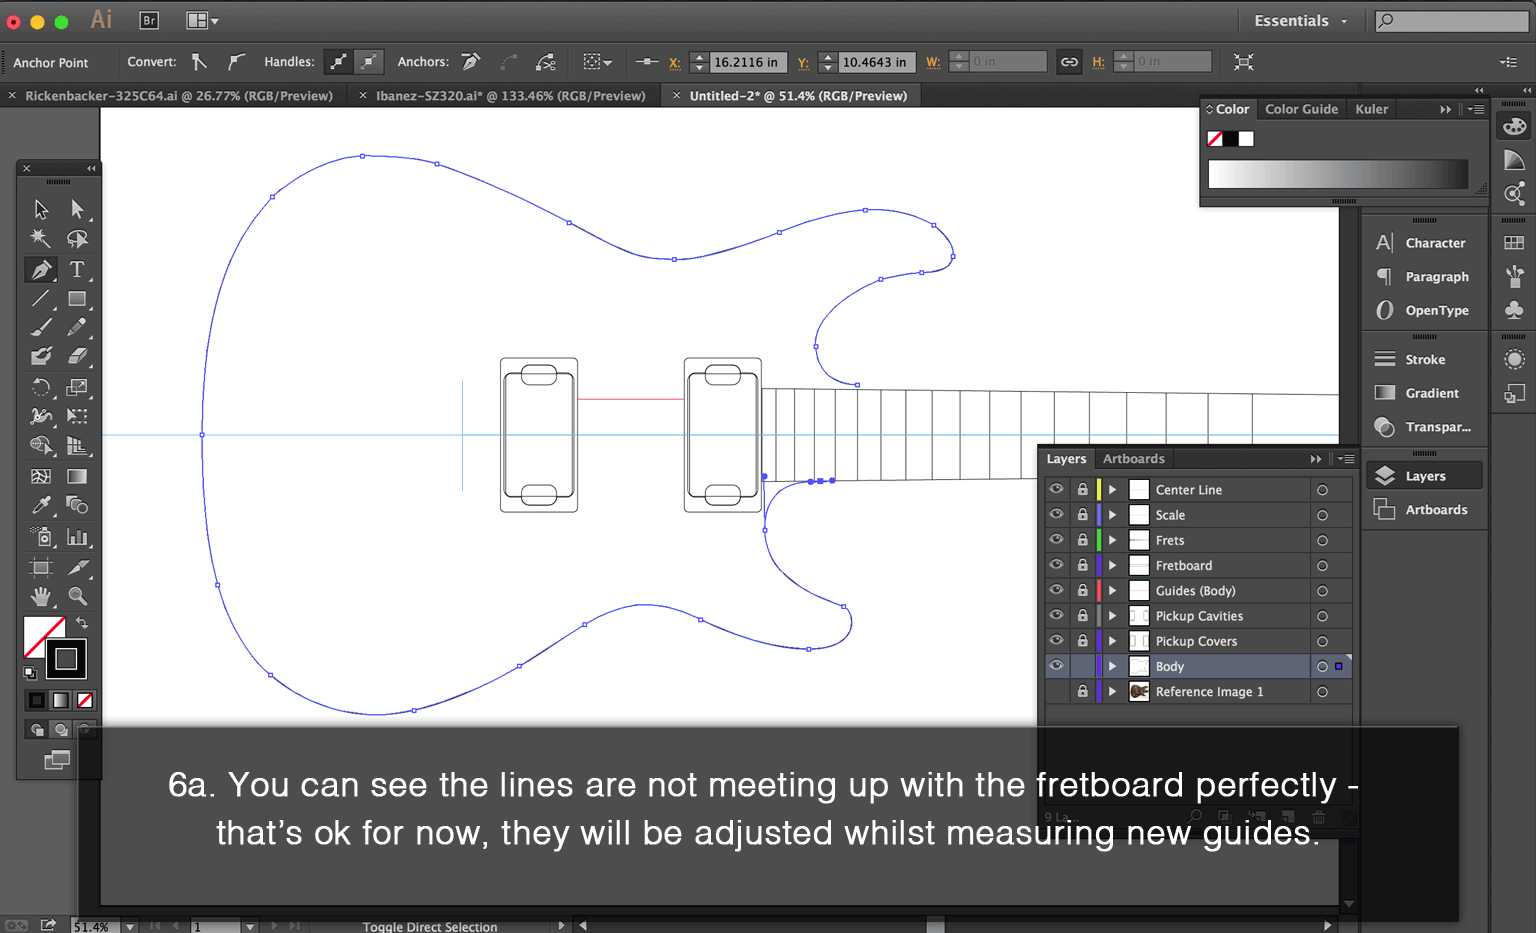
Part III – Tracing the Body
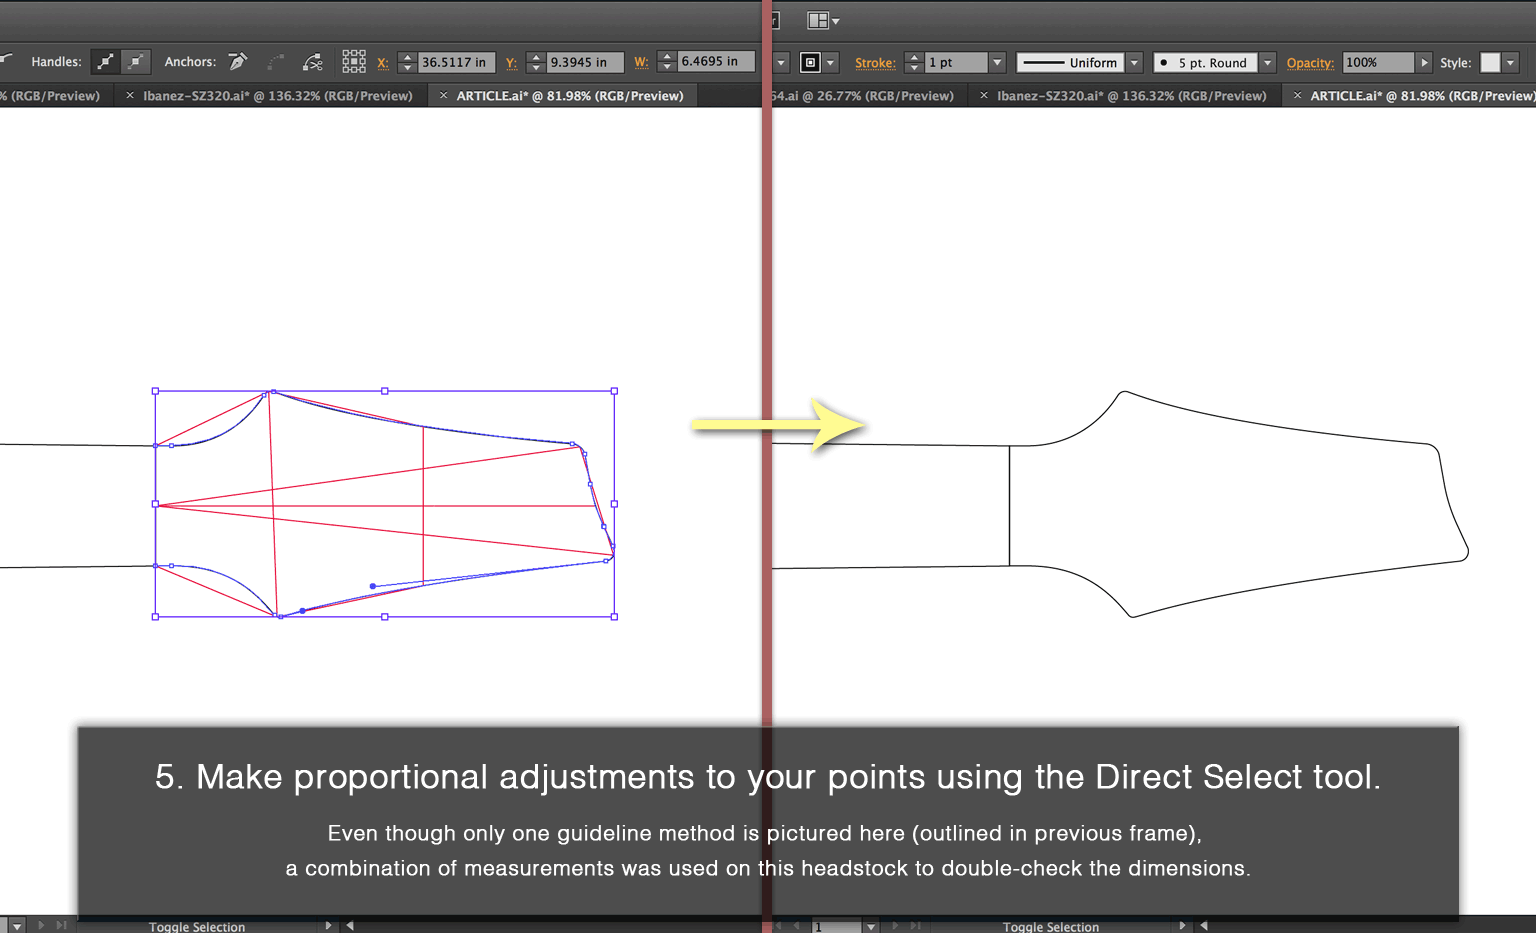
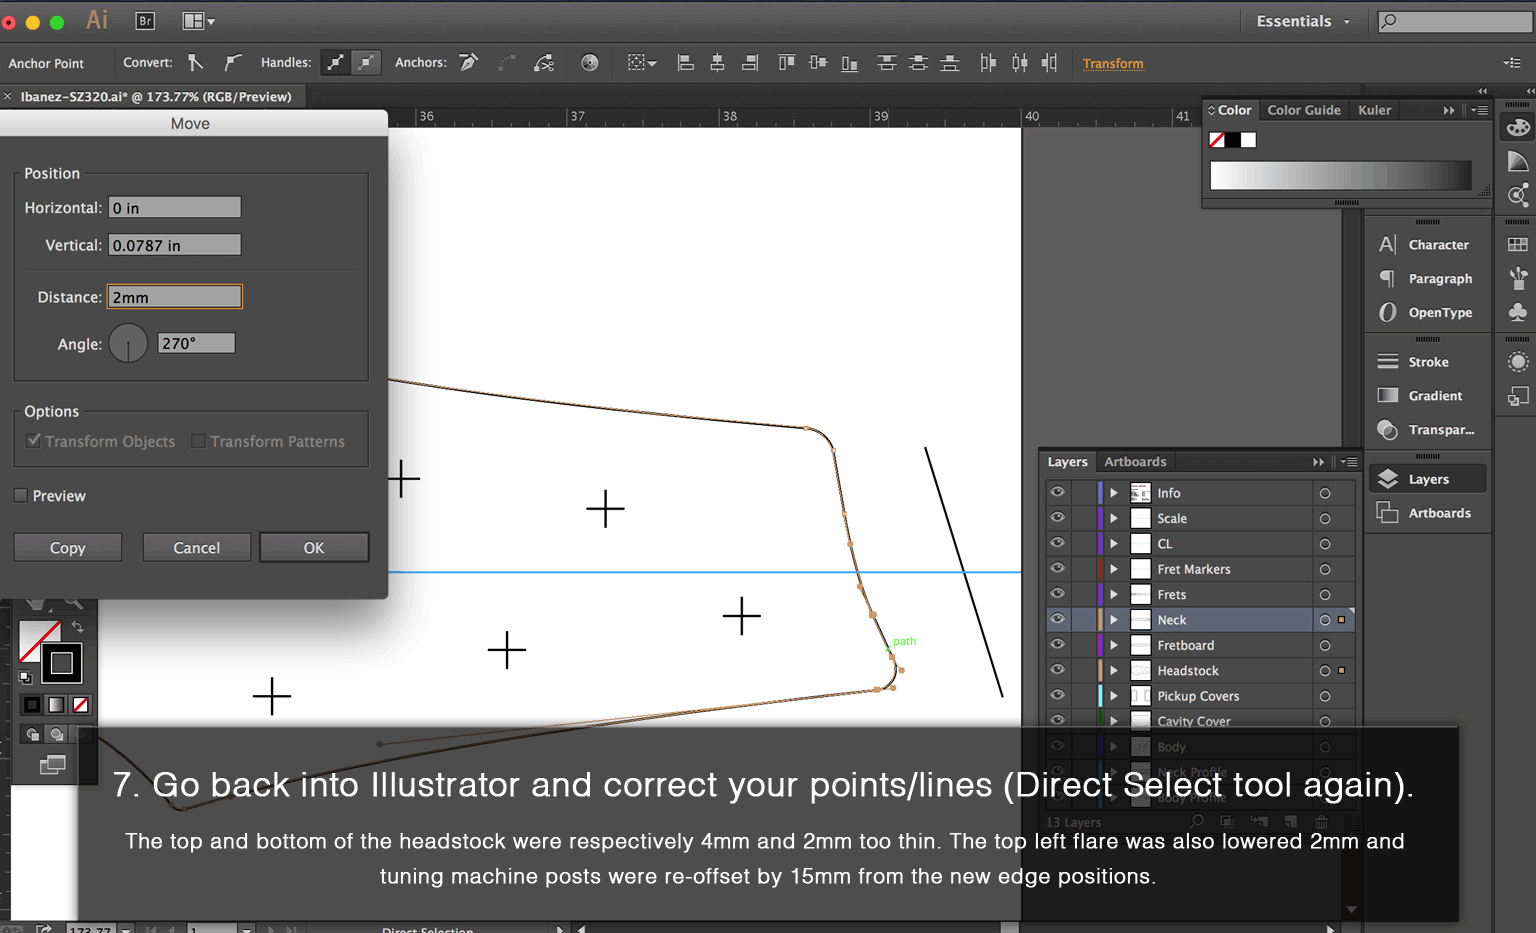
This is where you’ll want to have some practice in Adobe Illustrator. We’re going to be using the Pen Tool heavily, as well as the Direct Select tool to manipulate individual points. If you haven’t used these things before, you’re going to want to learn how from a tutorial.
Aside from being vector-based, one of the main reasons we’re using Illustrator is because of its intuitive pen tool function. The ability to manipulate curvatures to match the objects you’re tracing precisely is important, and Fusion 360’s line tools are extremely clunky compared to Illustrator’s.
Learn the pen tool and learn the hot keys (holding shift, control, etc to change the function). You also want to learn how to manipulate the points and their curvatures with the Direct Select tool.


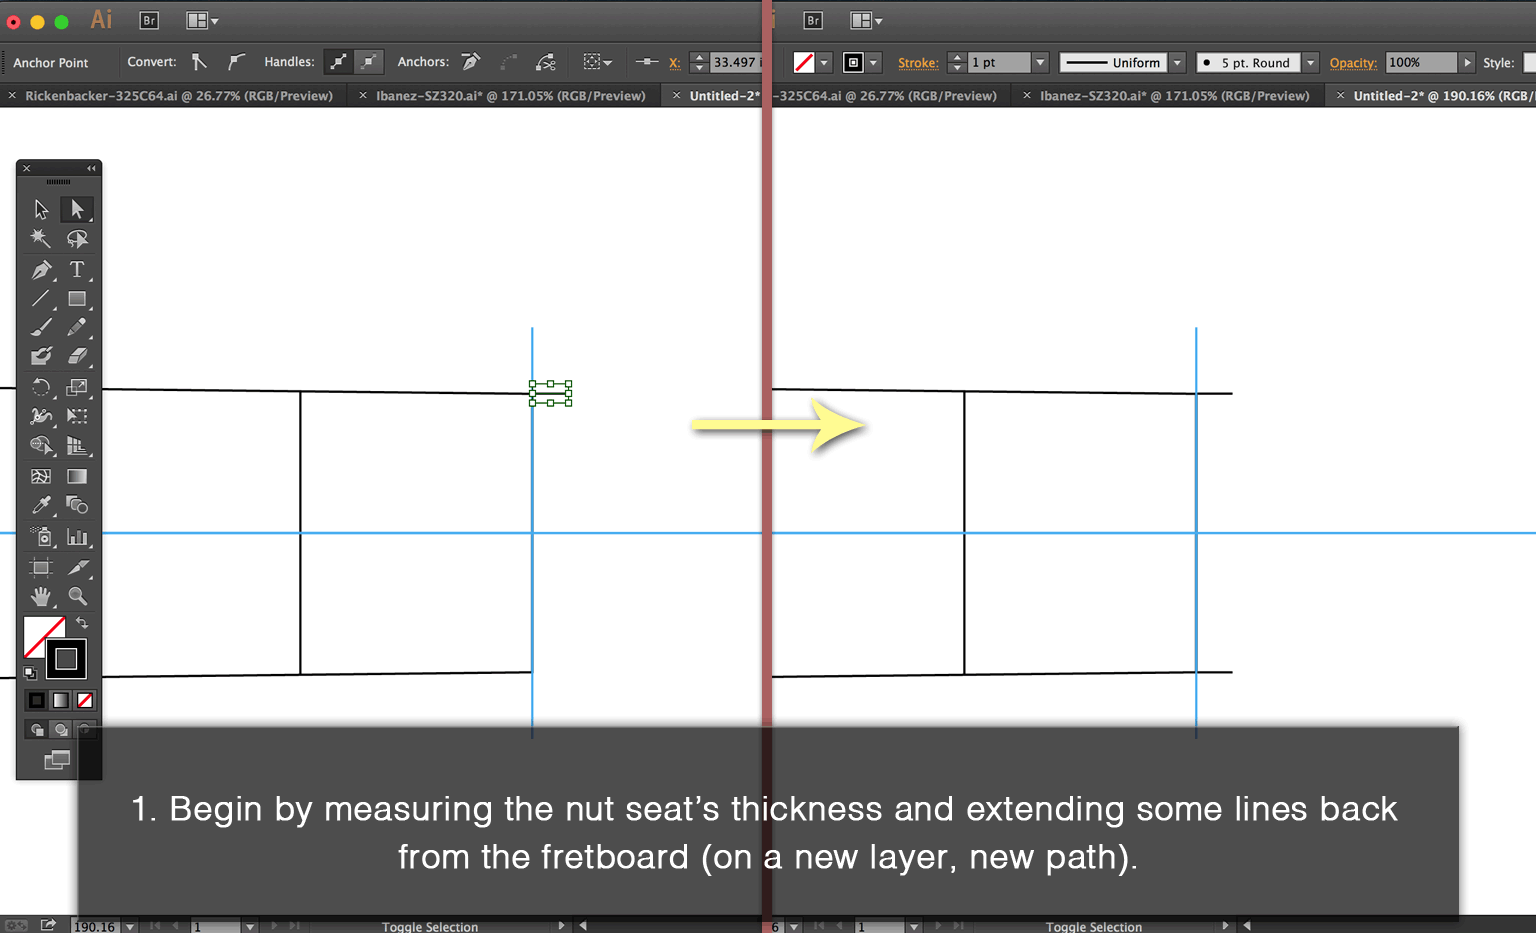
Part IV – Tracing the Headstock & Placing the Tuners
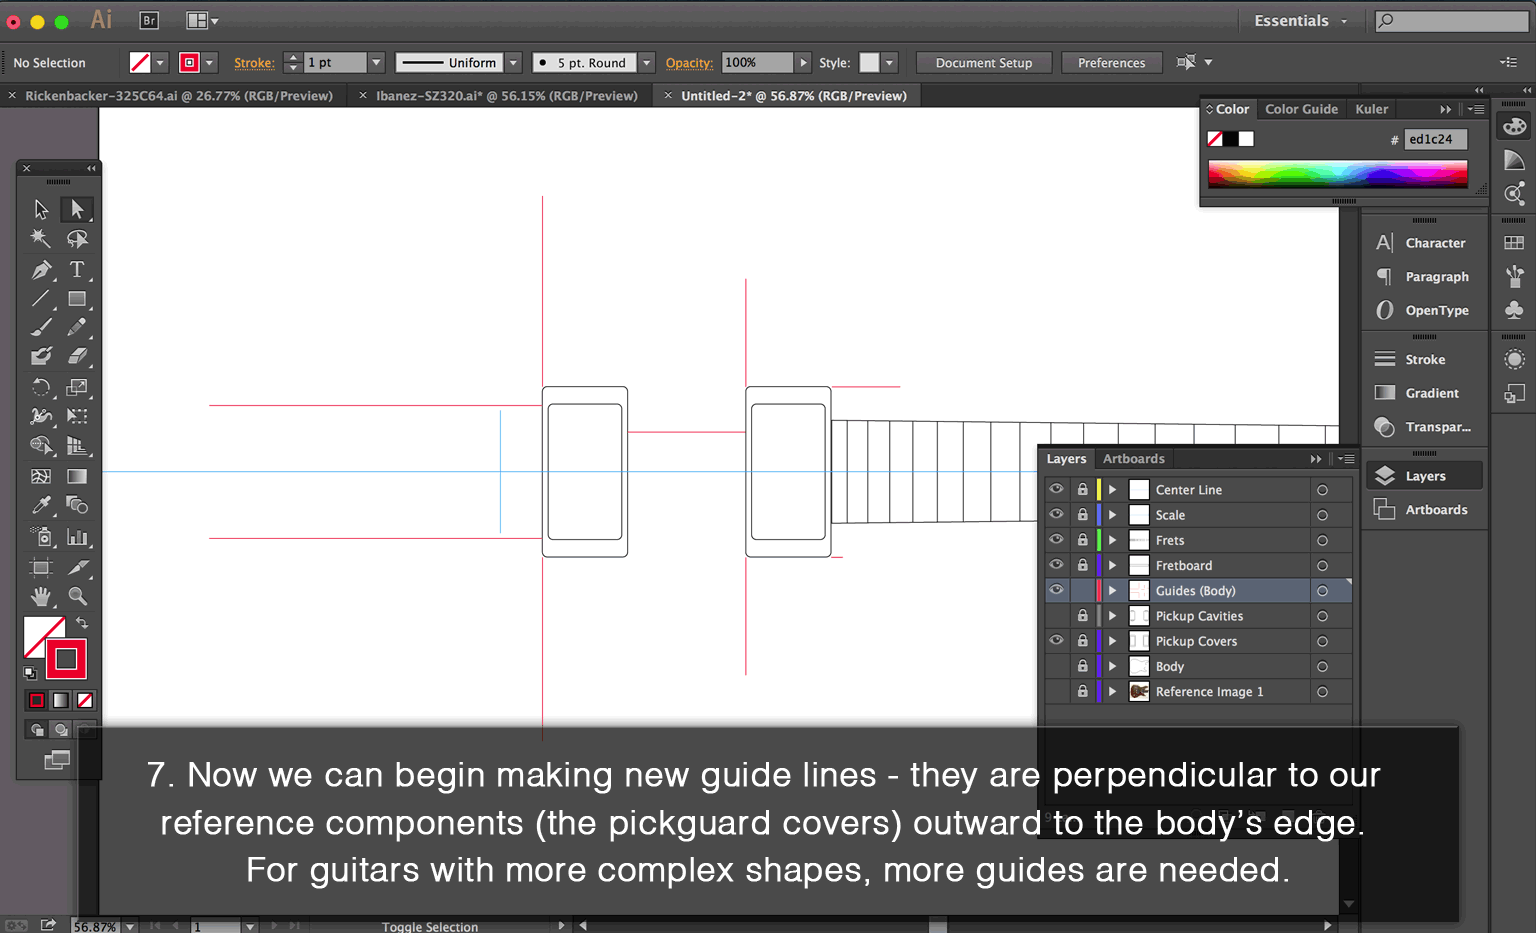
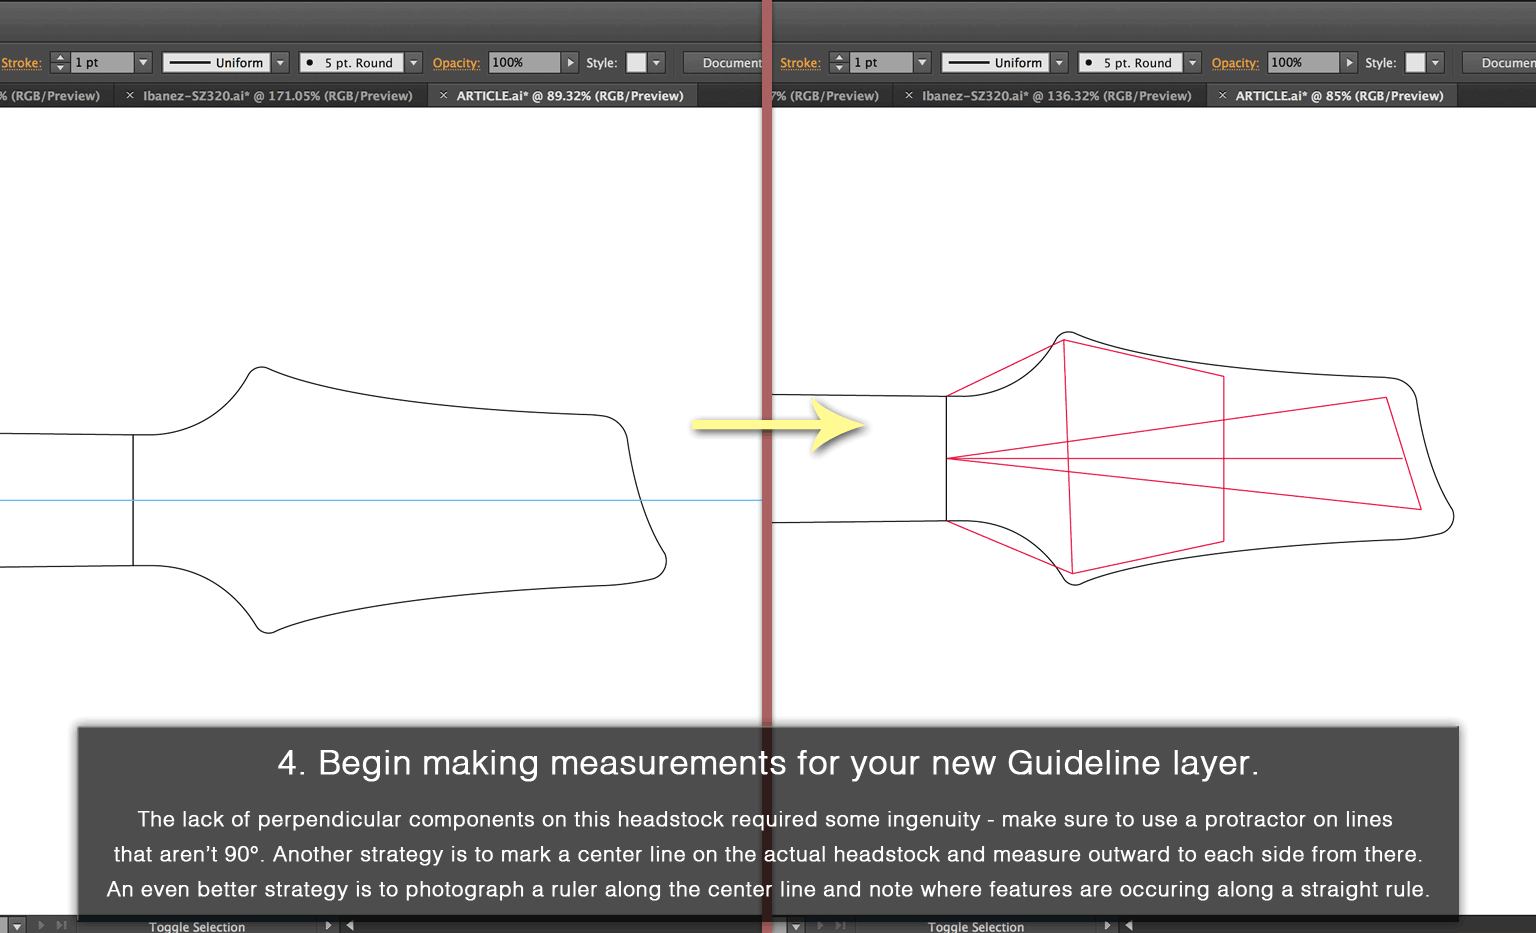
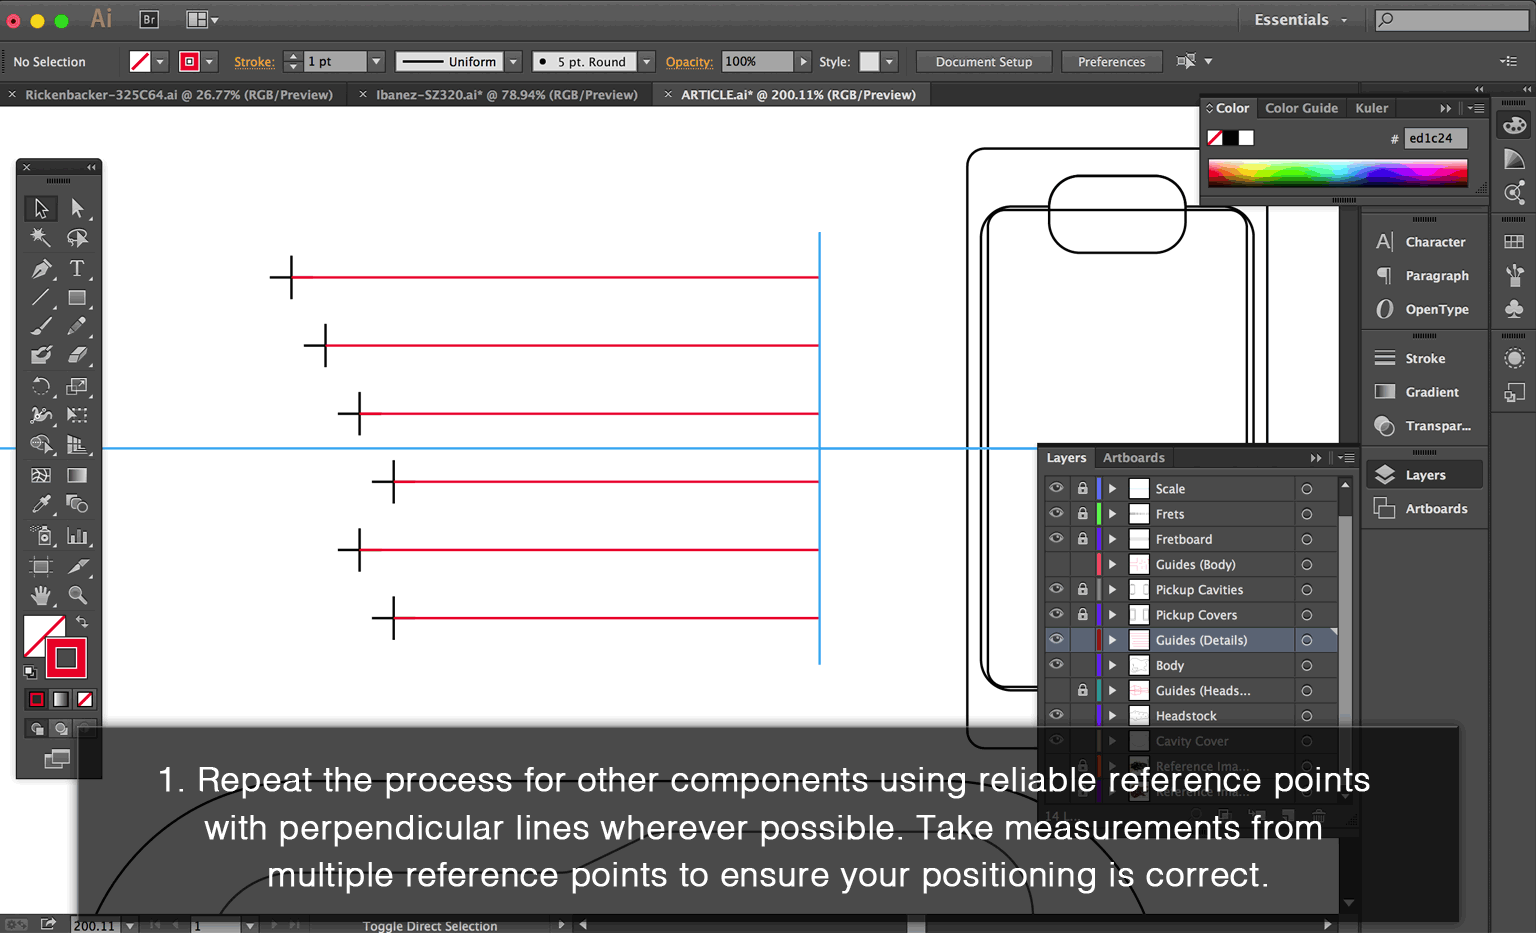
This part is going to be more of the same stuff you used to trace the body, except now you may not have the same perpendicular reference points. There’s a method outlined in the steps below that uses angles (protractor, ruler, and intuition), but it should be noted that a marked center line can serve as a way to ensure you have perpendicular lines to measure outward from. Keep this in mind as you read on and decide which way you’d prefer to work.


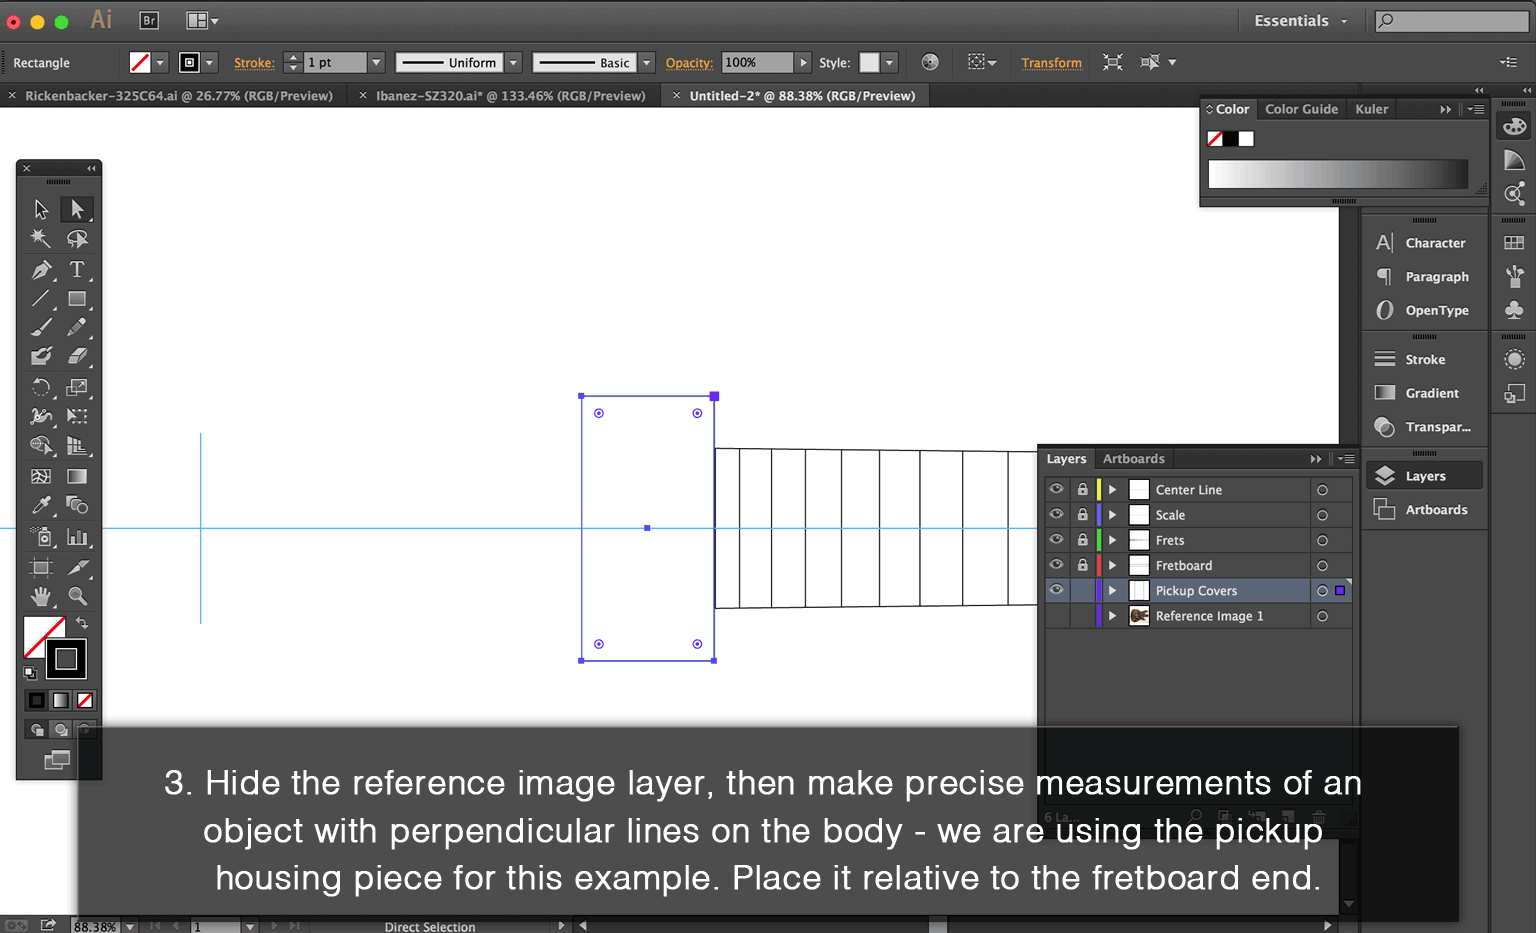
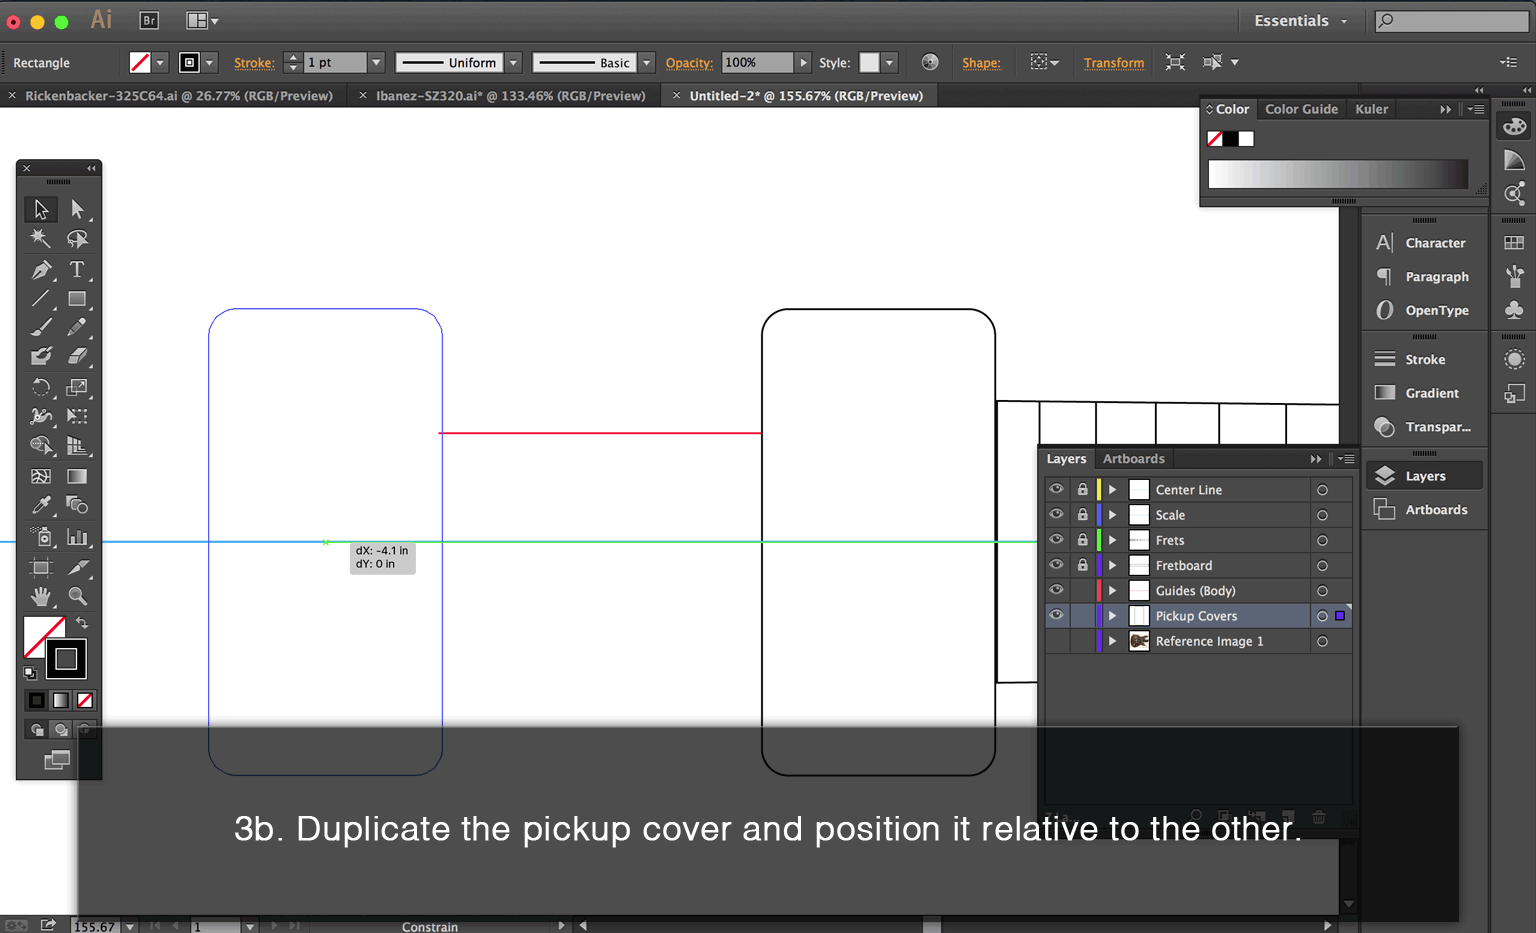
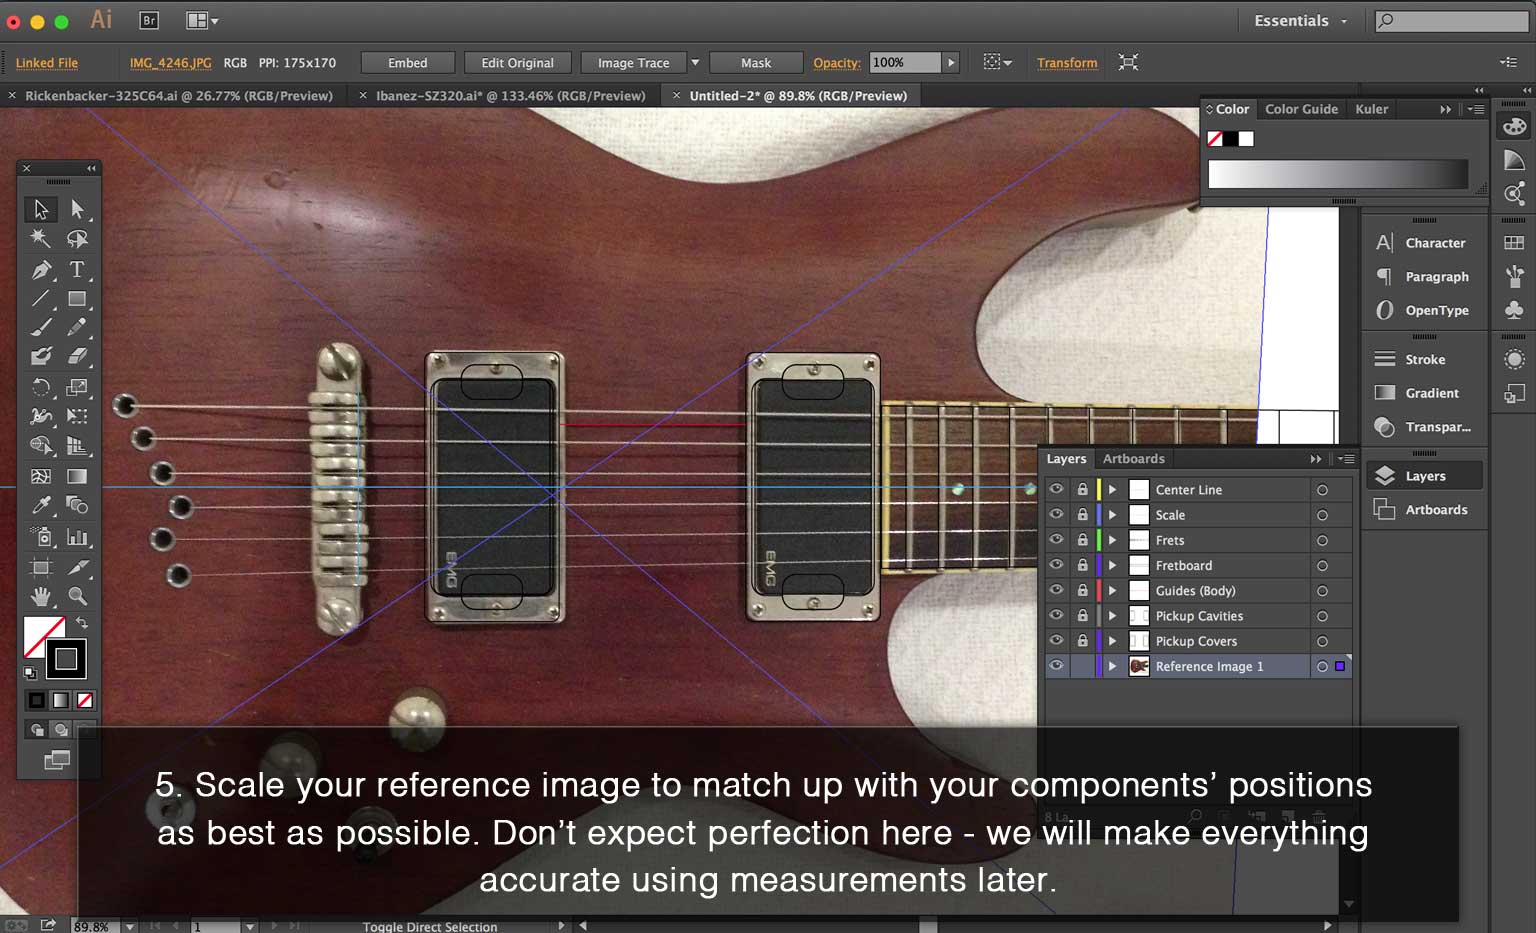
Continue on by using the same methods to place the rest of your hardware points, cavities, and cavity covers.
There’s one more extremely important step after this!
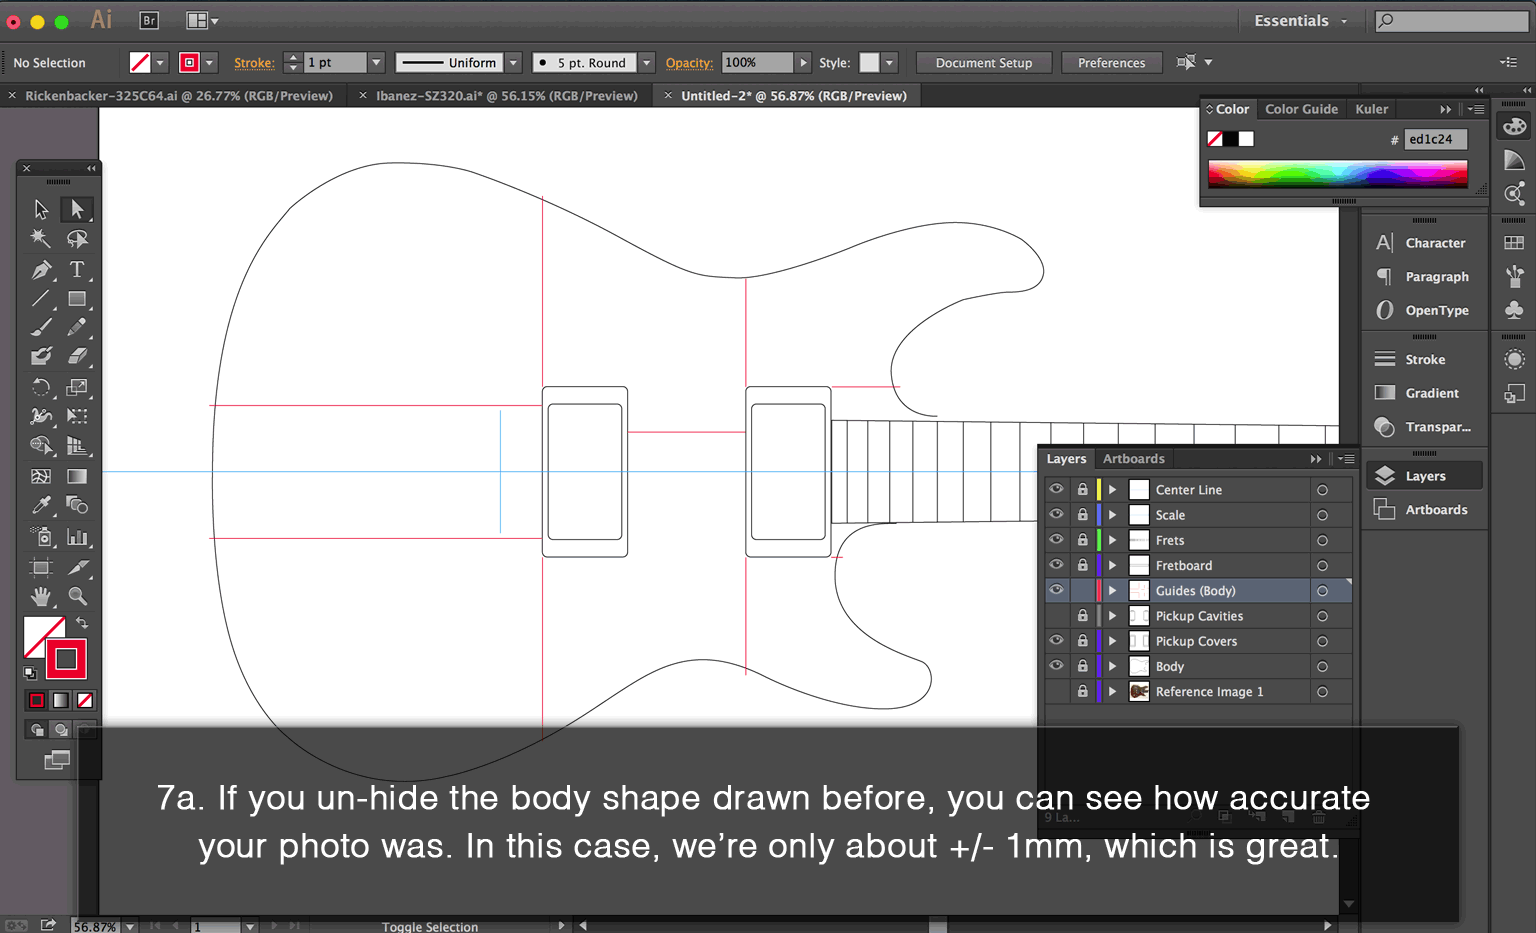
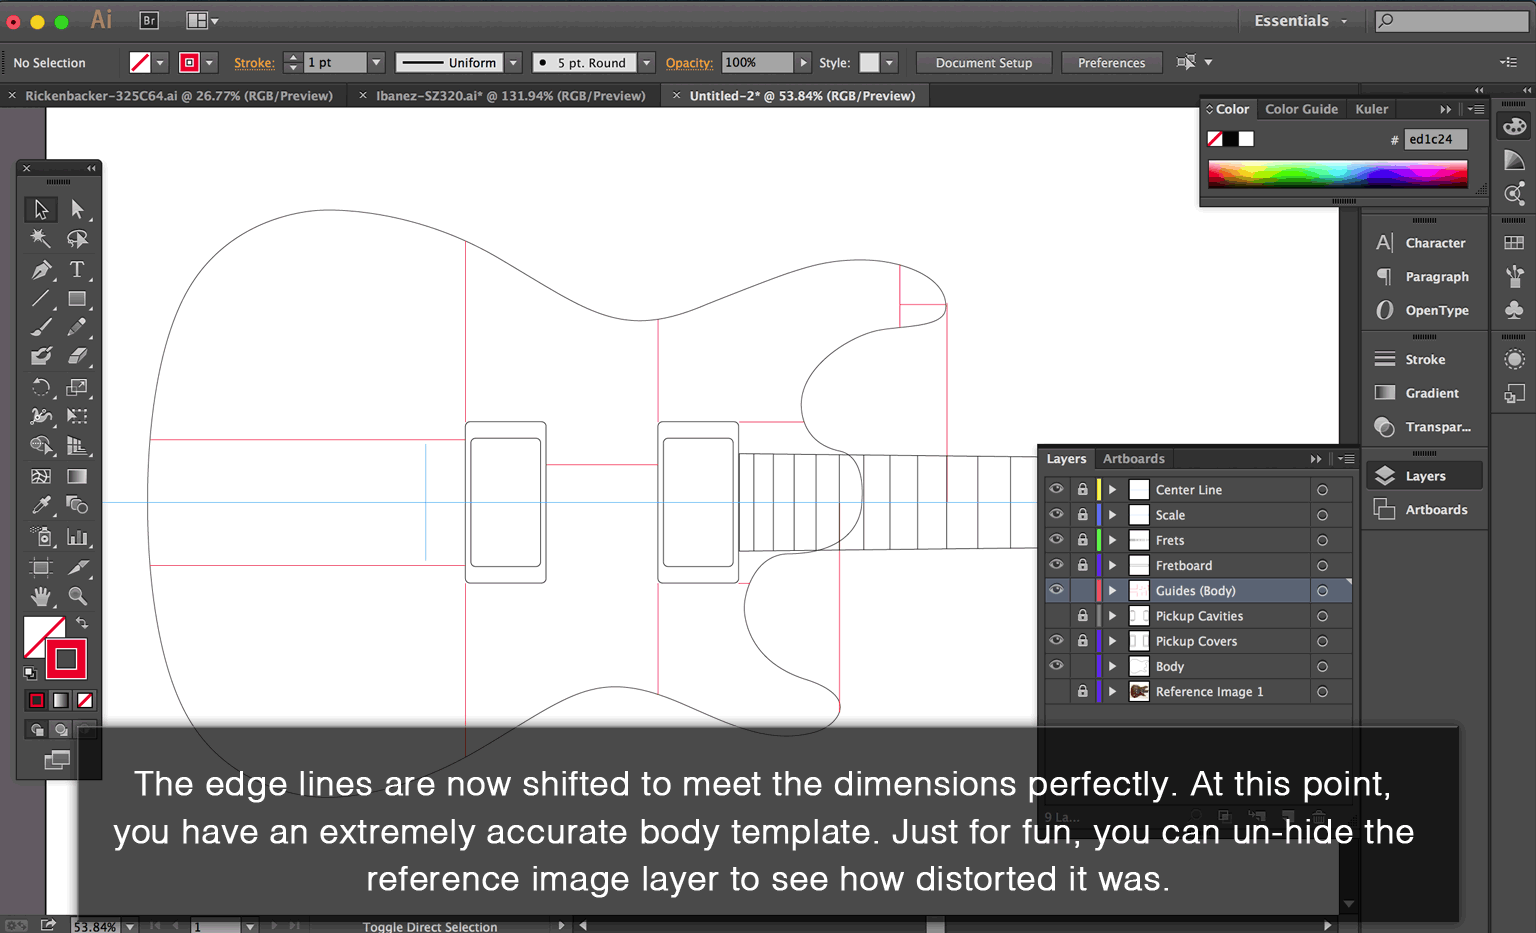
Part V – Perfect Your Work
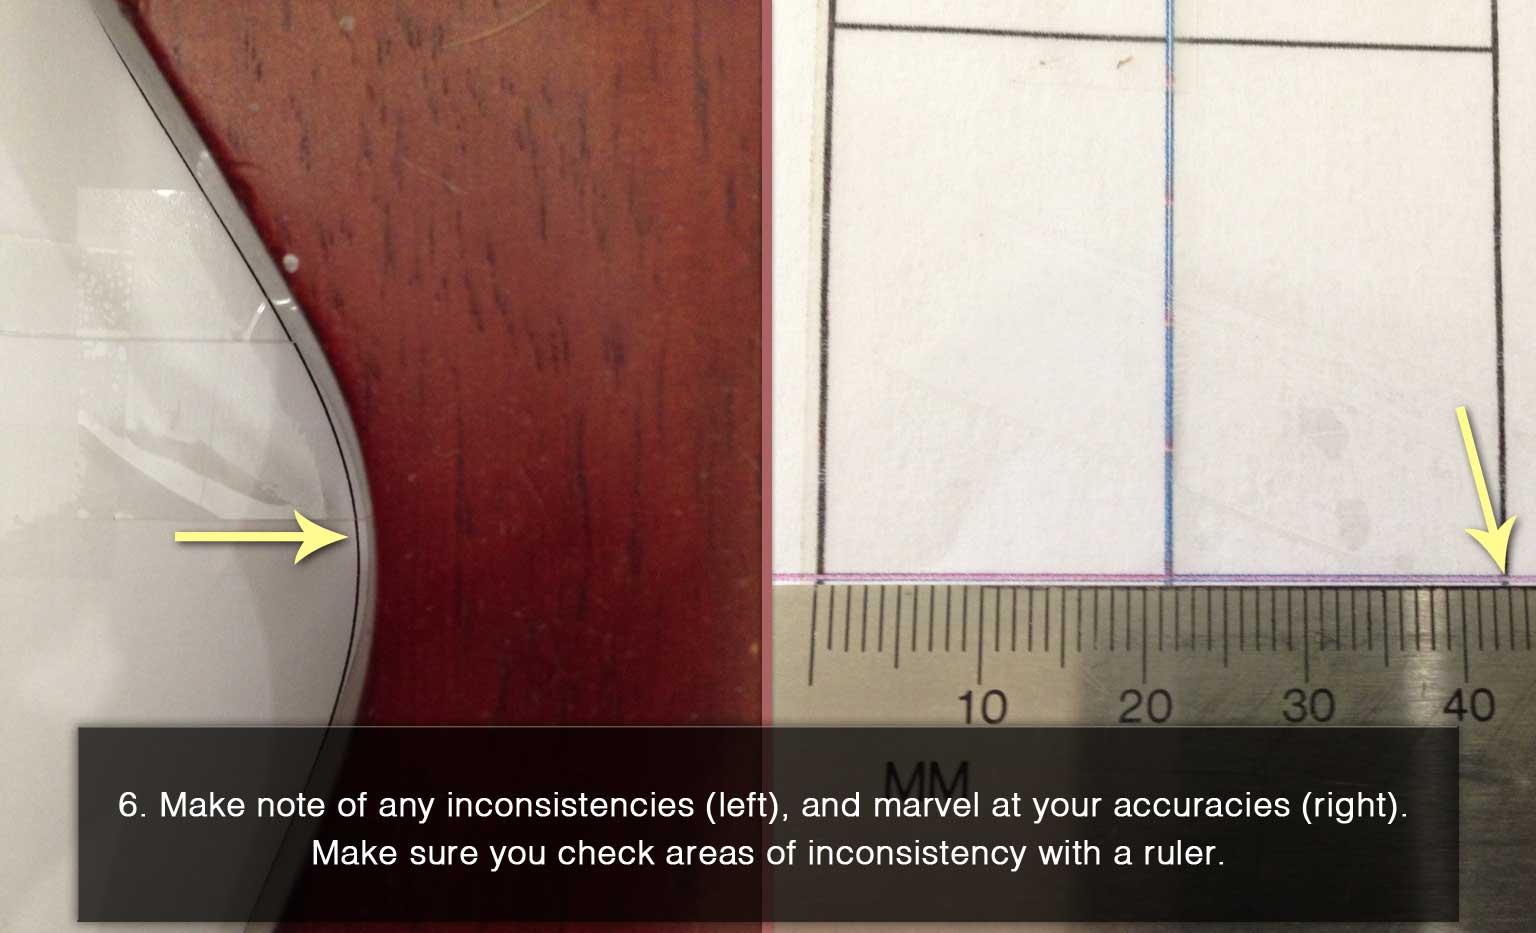
This is the most important part of making an accurate template: check your work. The purpose of this tutorial is to show how to make accurate guitar templates. Anyone can trace an image, but it wouldn’t be worthy of using the same name as the model it’s based on if it isn’t true to form. A couple millimeters off in the wrong place can be a big deal when it comes time to build the thing.
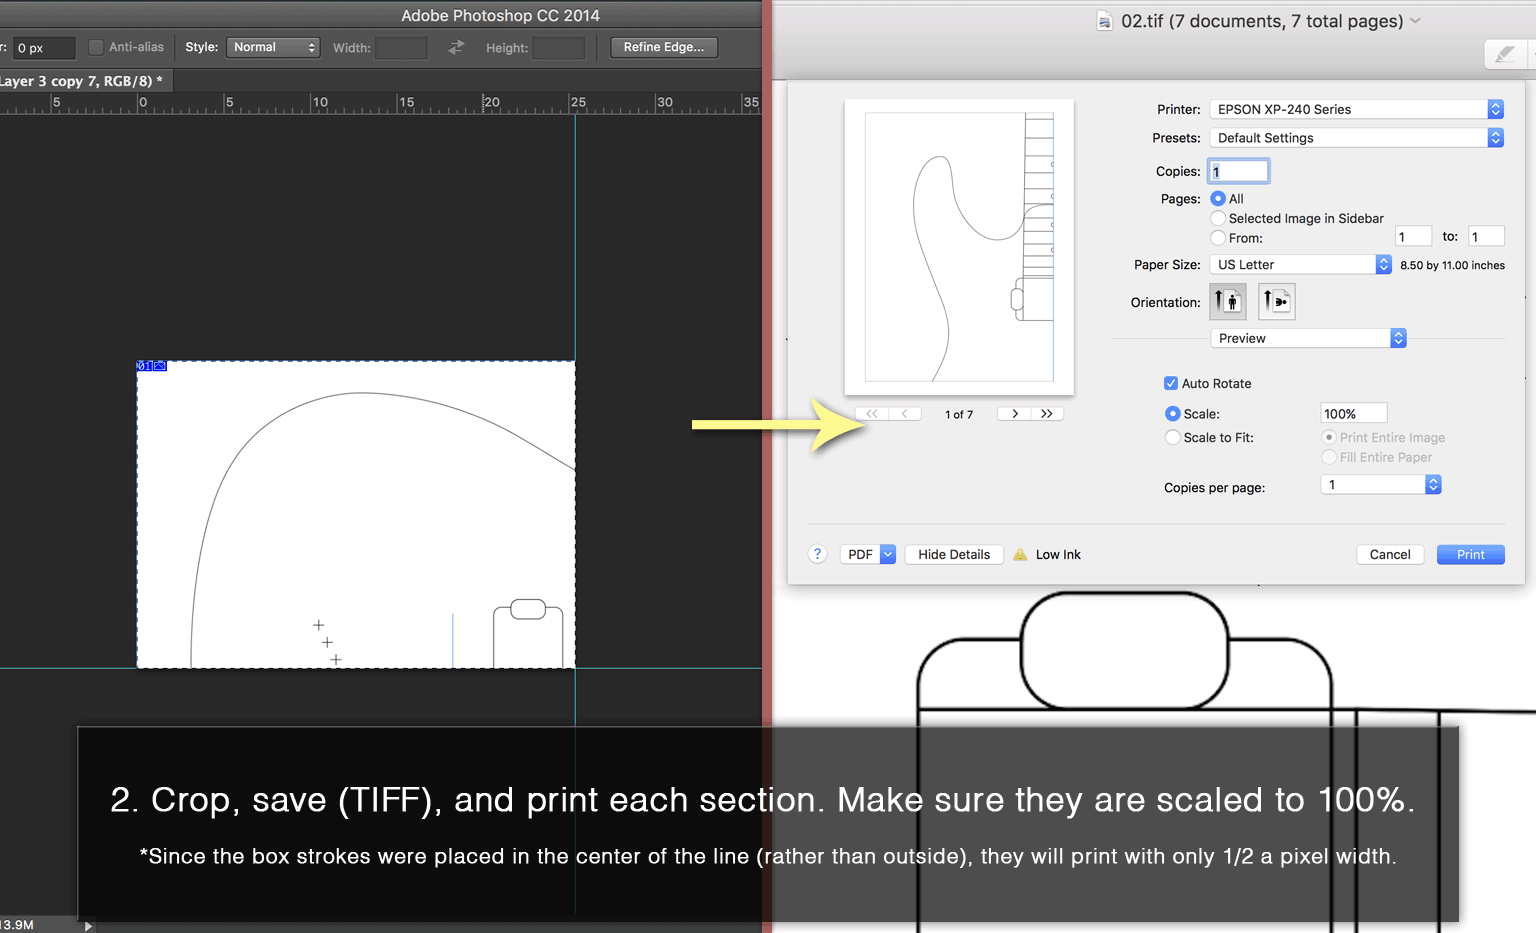
Note: the printing process utilizes Adobe Photoshop to slice the image into printable pieces – Illustrator has the same capabilities, and there’s also a printing tutorial here for Inkscape.


Part VI – Keep Drawing More Guitar Templates.
Now that you’re capable of creating extremely accurate guitar templates in digital formats, you’re also capable of contributing to the lutherie community. Over the years, various luthiers have shared their original guitar templates online and made it possible for builders to print and work with designs not readily available to them. We provide as many as possible for free here in the guitar templates section, while most of the original works are sold as digital downloads and CNC-cut MDF templates in the shop.
If you’d like to see how this example template came out, the Ibanez SZ320 is available in multiple digital formats as well as a physical product.