
Replacing a guitar’s nut is one of the most common requests a luthier will get, and for good reason too. Having a properly made bone nut specific to your particular guitar is an integral part of getting perfect action, and should be performed immediately after buying a new guitar or changing your strings to a different gauge set. Normally, the string heights are checked during a standard setup, and the nut slots will be adjusted if needed, then lubricated with graphite before putting new strings on.

There’s also another purpose to replacing your guitar’s nut, besides for the purpose of getting the action perfect: the material. Most production factories can’t feasibly spend the time and effort in making custom bone nuts for each instrument they build, nor do they want to go through the process of trying buy and stock cow bone in bulk – hence the reason for the market being flooded with cheap plastic nuts on stock models. It’s also the reason why guitar companies promote plastic nuts as being just as good as bone, when the evidence is clearly against them.

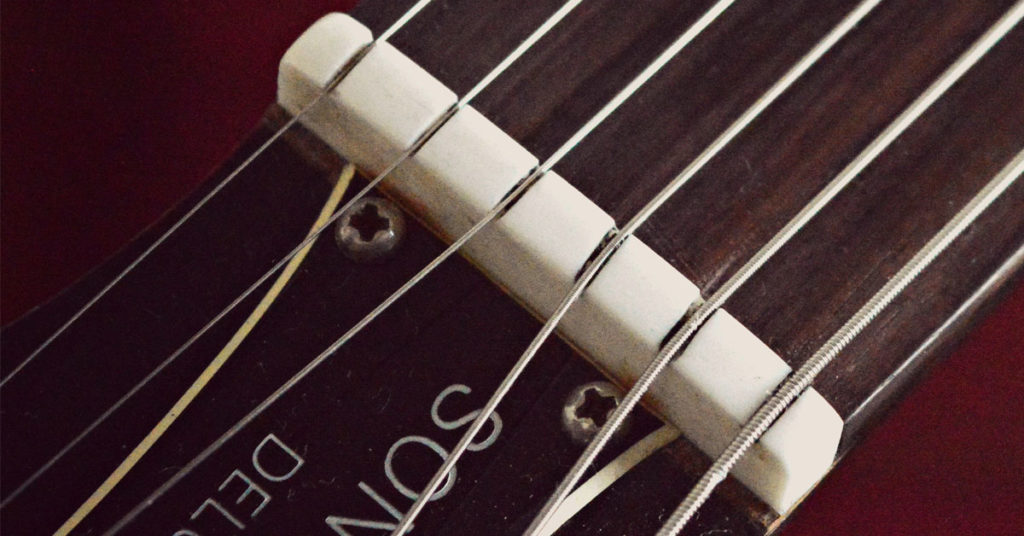
There is no substitute for bone – it transfers the vibrational energy from the strings to the wood much better than other materials (this process is explained in the tonewood analysis article).
Required Tools for Bone Nut Making
Here’s a brief rundown of the tools you’ll need to get the job done (links to Amazon):
- Belt Sander
- Bone Nut Blanks
- Carpenter’s Pencil
- Mechanical Pencil (.5mm)
- Nut Slot Files
- String Height Gauges
- String Spacing Rule
- Sandpaper – 400, 600, 800 grit
- Meguiar’s Polish
- Wood Glue
- Vice
Stewart-Macdonald is one of the very few companies that produces specialized tools for luthiers, and unfortunately tend to have high prices. Saving money where you can is perfectly alright, but sometimes it helps to splurge a little bit if you’re looking for something that’s not going to let you down for a few bucks less. This set of essential nut making tools could save you a bit of money though if you’re gathering everything.
Building Process Breakdown
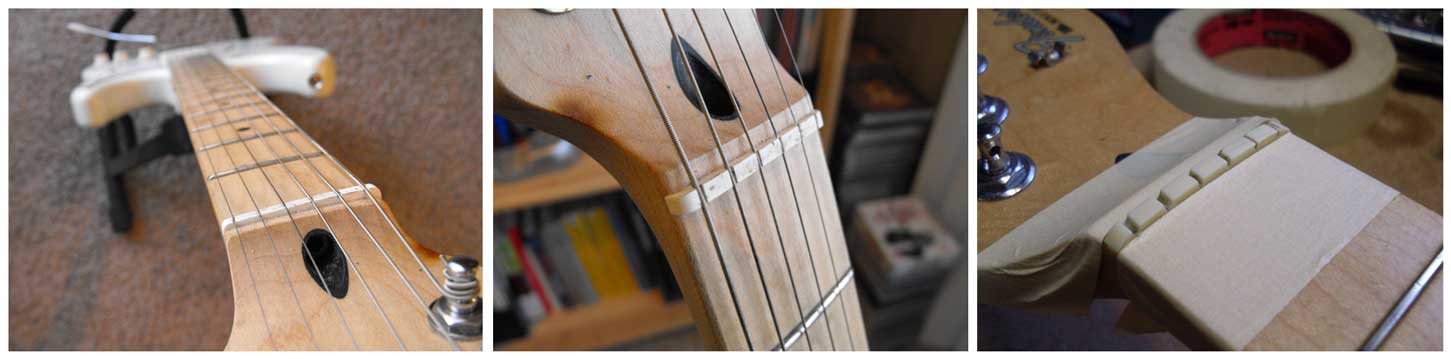
Step 1: Remove Old Nut
1. Remove the guitar’s strings – don’t throw them out, we’ll need them soon.
2. Use a razor to make a clean score around the nut to separate it from any lacquer.
3. Dislodge the nut by placing a small block of wood against the back of the nut (bridge side) and tapping it lightly with a mallet. Then, knock it out of the slot from the side.
4. Clean the slot with a nut seating file or another squared file / sanding instrument that will fit – we want the surfaces to be leveled without any remnants of glue.
Step 2: Mark The New Nut
1. Place your bone blank in the slot and make sure it fits snugly – if you’re using a thicker blank, use the belt sander to bring the thickness down in small increments until it fits.
2. While it’s seated in the slot, use your mechanical pencil to mark the ends of the fretboard width, then use your belt sander to shave the sides of the blank down to the lines until it fits flush at the ends.
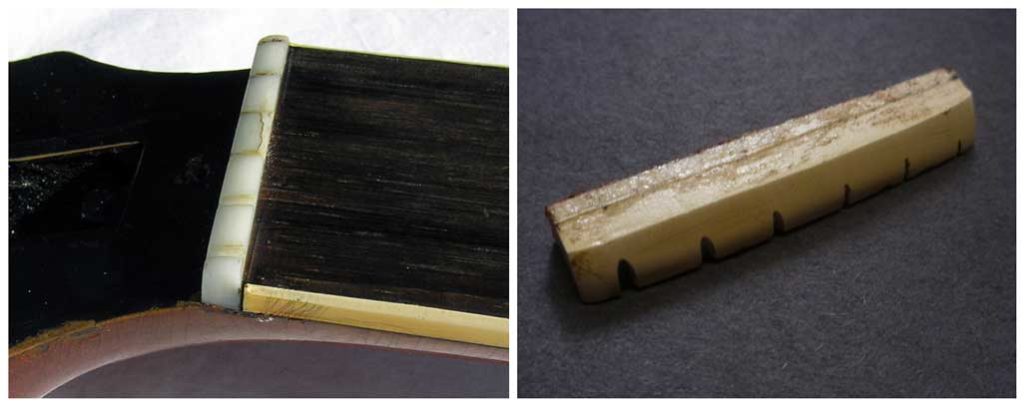
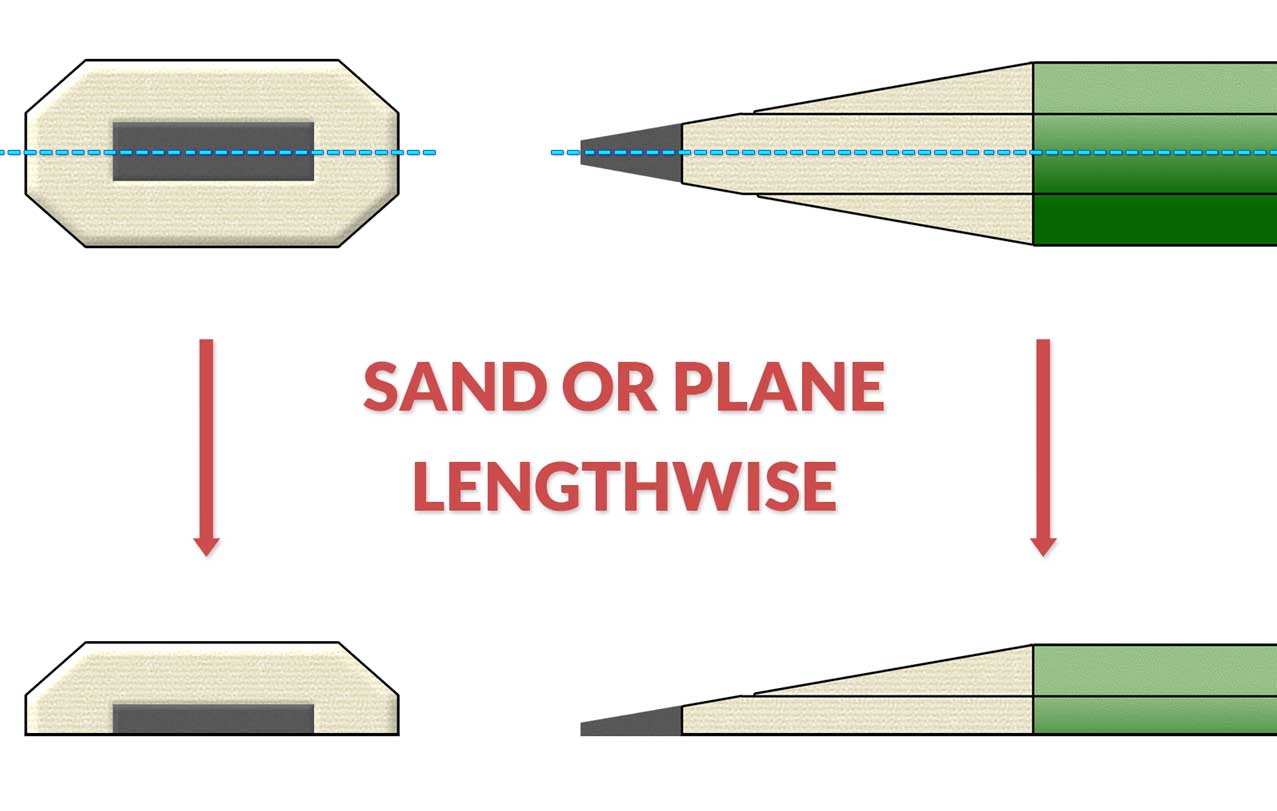
3. Take your carpenter’s pencil and place it against the sanding belt lengthwise on one of the wide flat sides and shave one half of it away completely – the graphite in the center of the pencil should now be exposed all the way down the middle to the tip.
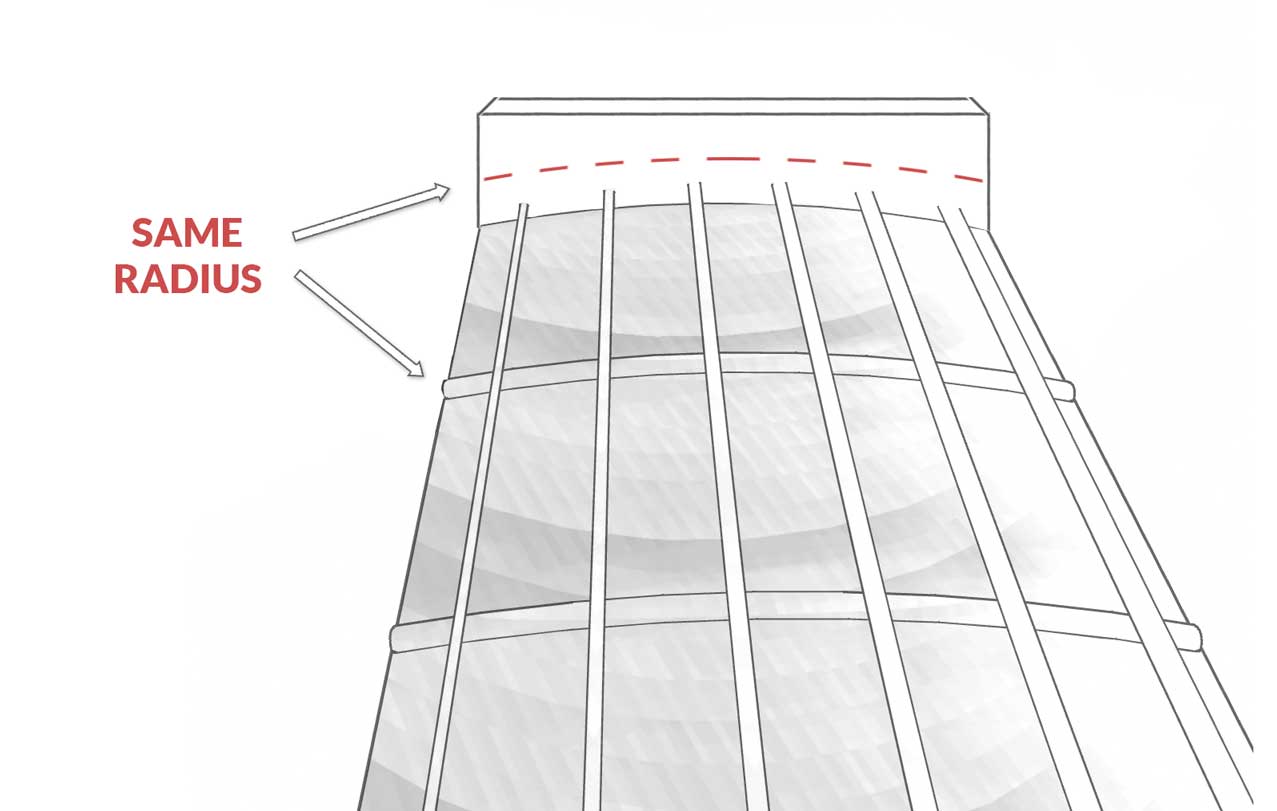
4. With the nut blank still seated in the slot, place the newly shaved surface of the pencil flat on top of the first few frets of the guitar with the point against the nut. Slide the carpenter’s pencil side to side to trace the exact fret height on the blank nut. This line follows the radius of the frets/fretboard.
5. Use a small ruler to mark 1/32″ (inches) above the fret-height line on the left and right side.
6. Place the top of the nut against the sanding belt and bring it down to the lines, mimicking the shape of the radius as you’re sanding to create a consistent 1/32″ gap above the fret-height line.


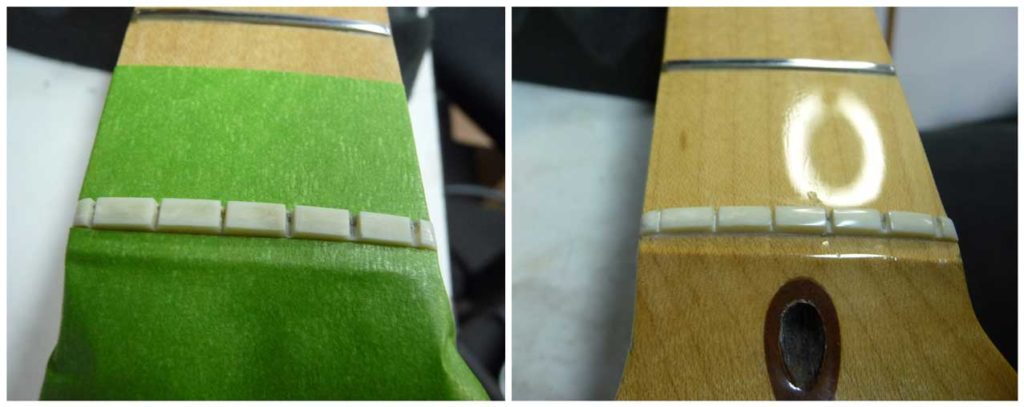
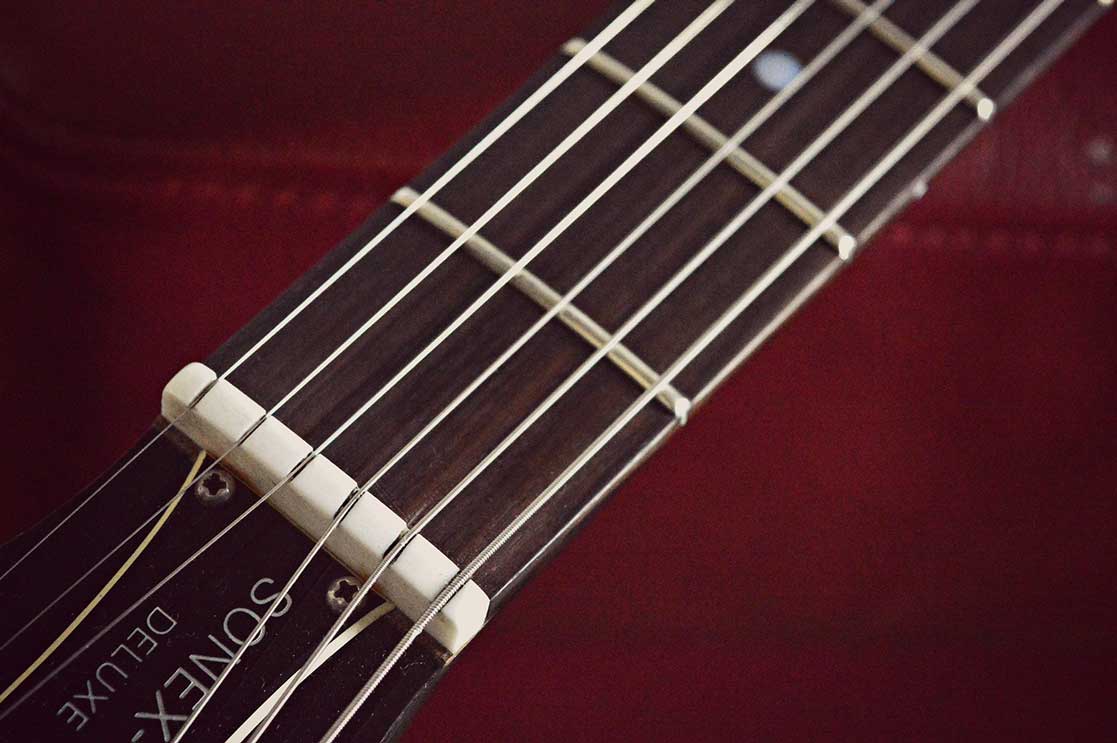
Step 3: Filing the String Slots
1. Use a ruler to mark 1/8″ in from the left and right sides at the top of the new nut – these are the locations for both of the E strings.
2. Use your string spacing rule to match the end marks up, then draw the lines for the rest of the strings in-between.
3. Score each line with a .012 nut file. After initial scoring, work the string slot down and into a ramp that matches the headstock angle from the front of the nut slot down to the tuning machines (about 18 degrees).
4. Work the slots down to top of the fret-height line with the .012 file. Sand the back and top of the nut blank as the slot deepens to avoid chipping the blank (creating a downward slope to the back side).
5. Being careful not to go any lower, use the following fret files to widen the string slots:
- High E – .012 (already done)
- B string – .016
- G string – .025
- D string – .036
- A string – .046
- E string – .046 to .060 (depending on string set gauge)
- After all of your slots are down to the top of the guide line and widened, restring the guitar with the old strings we removed before – it’s important that all other setup specs are correctly adjusted before we can do the nut heights accurately.
6. Use your string height feeler gauges at the first fret to check that the slots are correct. If they are too high, your string will be just above the feeler gauge – you will have to detune the string and pull it out of the slot to bring it down in very small increments until the string is just brushing the top of the feeler gauge. The gauge heights for each string are as follows:
- High E – .012″
- B string – .012″
- G string – .014″
- D string – .016″
- A string – .018″
- E string – .020″
- (For strings E, A, D, and G, you want the feeler gauge to brush the bottom of the string slightly, while the B and high E string should be exact. All measurements are done while the guitar is tuned to pitch.)

Step 4: Cleaning Up
1. After the slots are perfect, remove the old strings and pull the nut out to give it a final shaping and polishing.
2. Use the belt sander to bring the top surface down so it’s parallel with the string slots – we want about half of the string’s diameter to be seated in the slot while the upper half is exposed. There will be a slope from front to back in accordance with the pitch of the slots / headstock.
3. Round off any sharp edges.
4. Sand the nut surfaces (don’t touch the bottom, obviously) with 400, 600, and then 800 grit sandpaper.
5. Finally, use some auto polish or fine rubbing compound and a cloth rag to give the new nut its final polishing.
6. Clean and lubricate the string slots with the graphite from your .05 mechanical pencil.
7. Re-seat the nut in its slot with a single drop of Titebond wood glue – restring the guitar and tune to pitch!
All finished! If you’ve done everything correctly, your guitar should be playing perfectly now.
As thorough as these instructions may be, it always helps to actually see the process before diving into it, so I’m including this video of Dan Erlewine from Stewart MacDonald slotting a bone nut. It’s OK to like him and still hate his prices, he’s a good teacher and seems like a nice character.
