This tutorial will walk you through the process of modeling a flawless straight-radius fretboard in Fusion 360, but the design principles can be used in any CAD environment and even applied to your hand-built fretboards.
There are three parts to this process – base sketch, extrusions & radius sketches, and the fret cuts. The walkthrough is made so that absolute beginners can follow along as well, so the sketching phase may seem a little tedious to some of you. If you happen to know a shortcut or see room for improvement in the process, feel free to email any suggestions here!
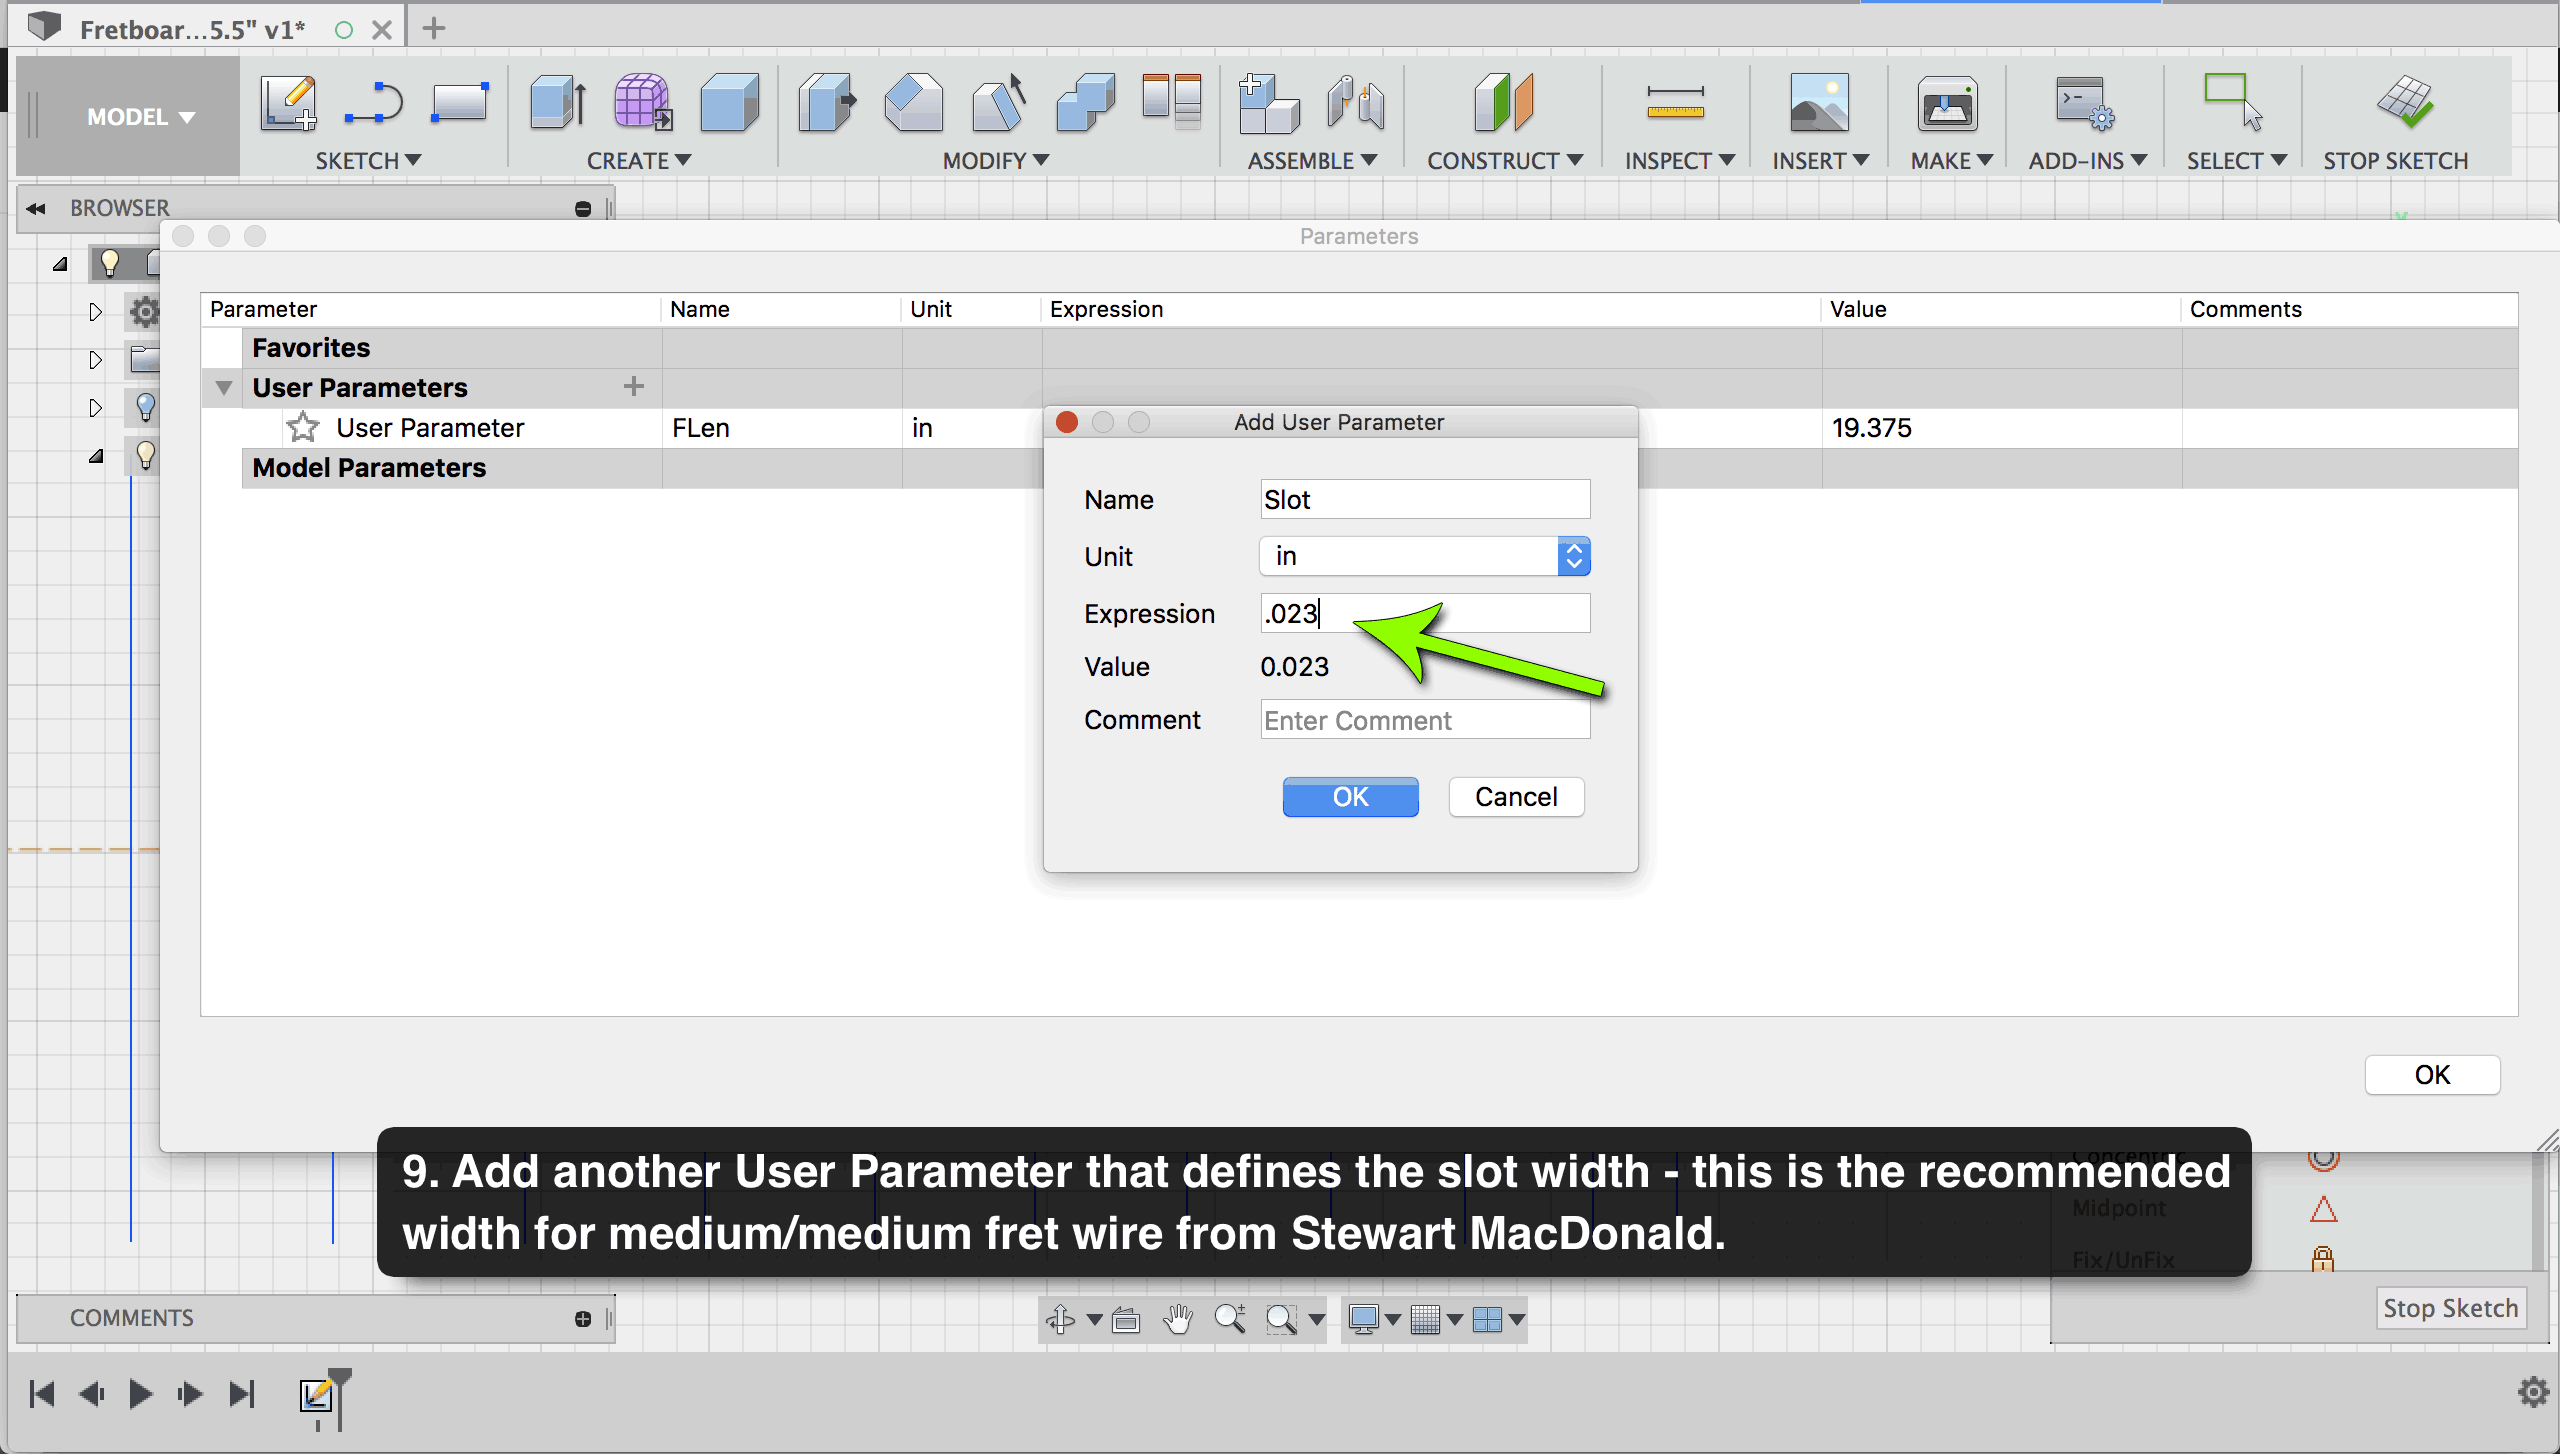
This tutorial makes use of our fretboard distance calculator, but there’s a few more options out there (especially if you’re wanting to work in Metric instead of Imperial units). We are using example fret wire measurements from Steward MacDonald.
I’d encourage anyone with the desire to learn more about the technical aspects of your instrument to get yourself a trial version of Fusion 360 (which is indefinite for hobbyists) and try modeling one. Even if you don’t intend on using it.

CAD from a Hand-Builder’s Perspective
Contrary to the common train of thought regarding automated machining as being a talentless, lazy method of guitar making, I have found the opposite is true. Being deprived of the wood, hands, intuition, and a straightedge forces you to strip the process down to its bare math. It takes me far longer to make a model of a guitar neck than with a block of wood and a rasp.
Since undertaking a quest to master modeling perfect guitars for CNC machining, I can say I know more now about the mathematic principles and design considerations that go into making a guitar than ever before.
Get Your Fretboard Measurements First
We will use a 25.5″ scale / 9.5″ radius for our example, but feel free to adjust those specs to your liking if you’re following along. You’ll want to know the following set of numbers before beginning your model:

Before we begin, we need our measurements. The scale length and fretboard radius is just a matter of preference really – this tutorial only deals with straight-radius fretboards though. If you’re making a guitar with one of our free templates, the nut width can be measured after printing or in a program like Adobe Illustrator.
The bridge width will depend on whatever hardware you’re choosing for the guitar. If you don’t have the bridge in hand to measure just yet, the manufacturers will usually include precise diagrams and/or measurements on their websites.
Bridge Height, String Clearance, and Fretboard Thickness
When you’re making a guitar by hand, you don’t have to have all your math down on paper from the start, but you should know exactly which bridge you’re going to be using beforehand. This way, you can assure that you’ll have a perfectly flat plane between the nut and saddles.
It’s no different for CAD designs – you want to know that you’ll have string clearance and play in the action before you commit.
Considerations should be made for your bridge’s adjustment heights before you route a neck pocket, pitch the neck, or thickness a fretboard. The bridge’s base height will dictate a lot of things along the scale length regarding string clearance, and is best used as a starting point for planning the rest of your guitar.
It sounds like a lot of measuring and figuring, but if you take a look at the first diagram in this article (this one), you’ll see that you can check clearance by dry fitting the parts and placing a straightedge on the fretboard and extending a line out to the bridge saddles. When in doubt, make your fretboard thicker and plan to shave some off of the bottom with a belt sander to get the height right when test-fitting it.
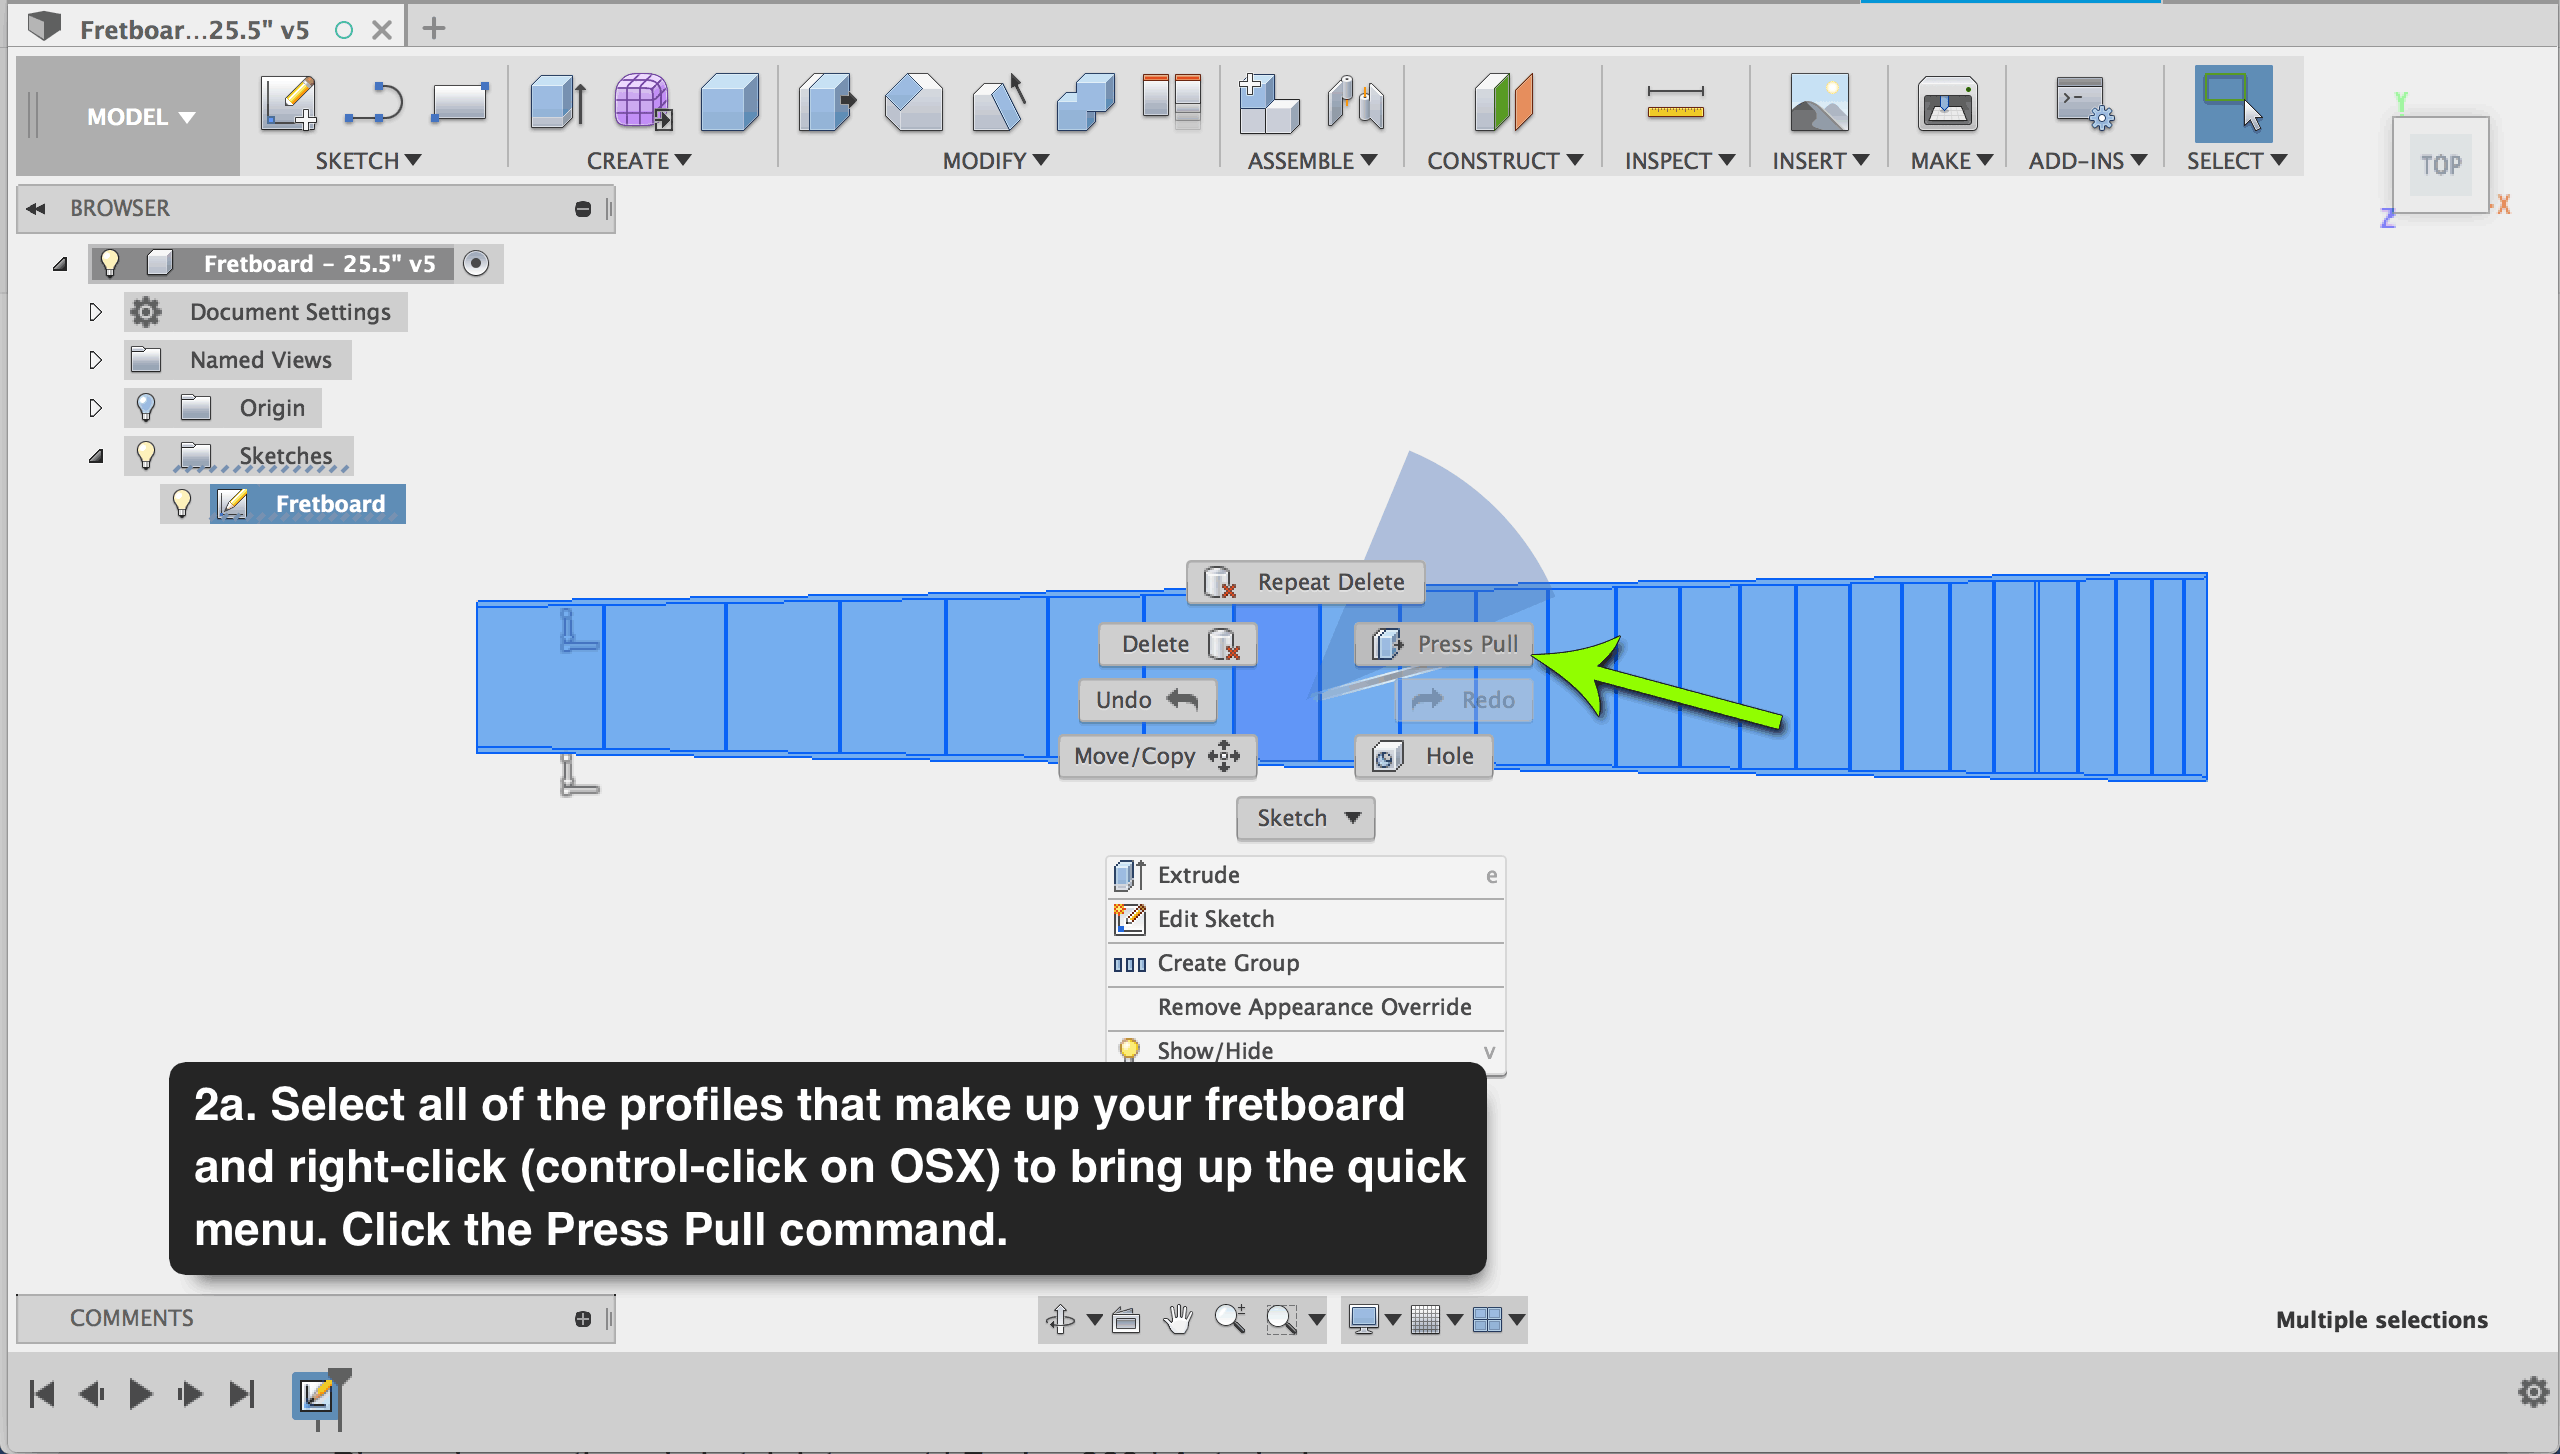
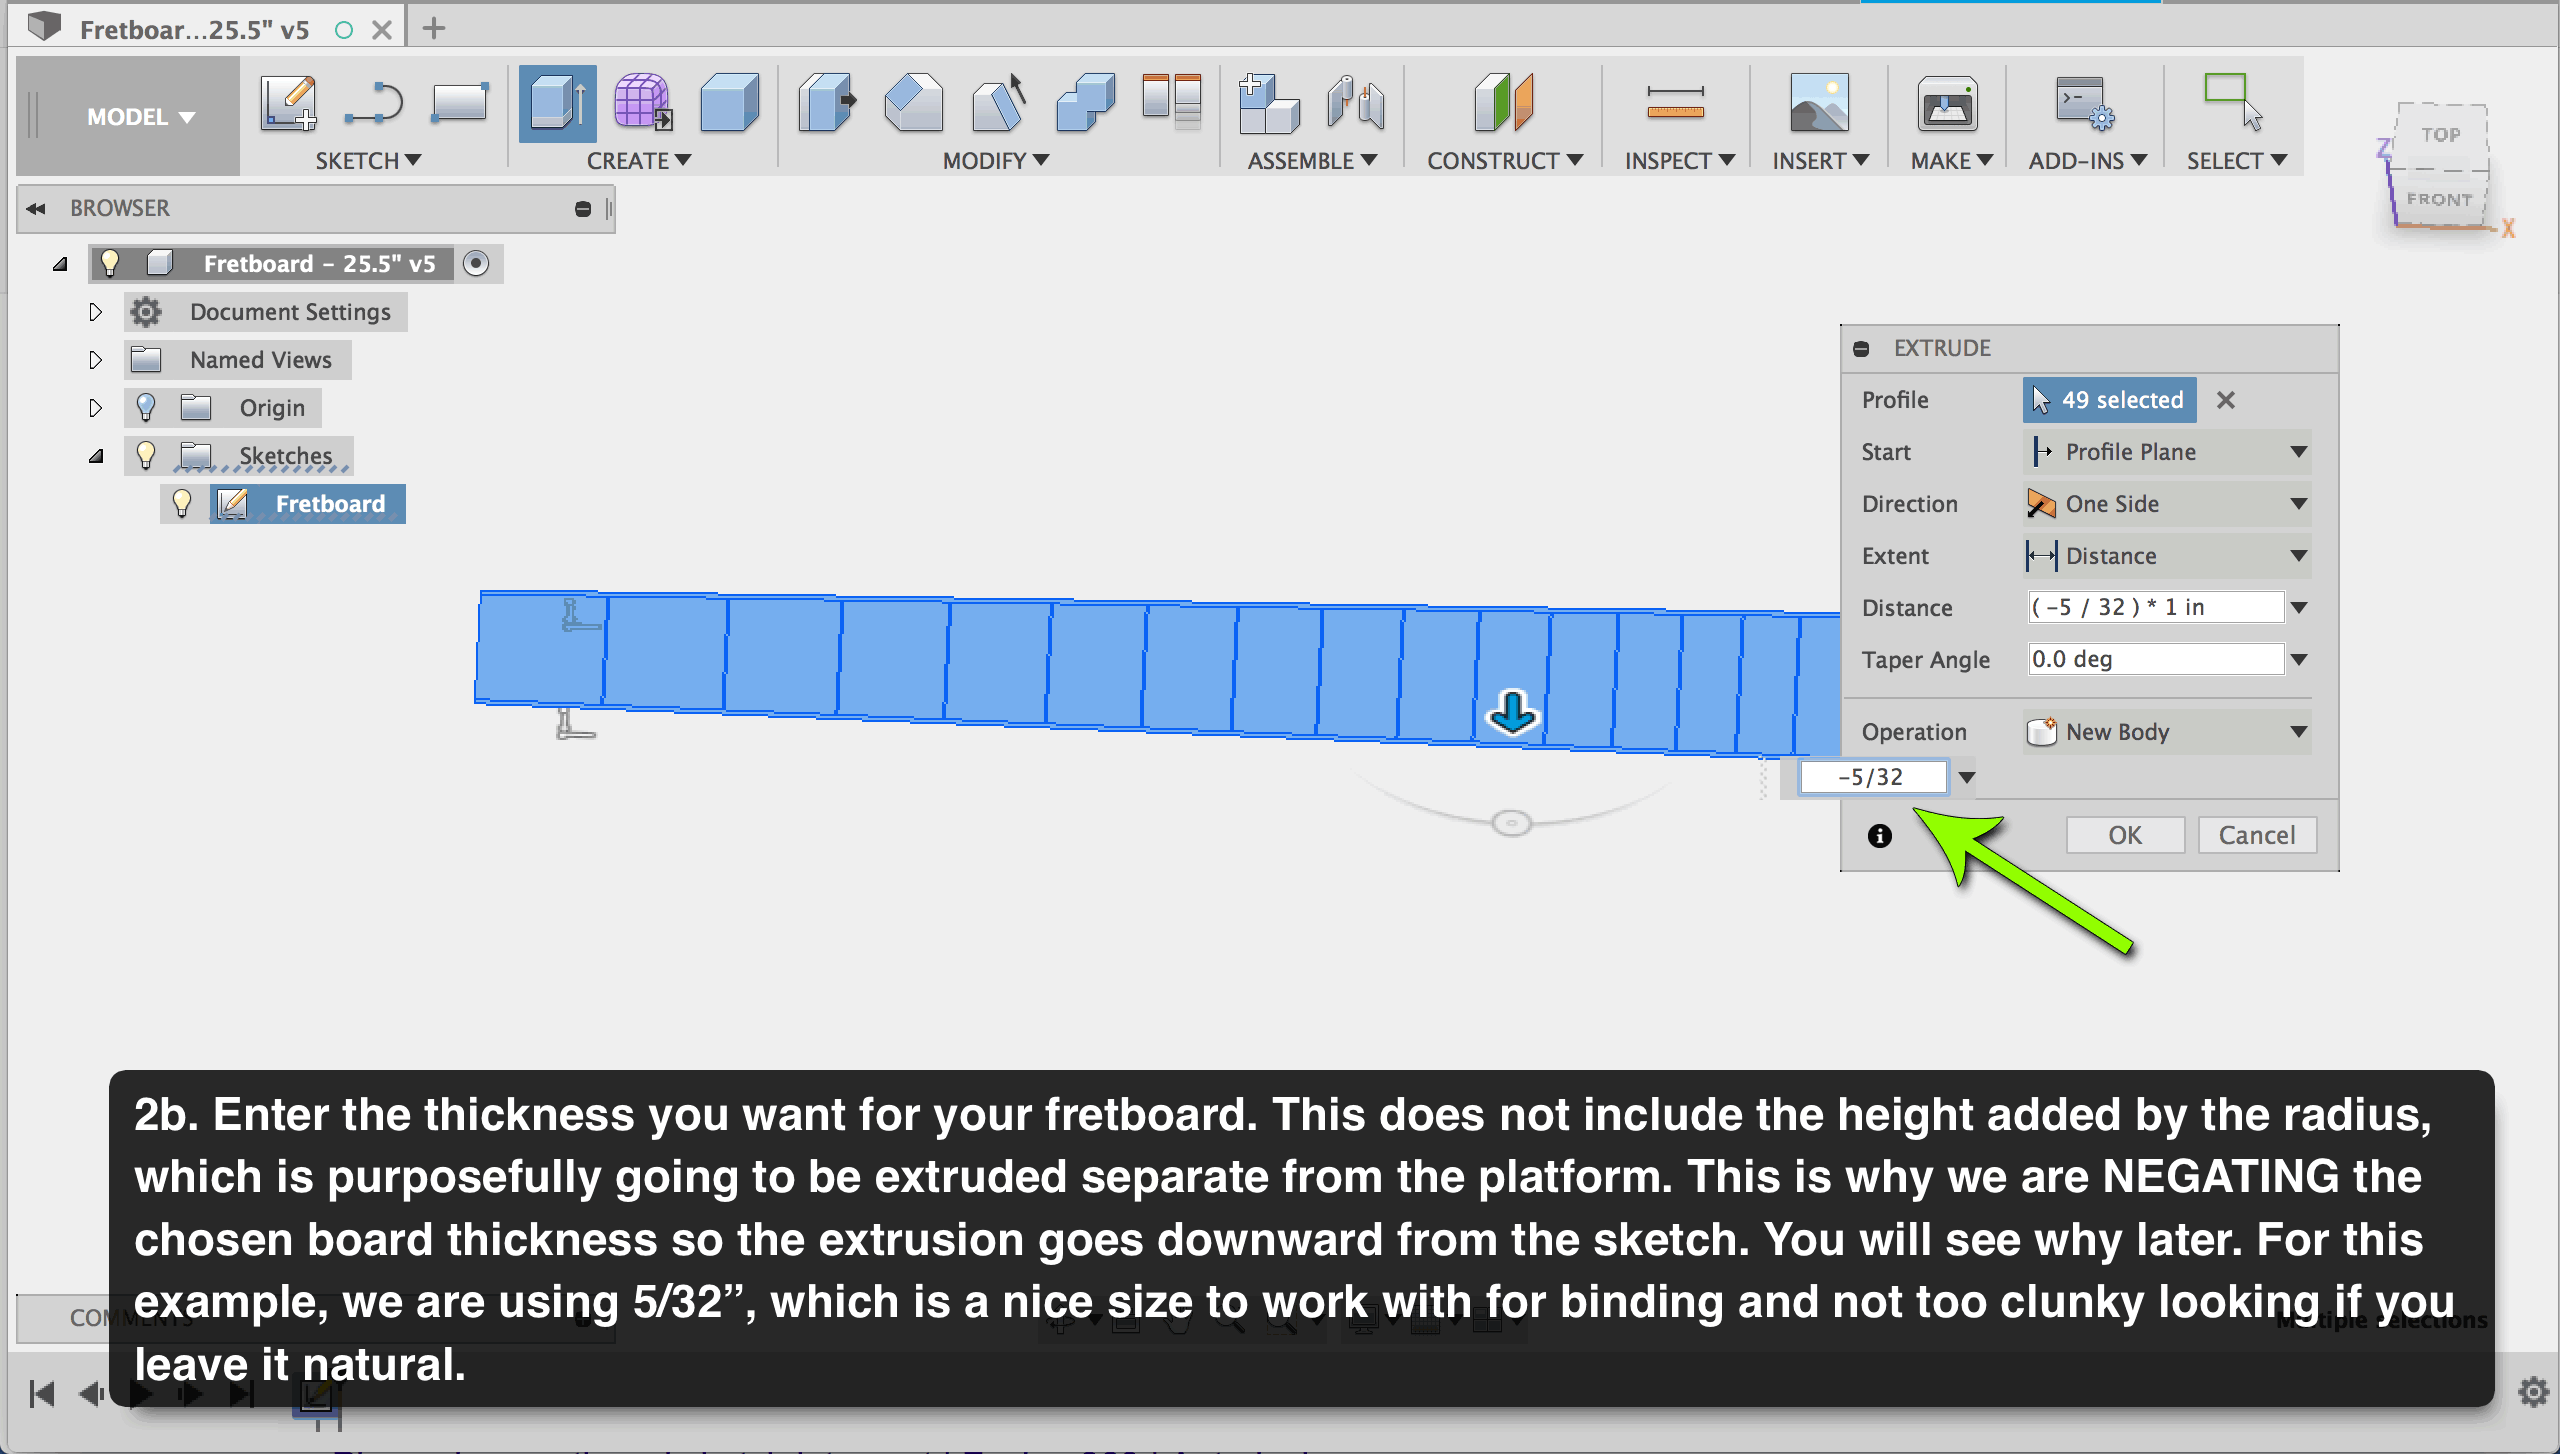
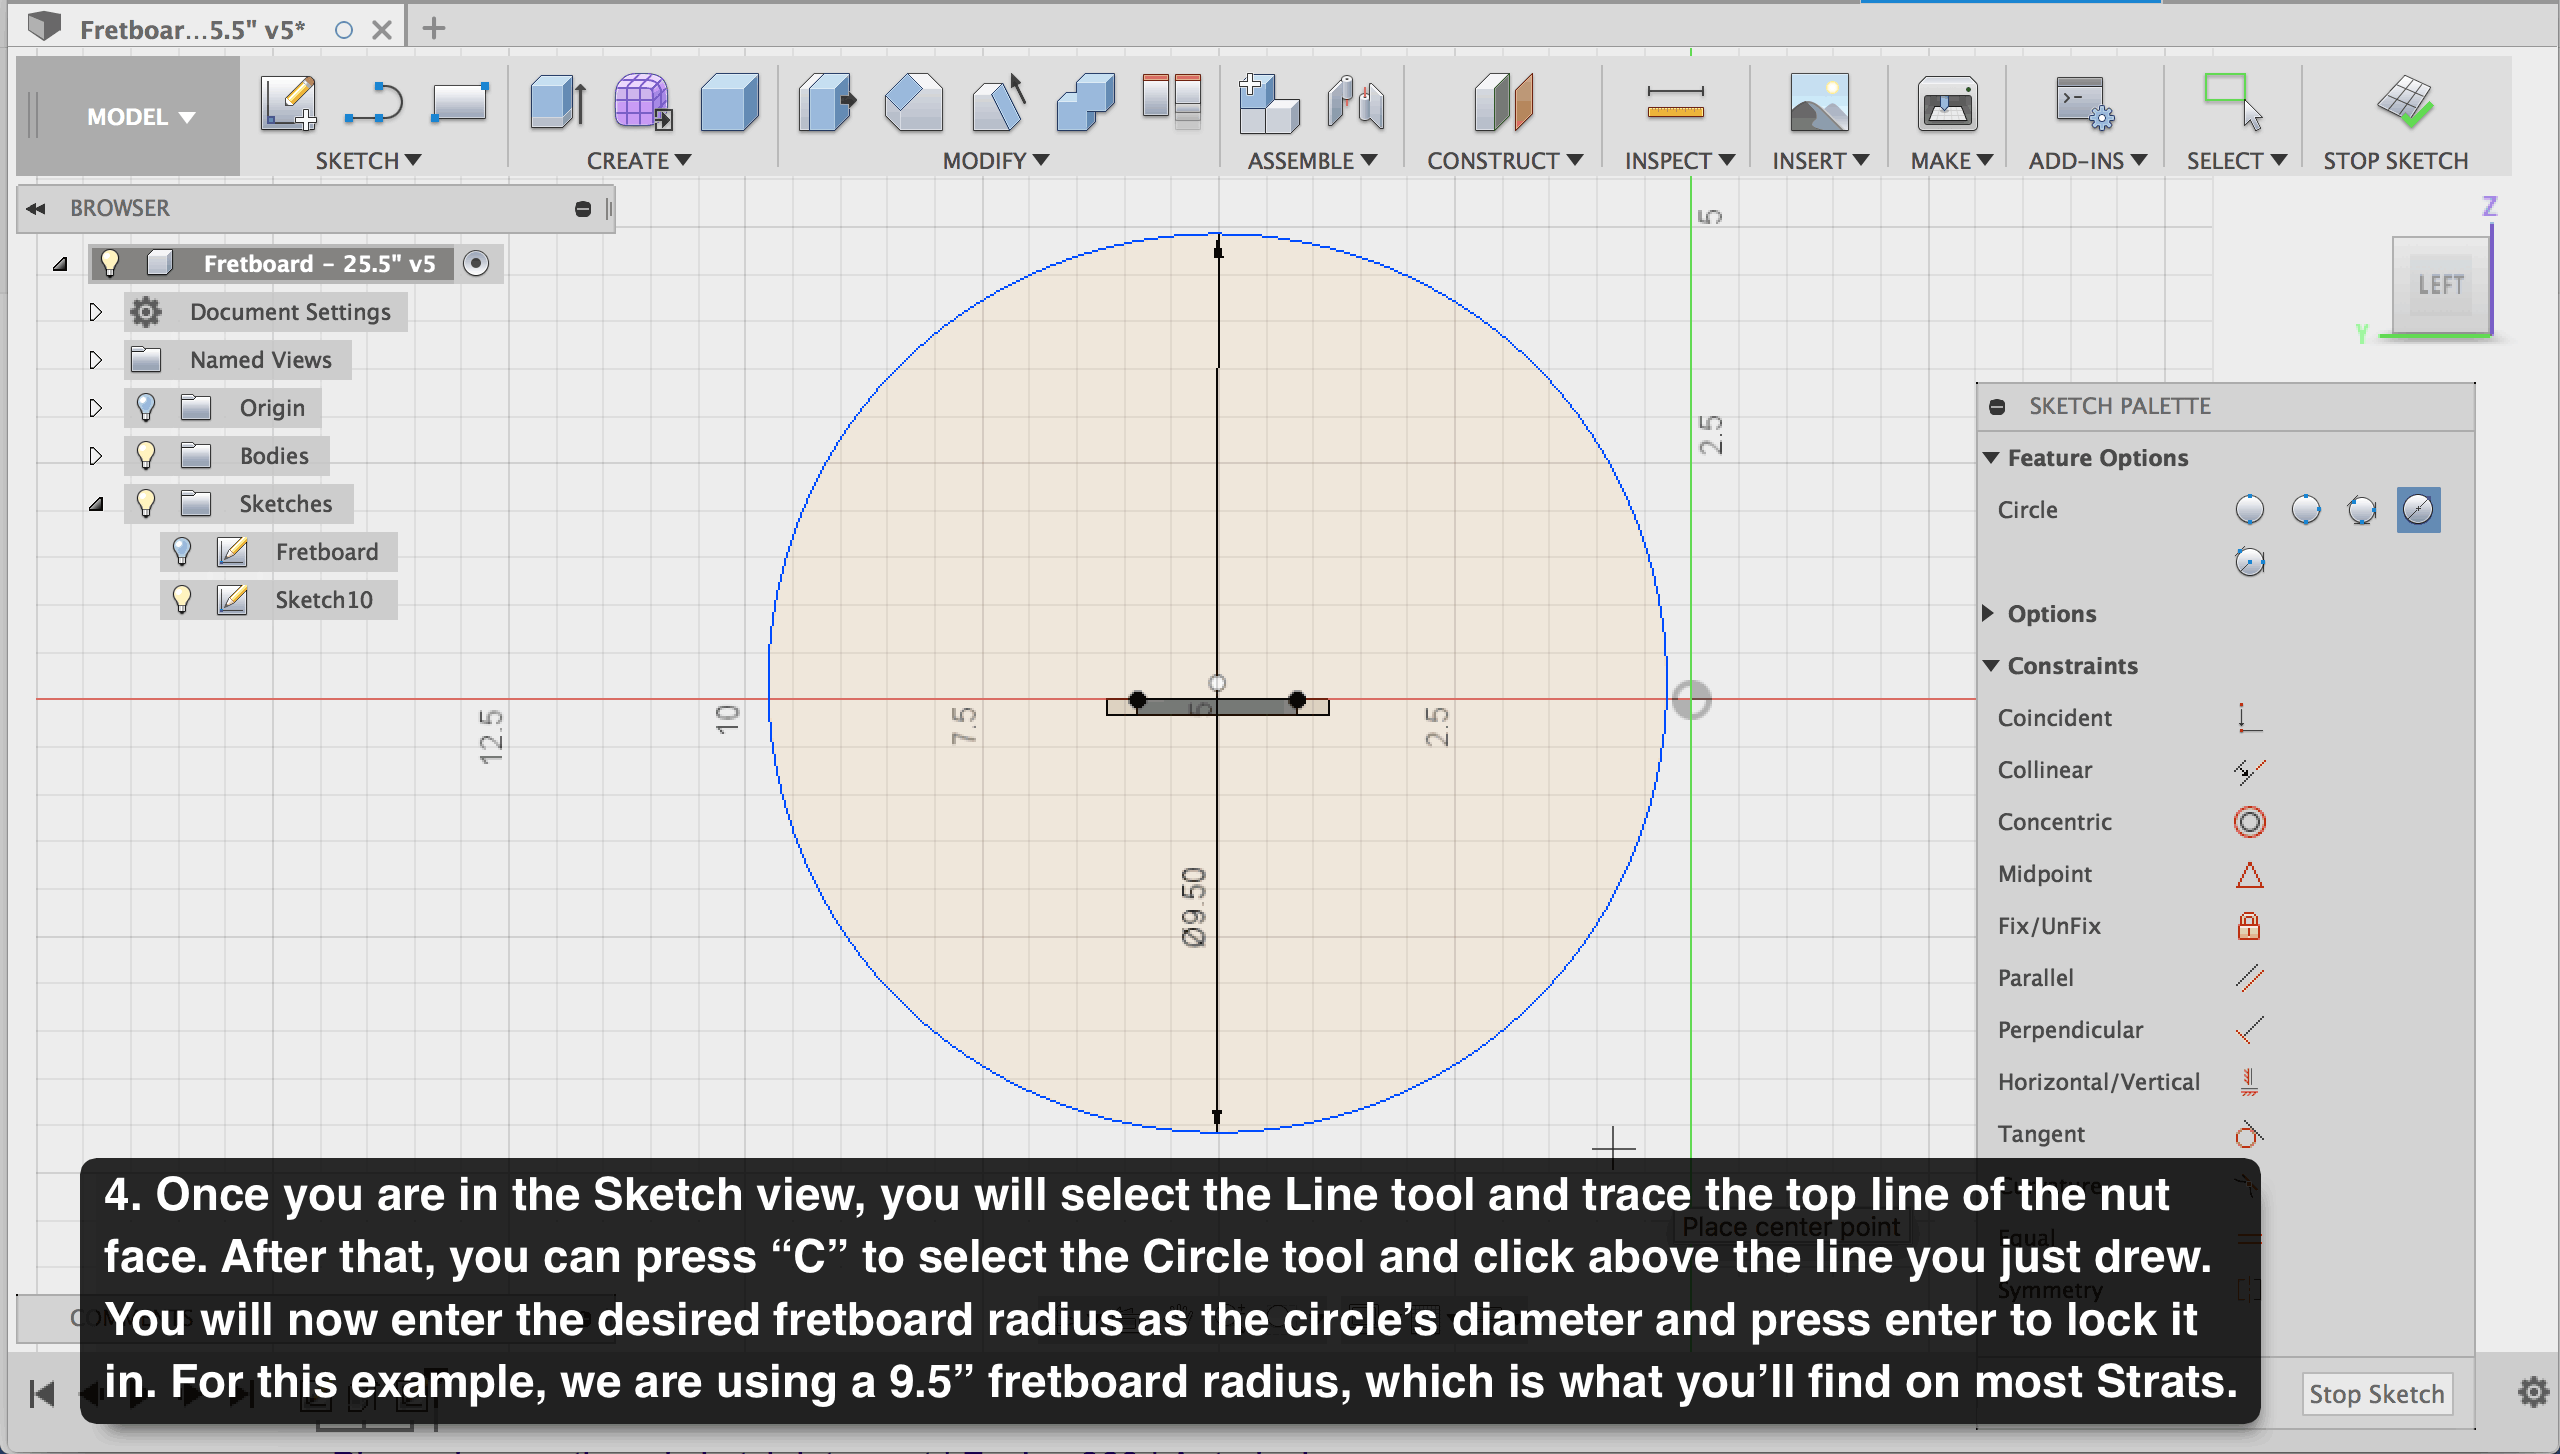
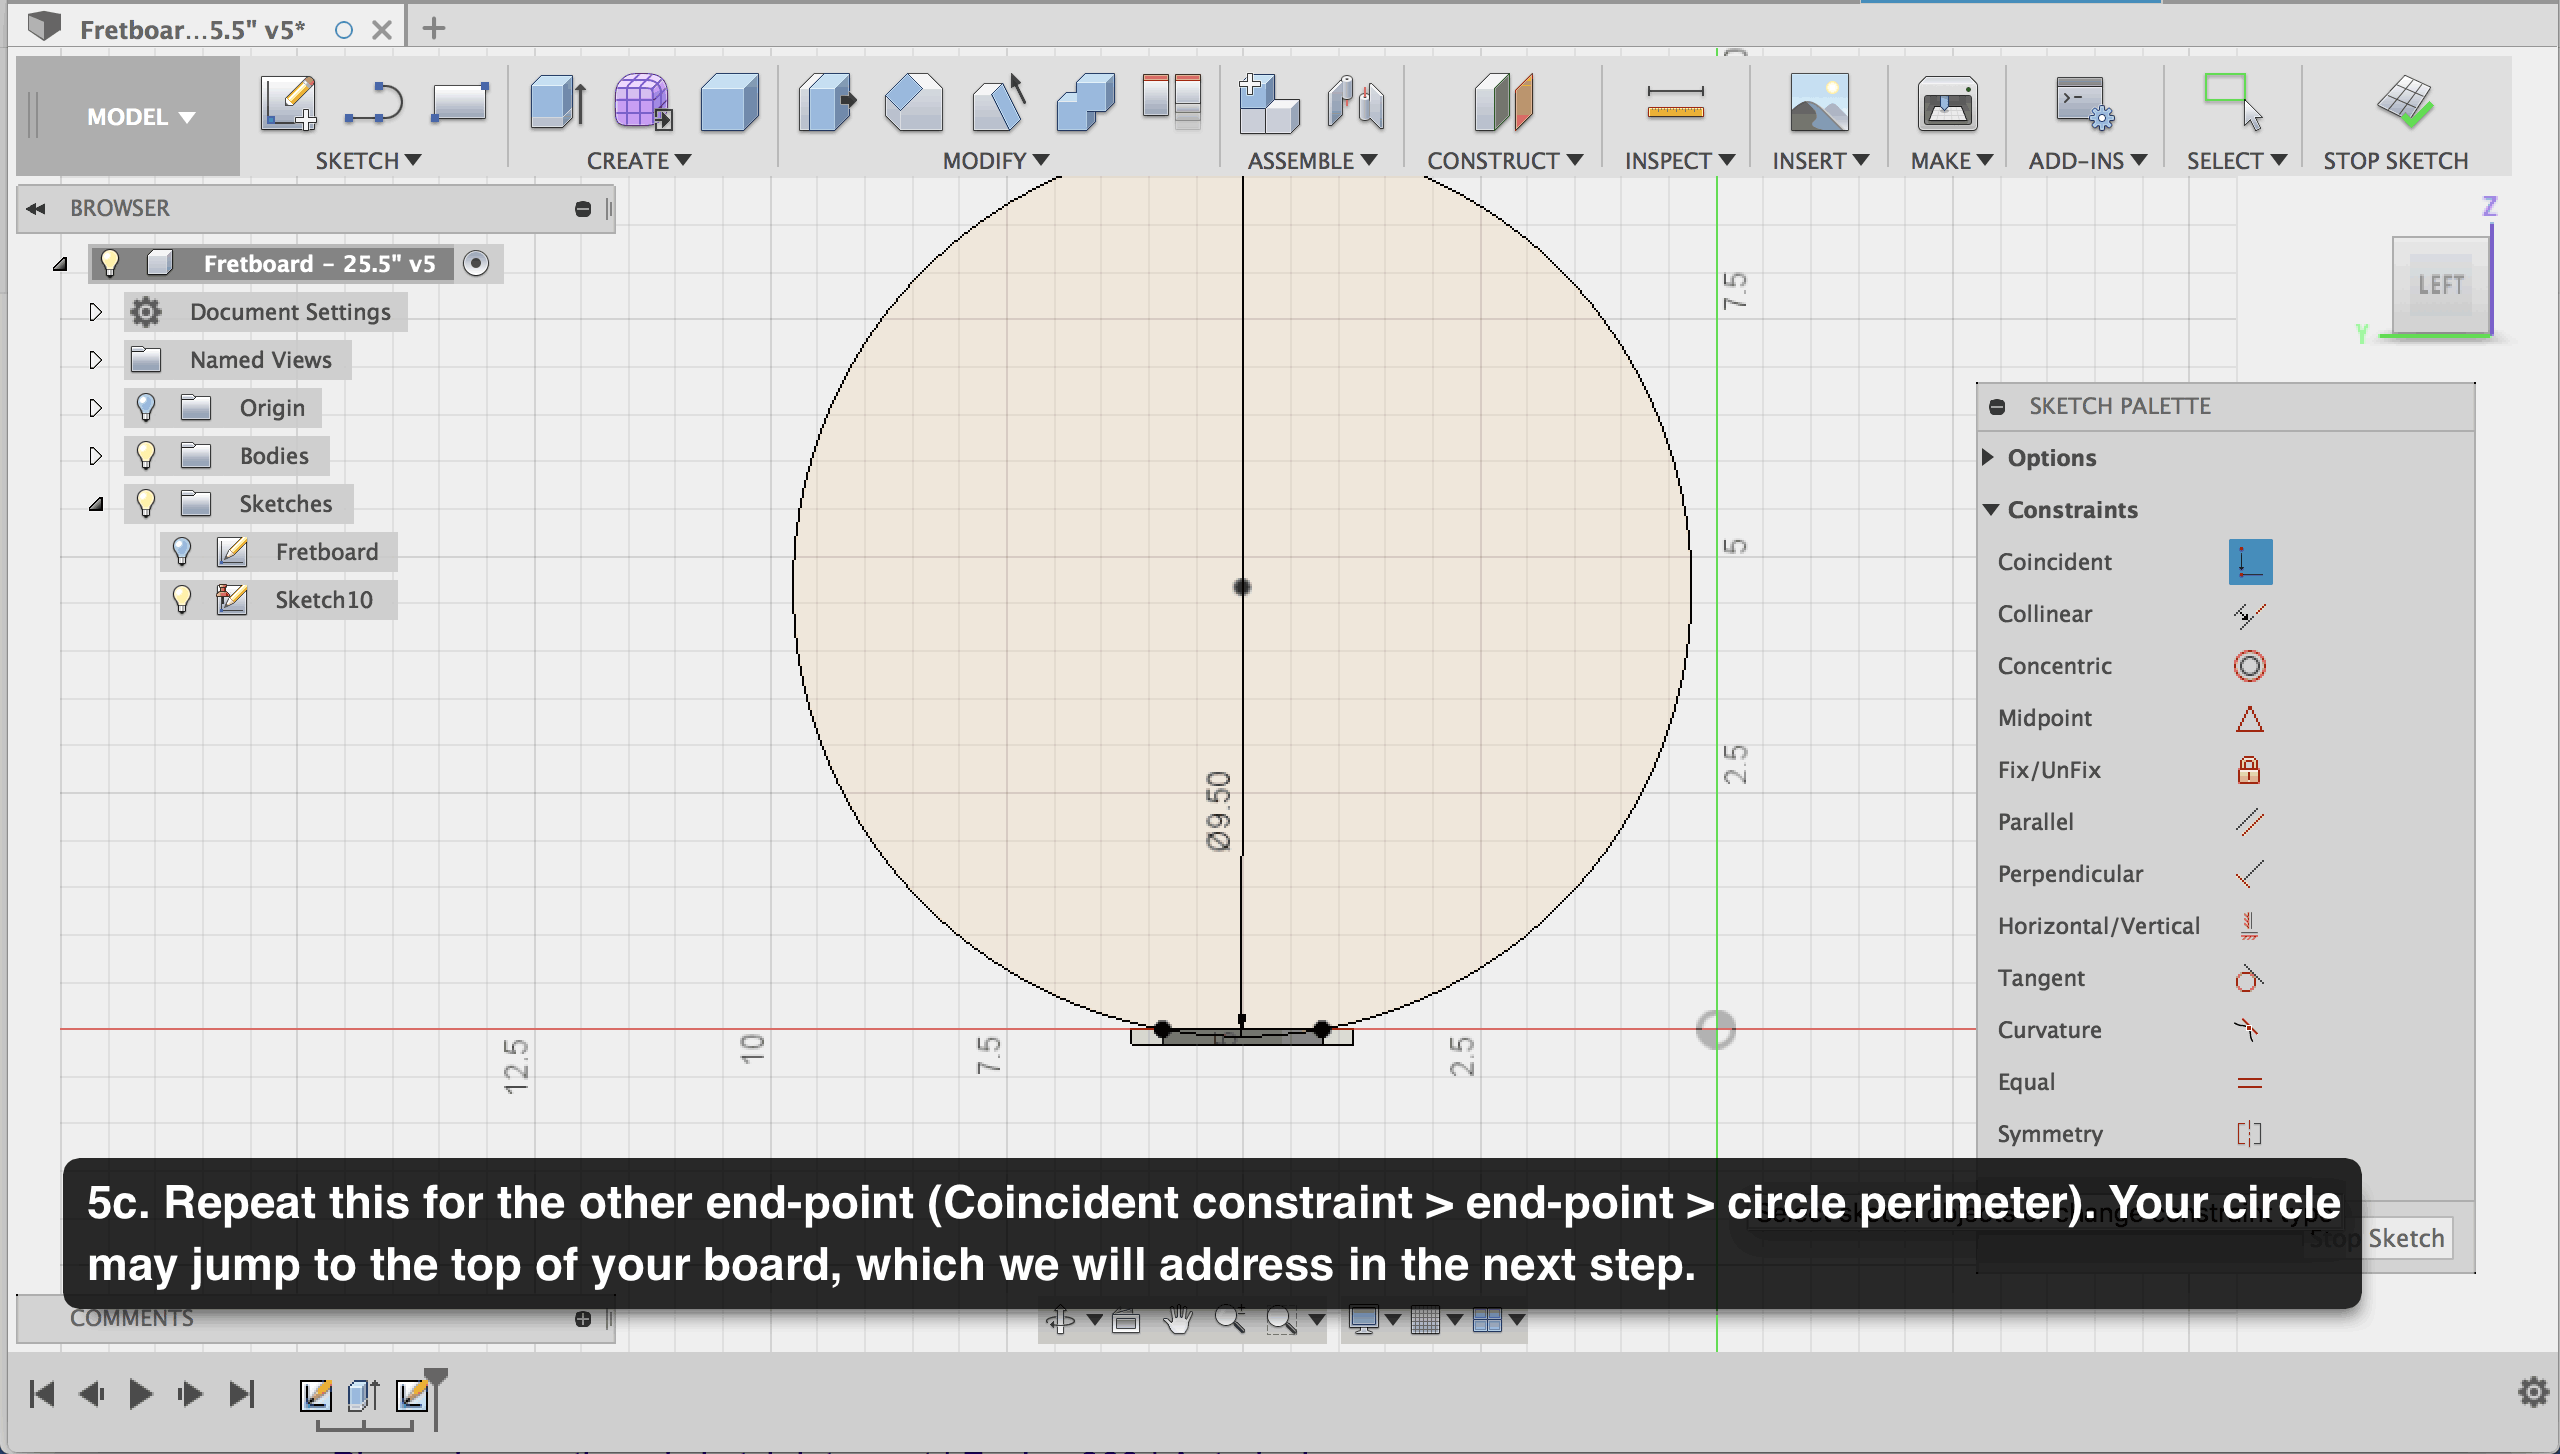
How to Model a Perfect Fretboard (Straight Radius version)
Click the images in the galleries below and cycle through with your arrow keys.
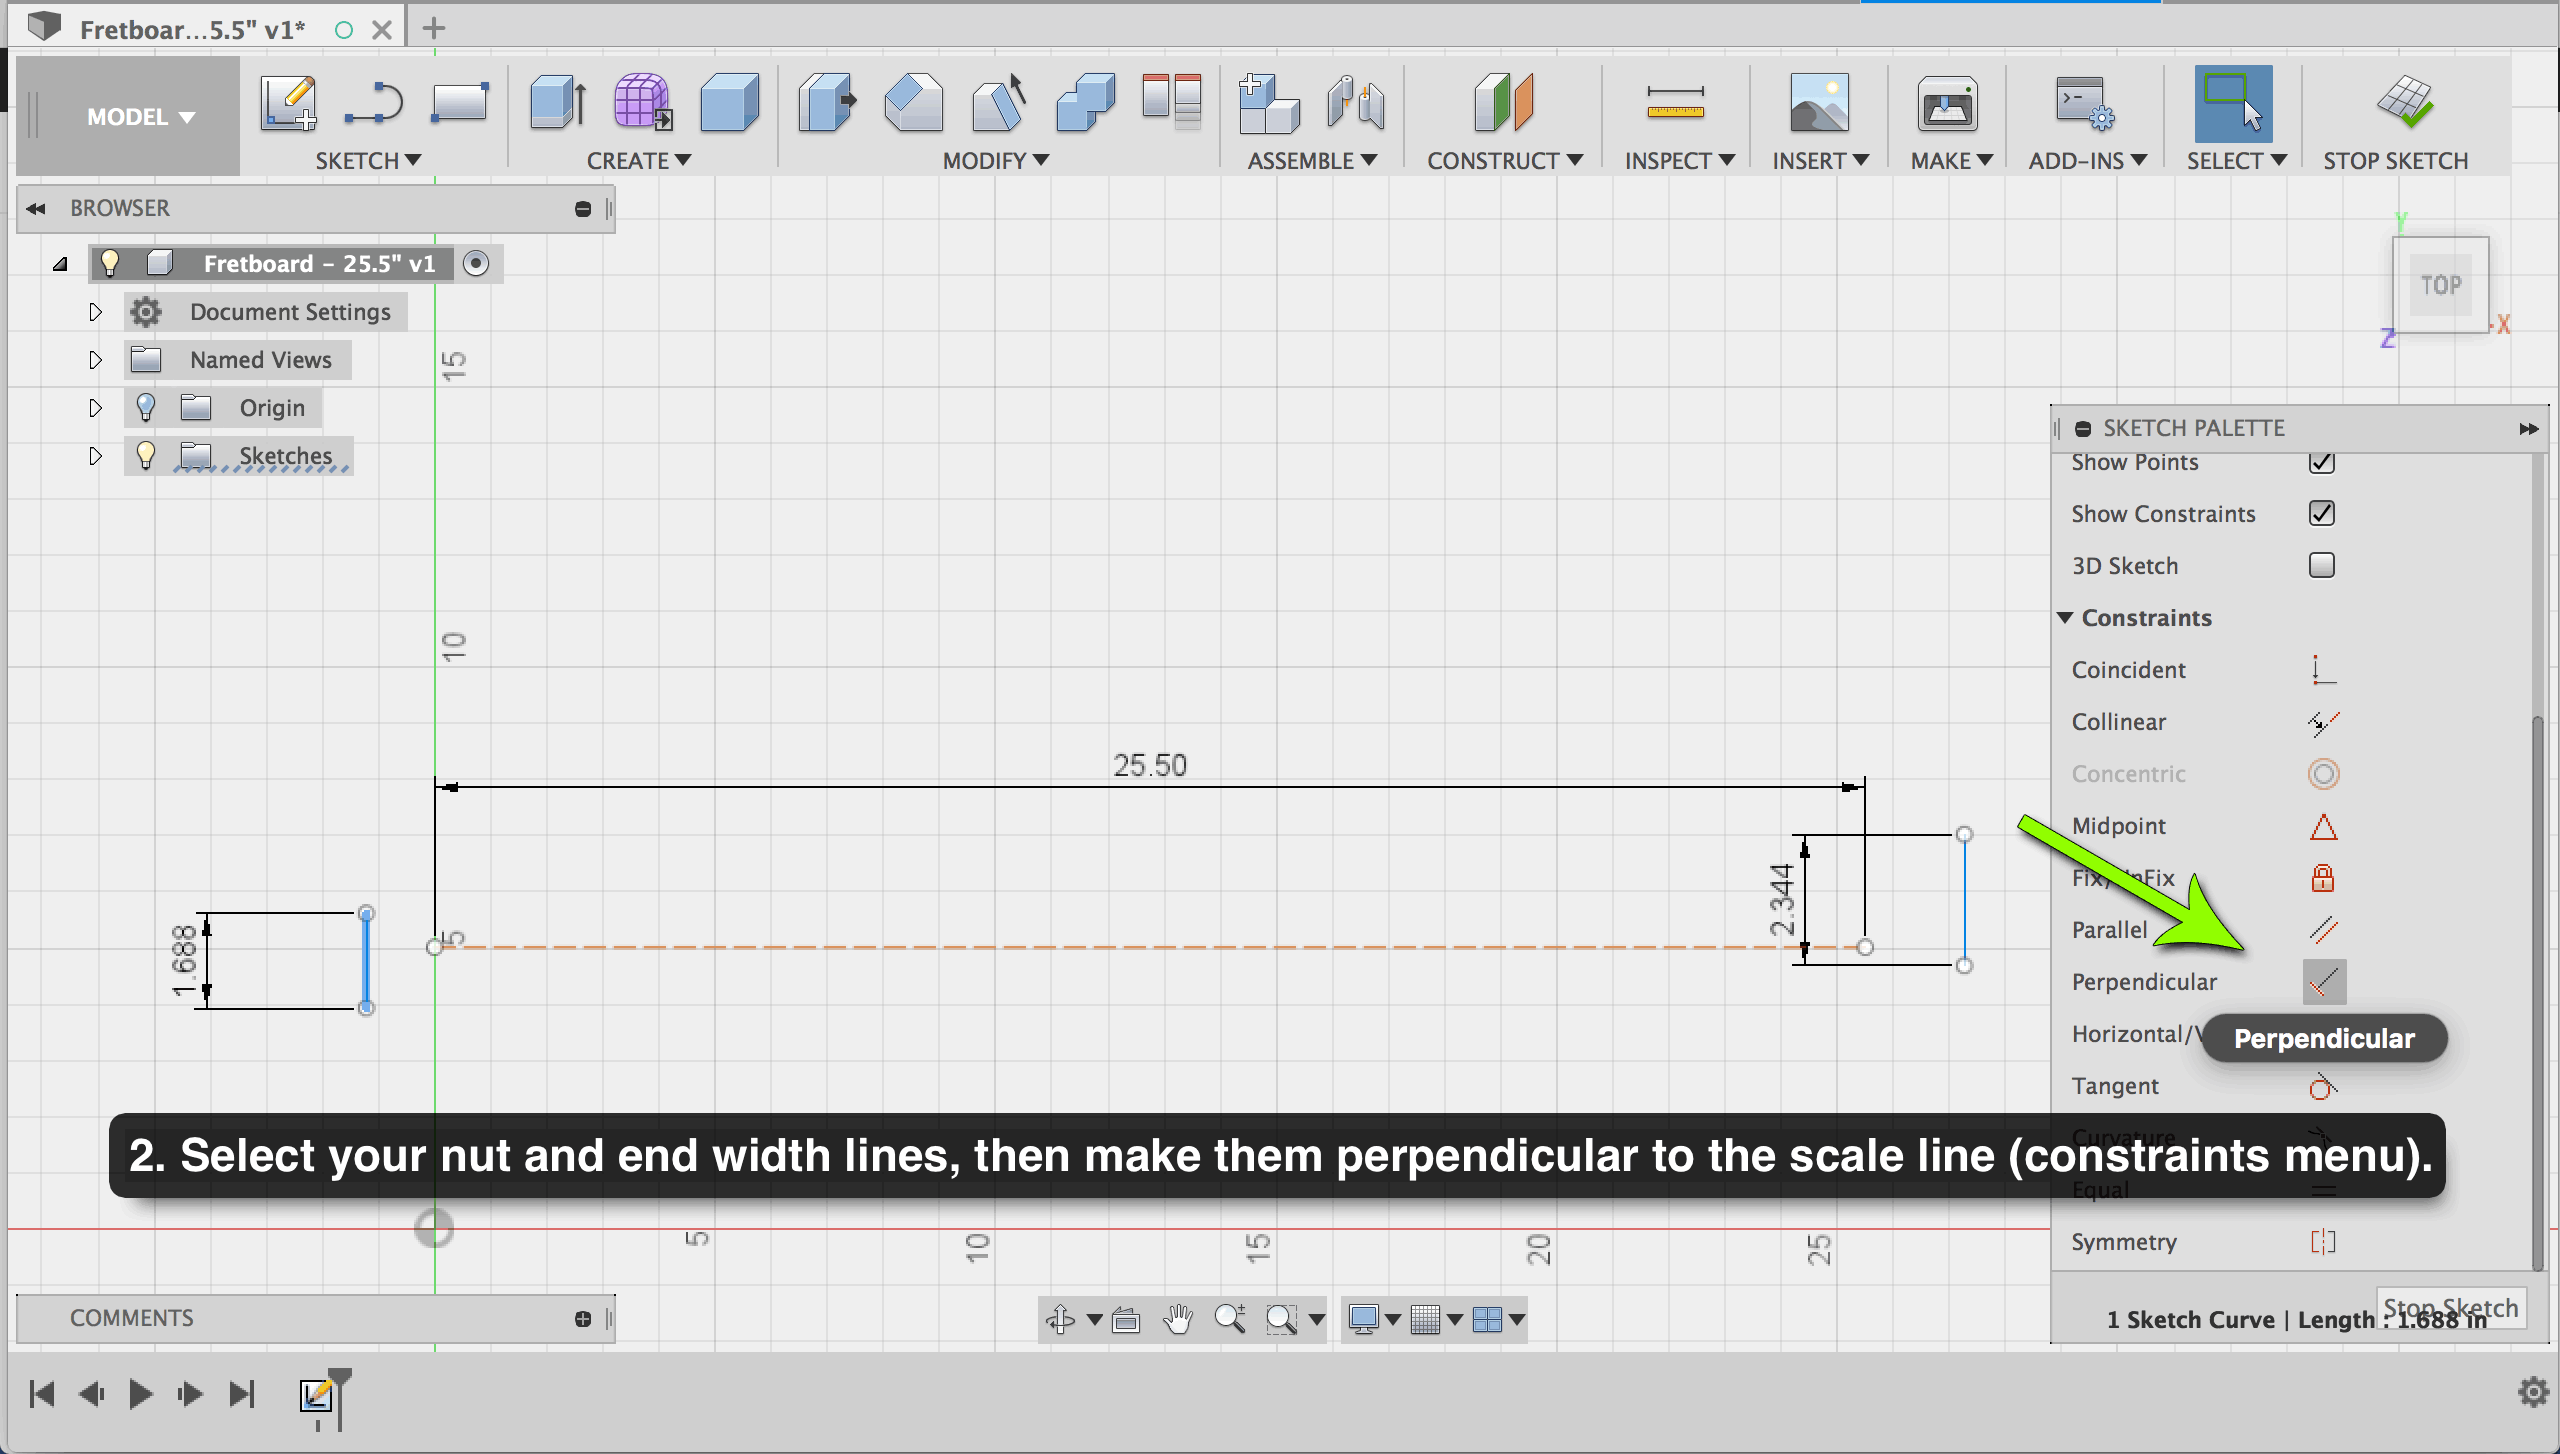
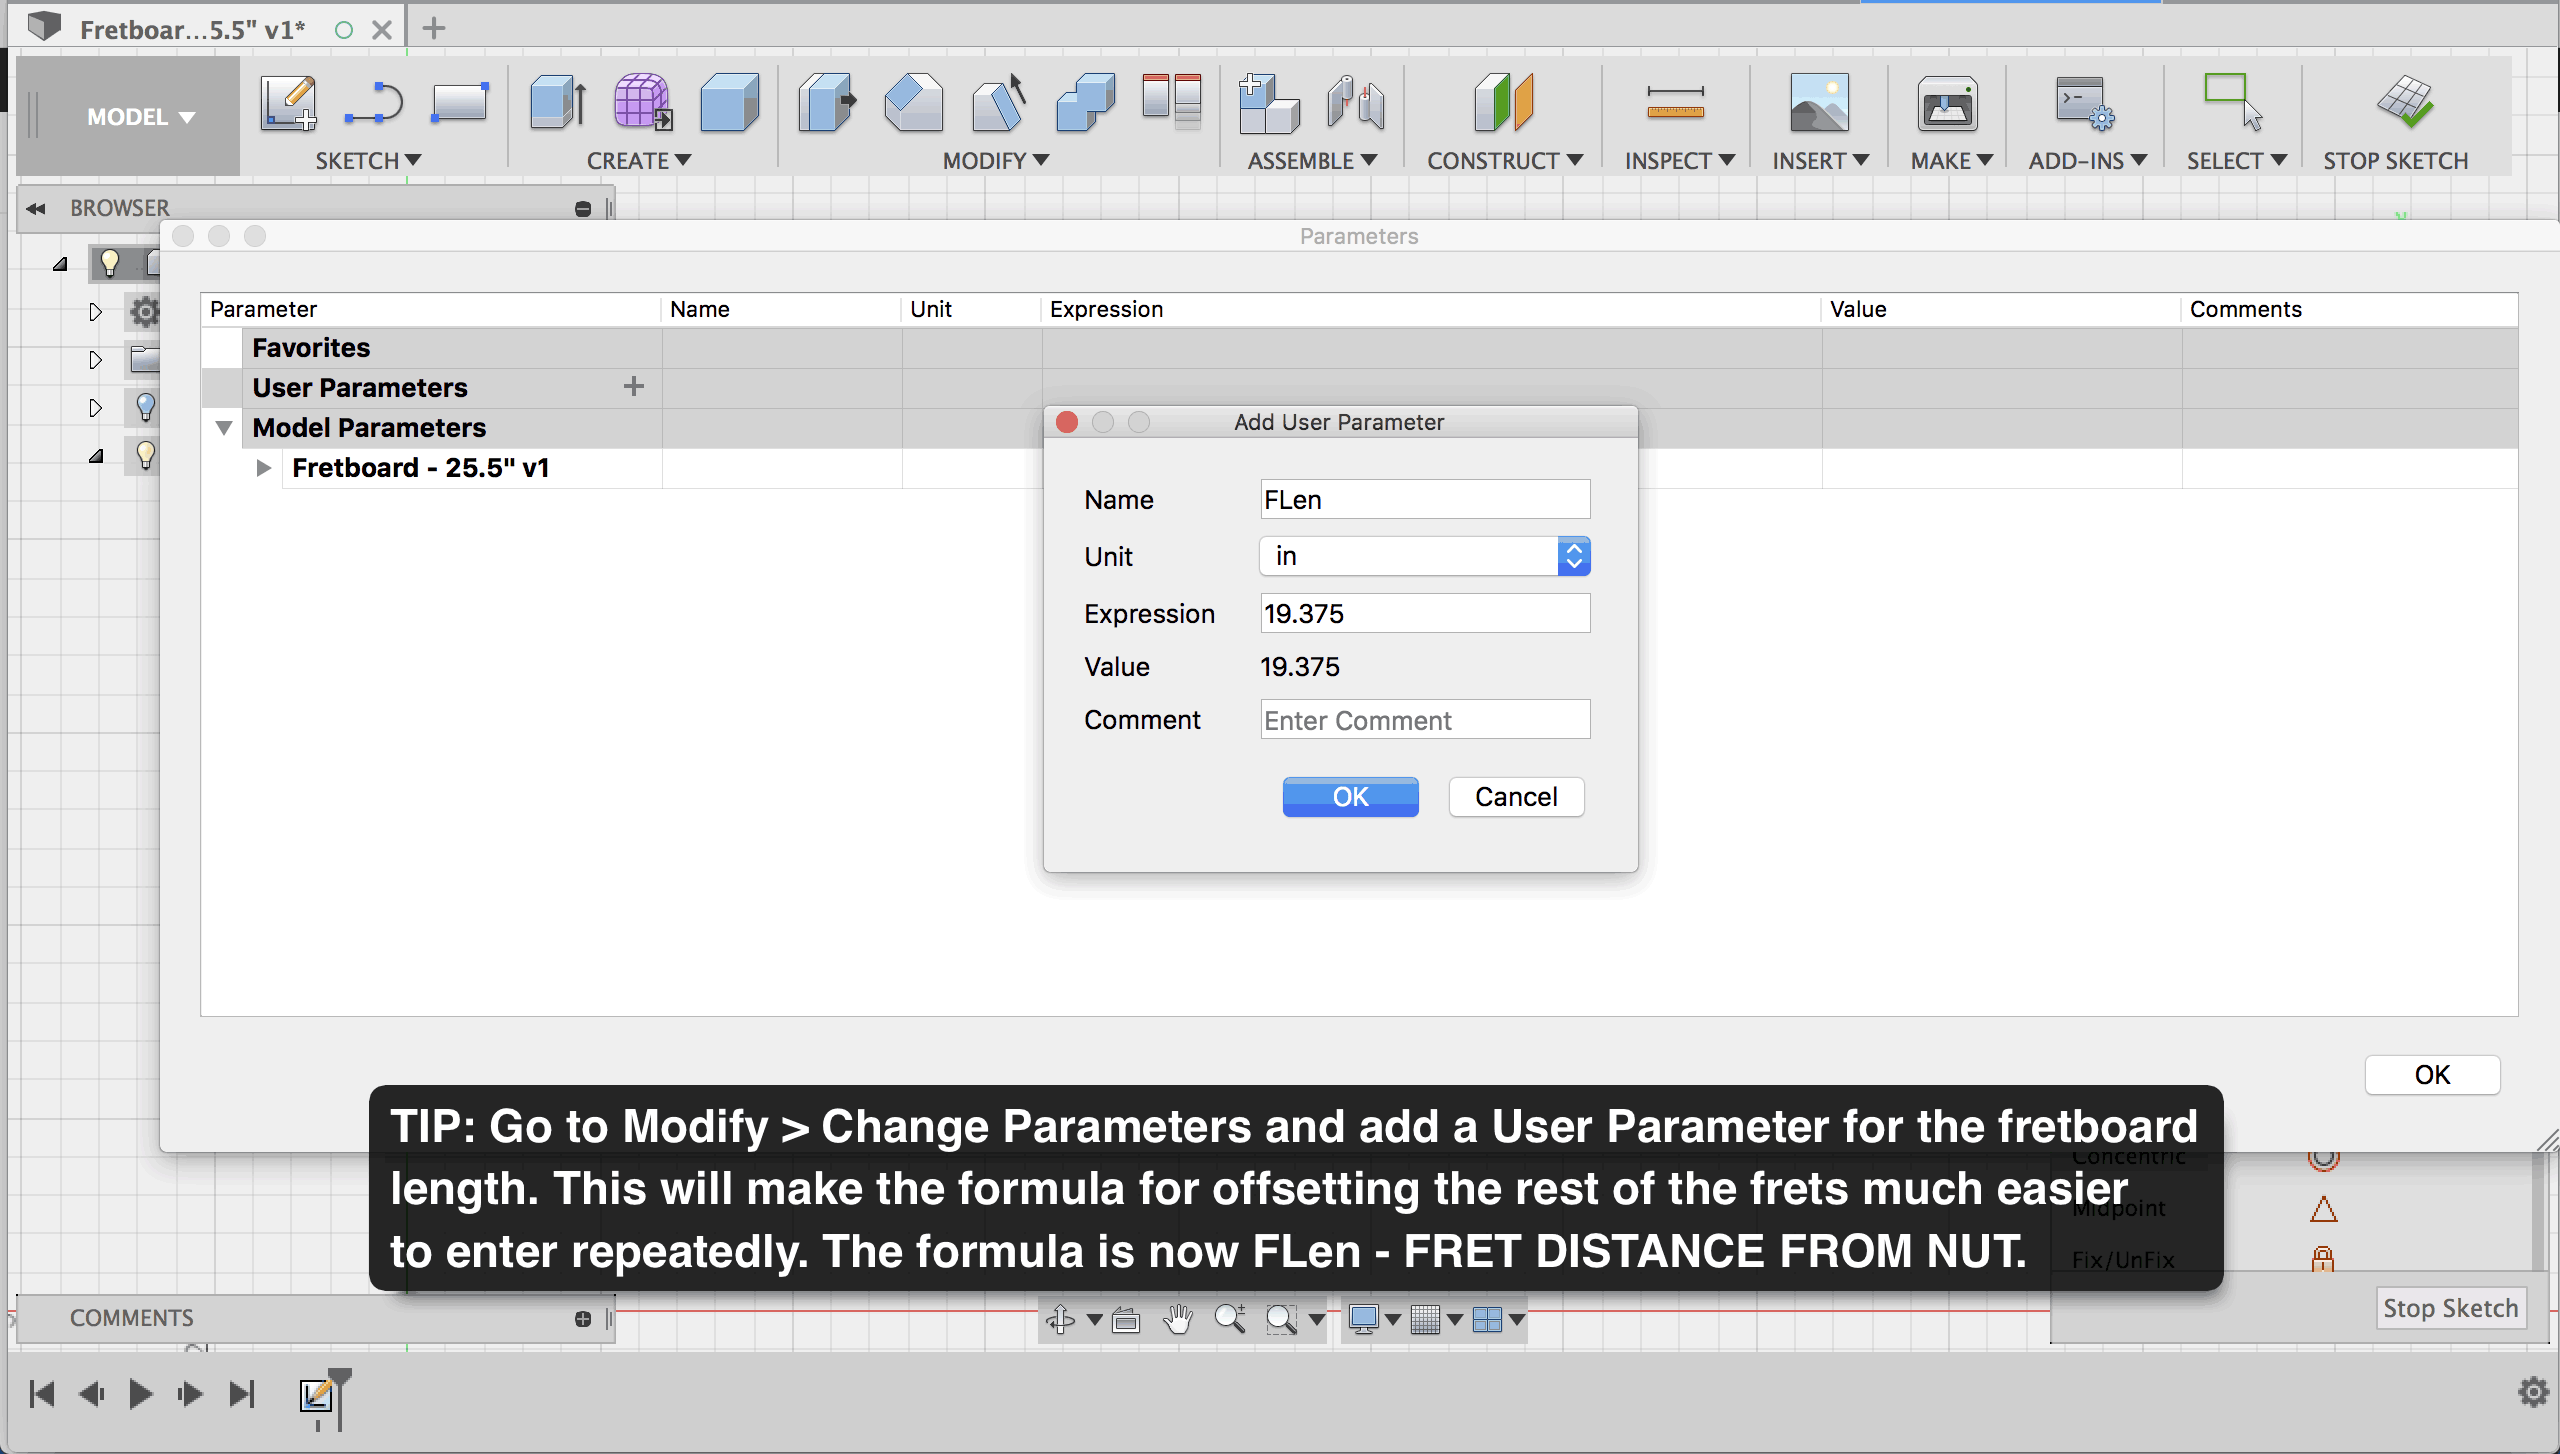
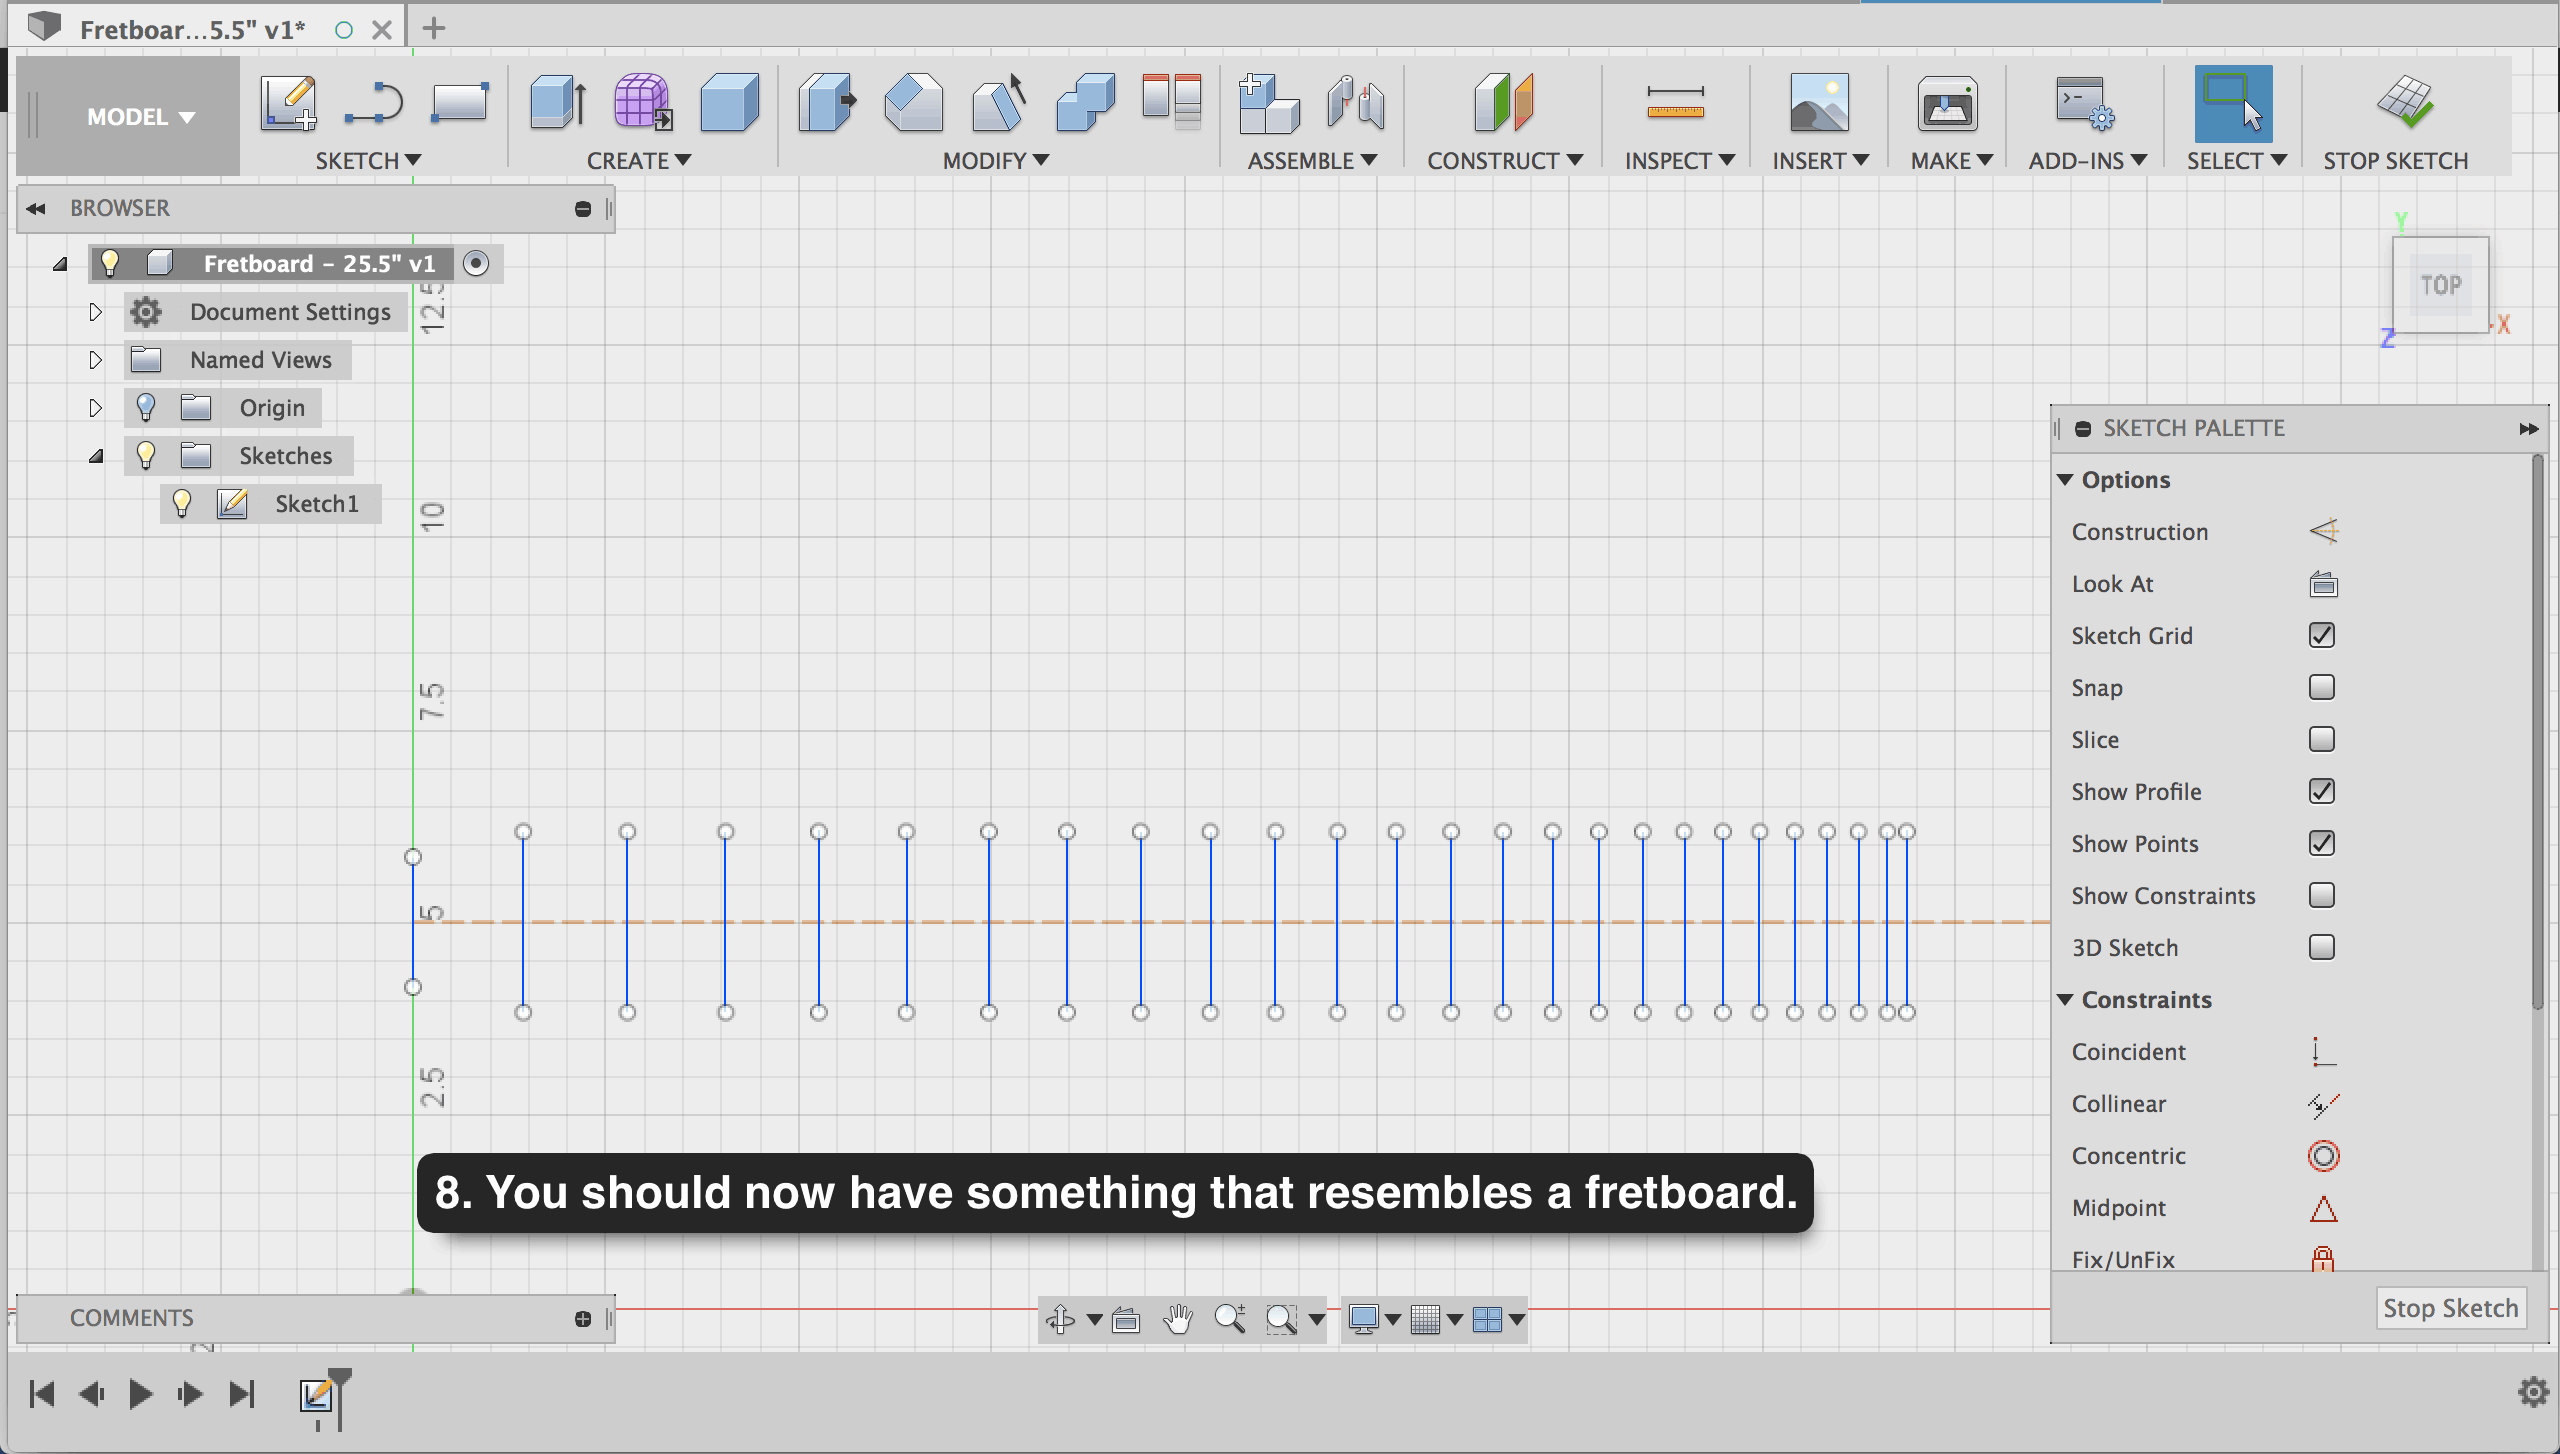
Part I: 2-D Sketch


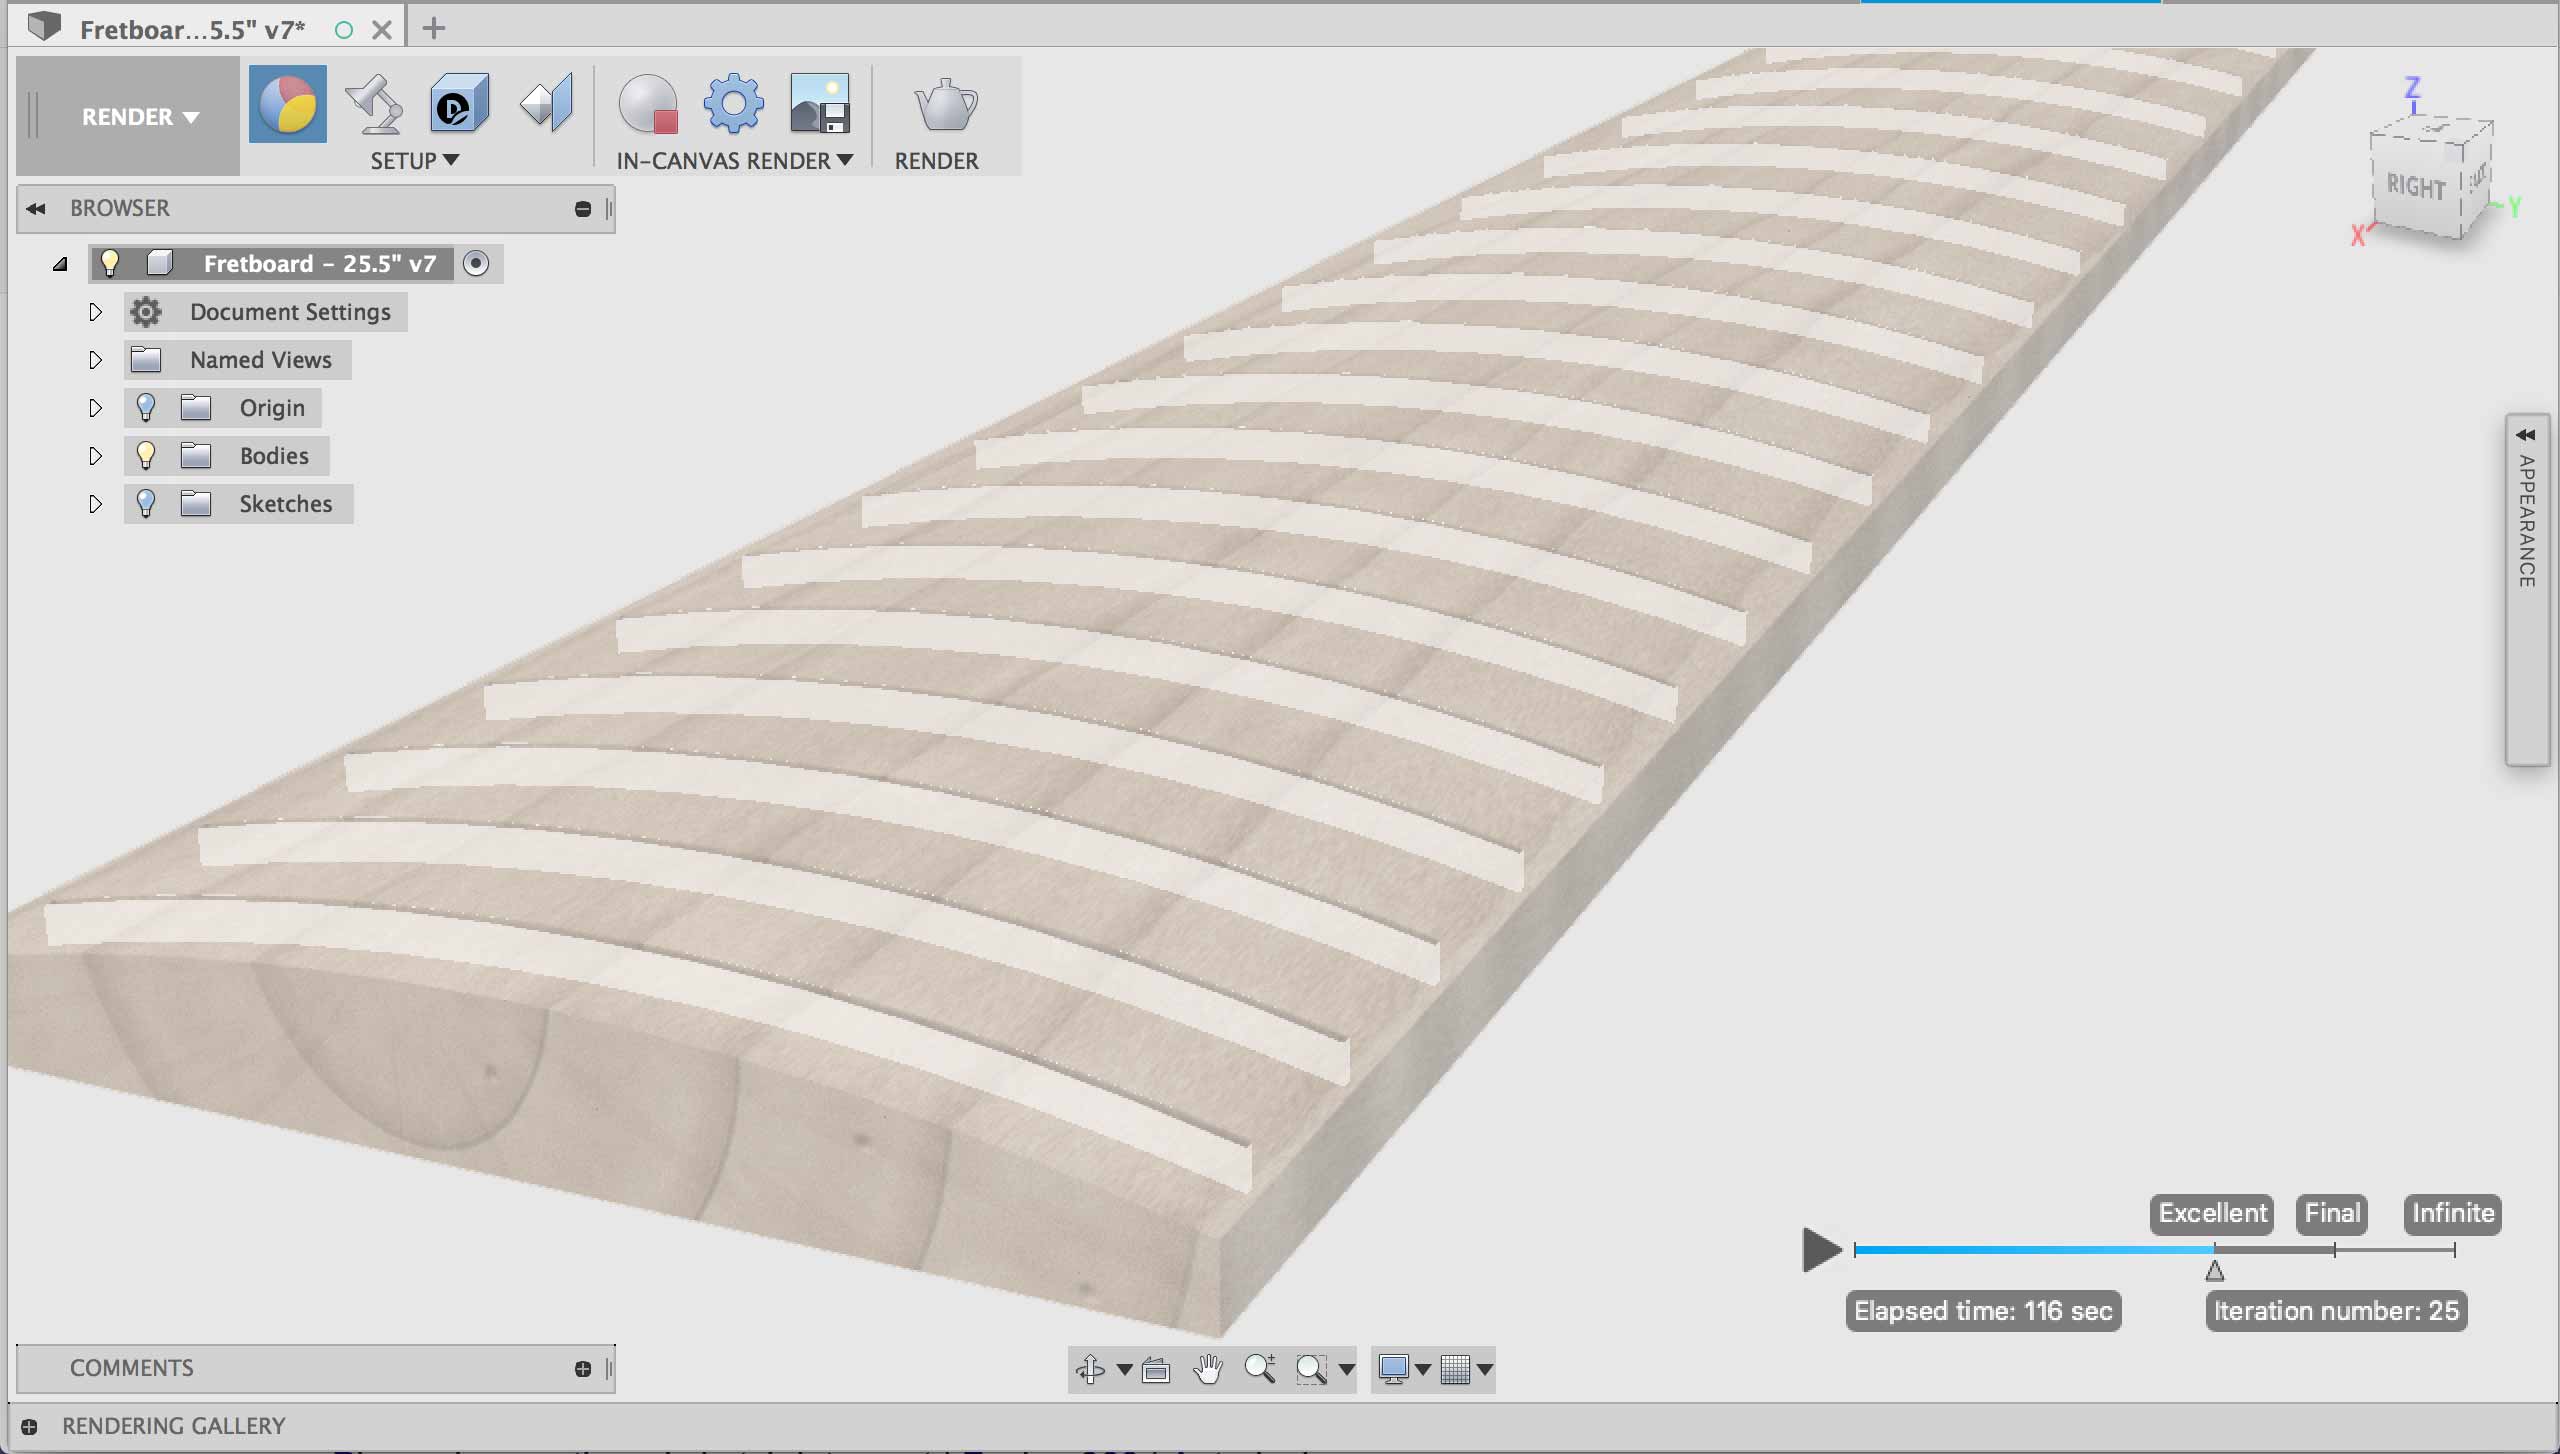
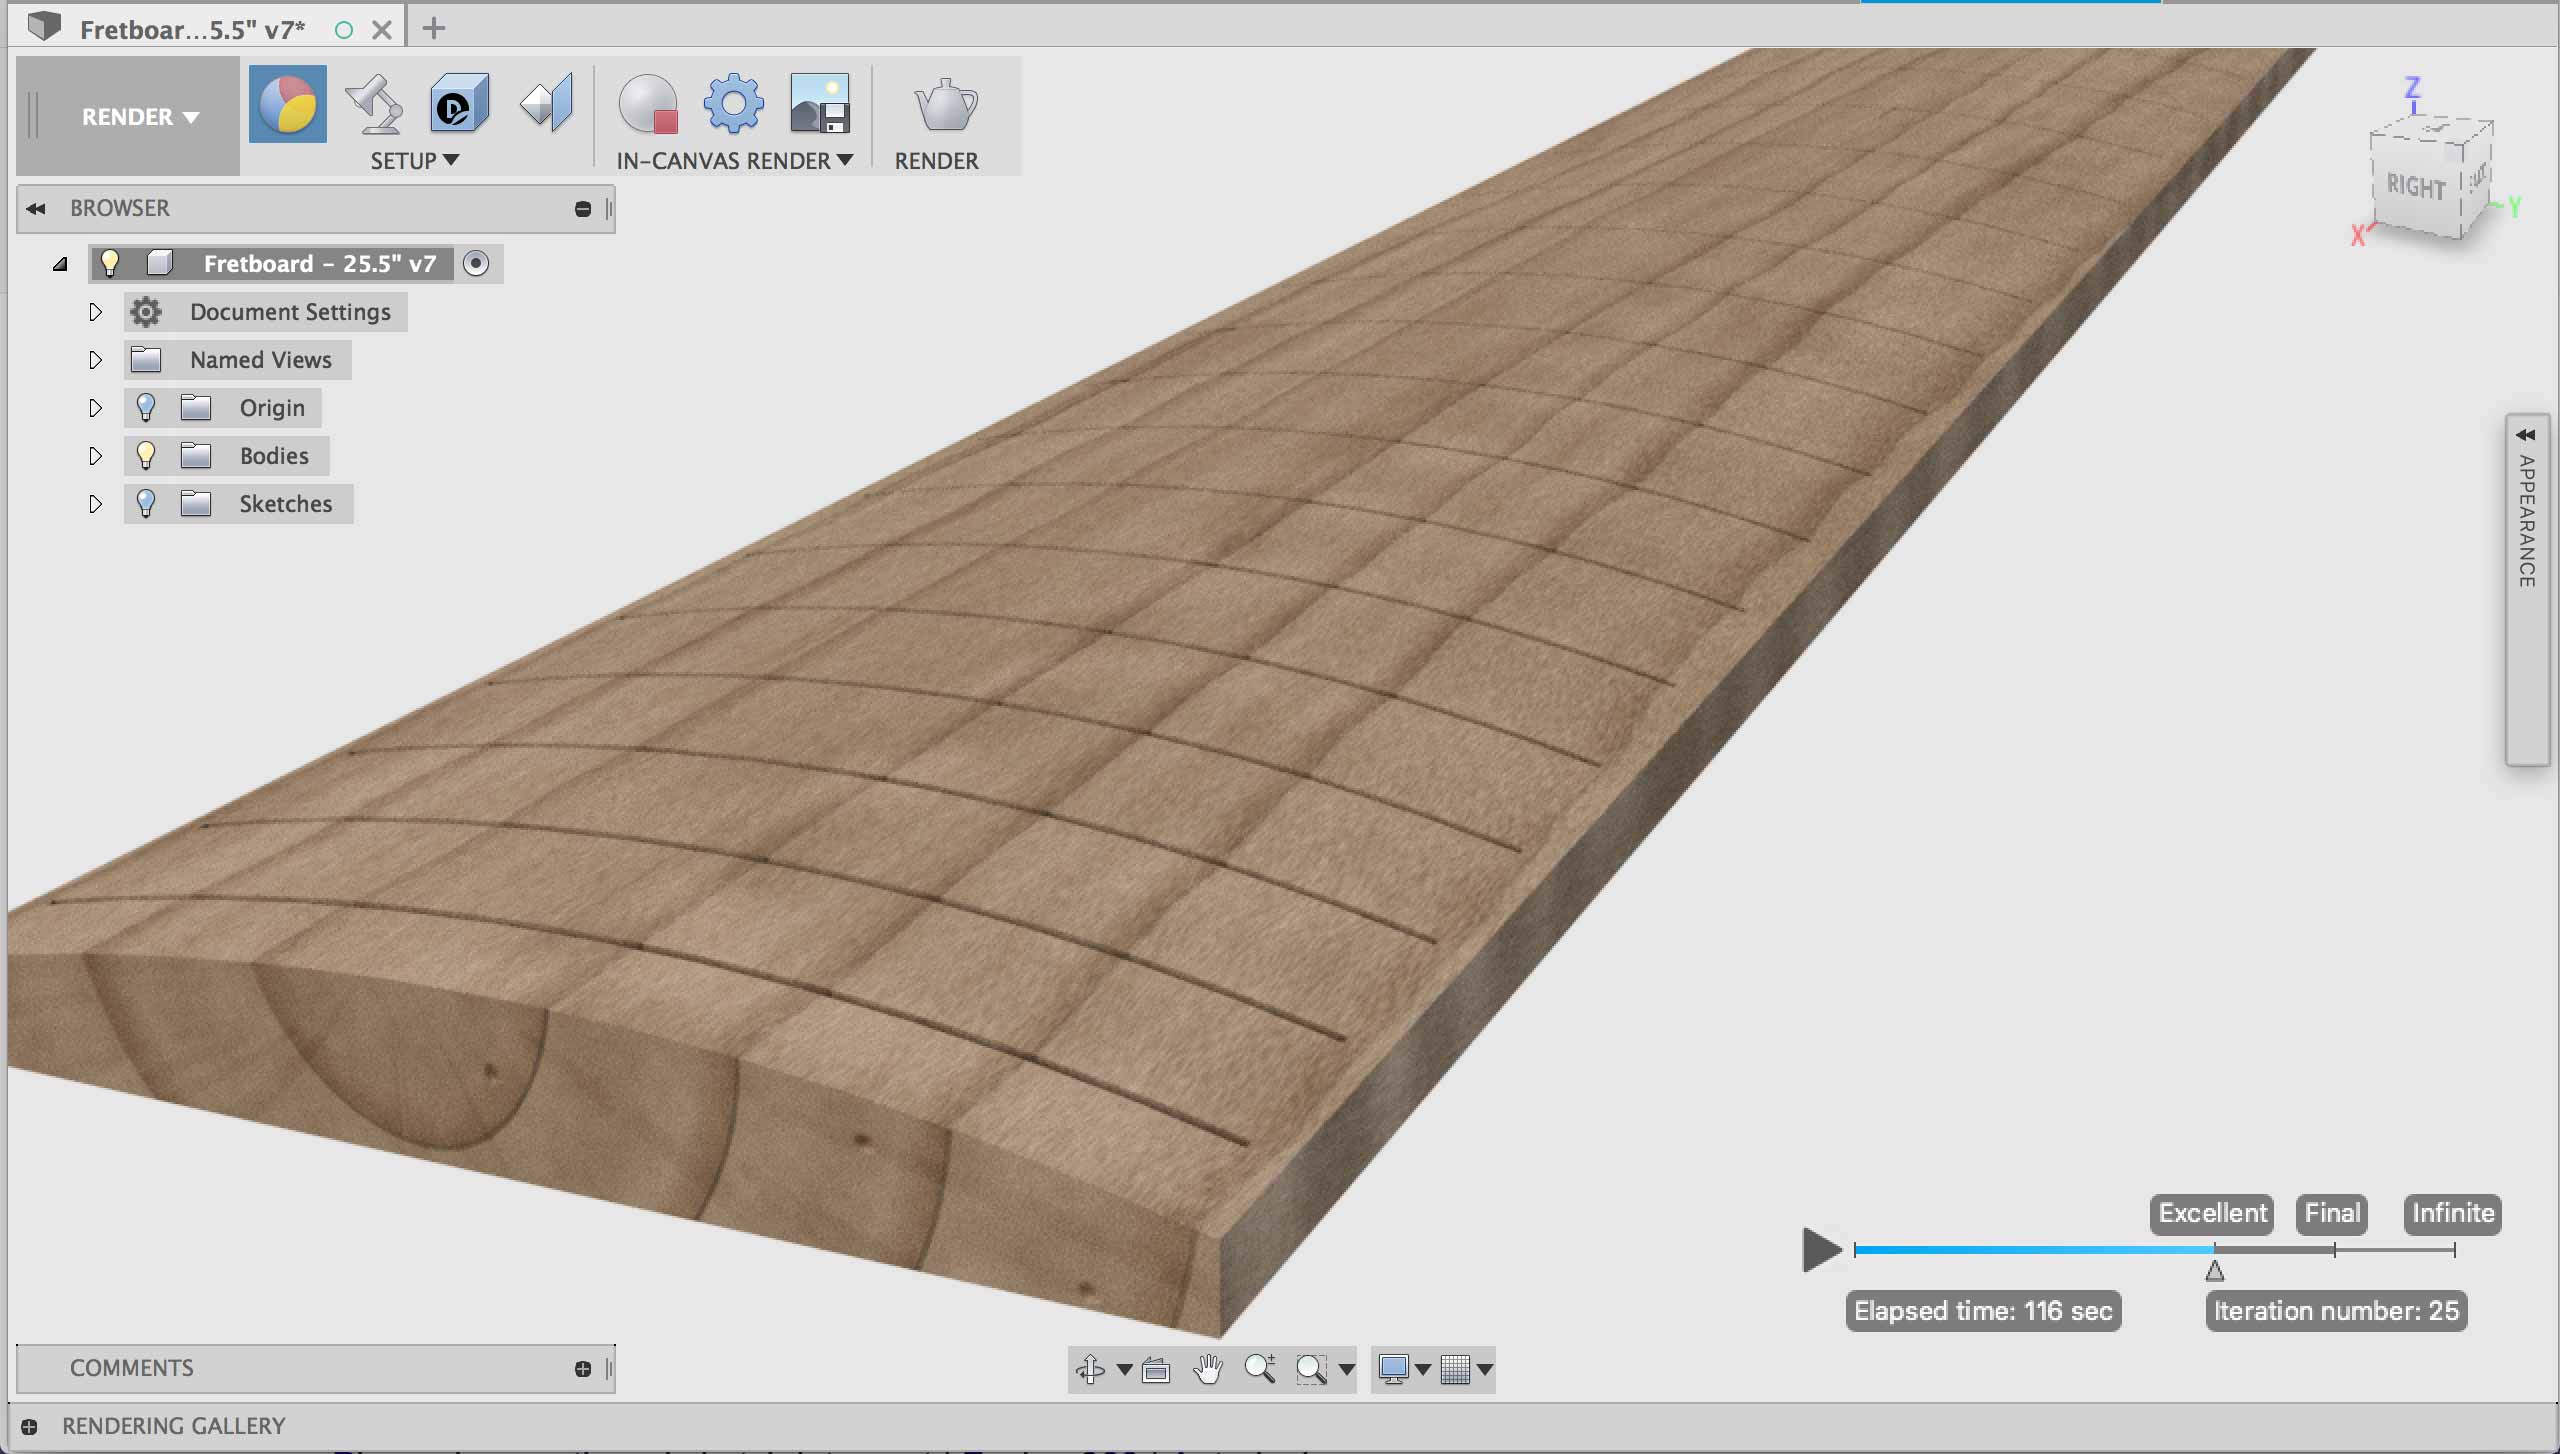
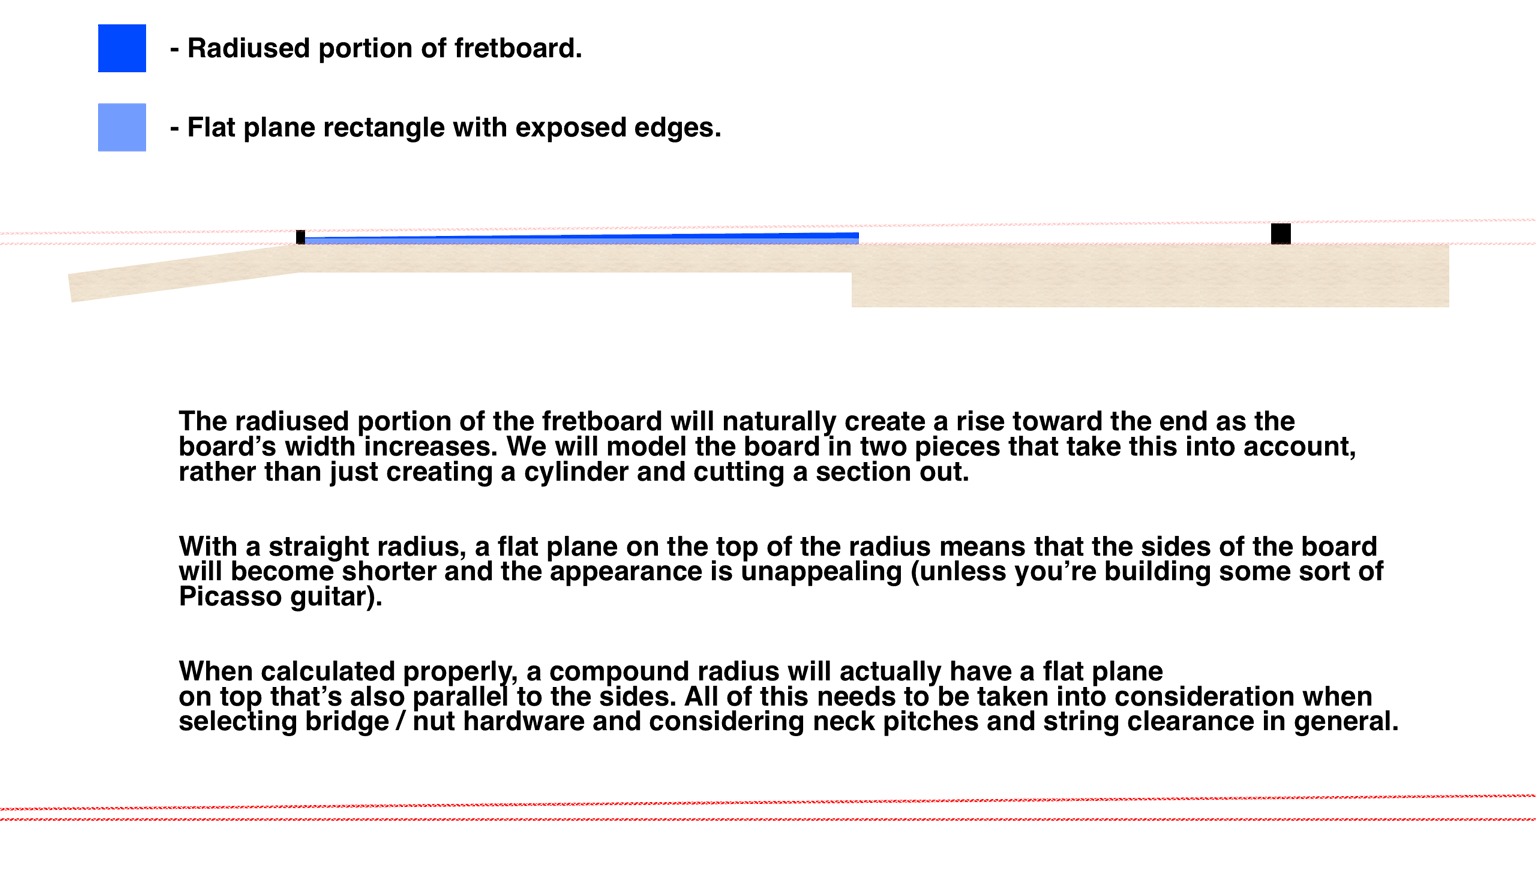
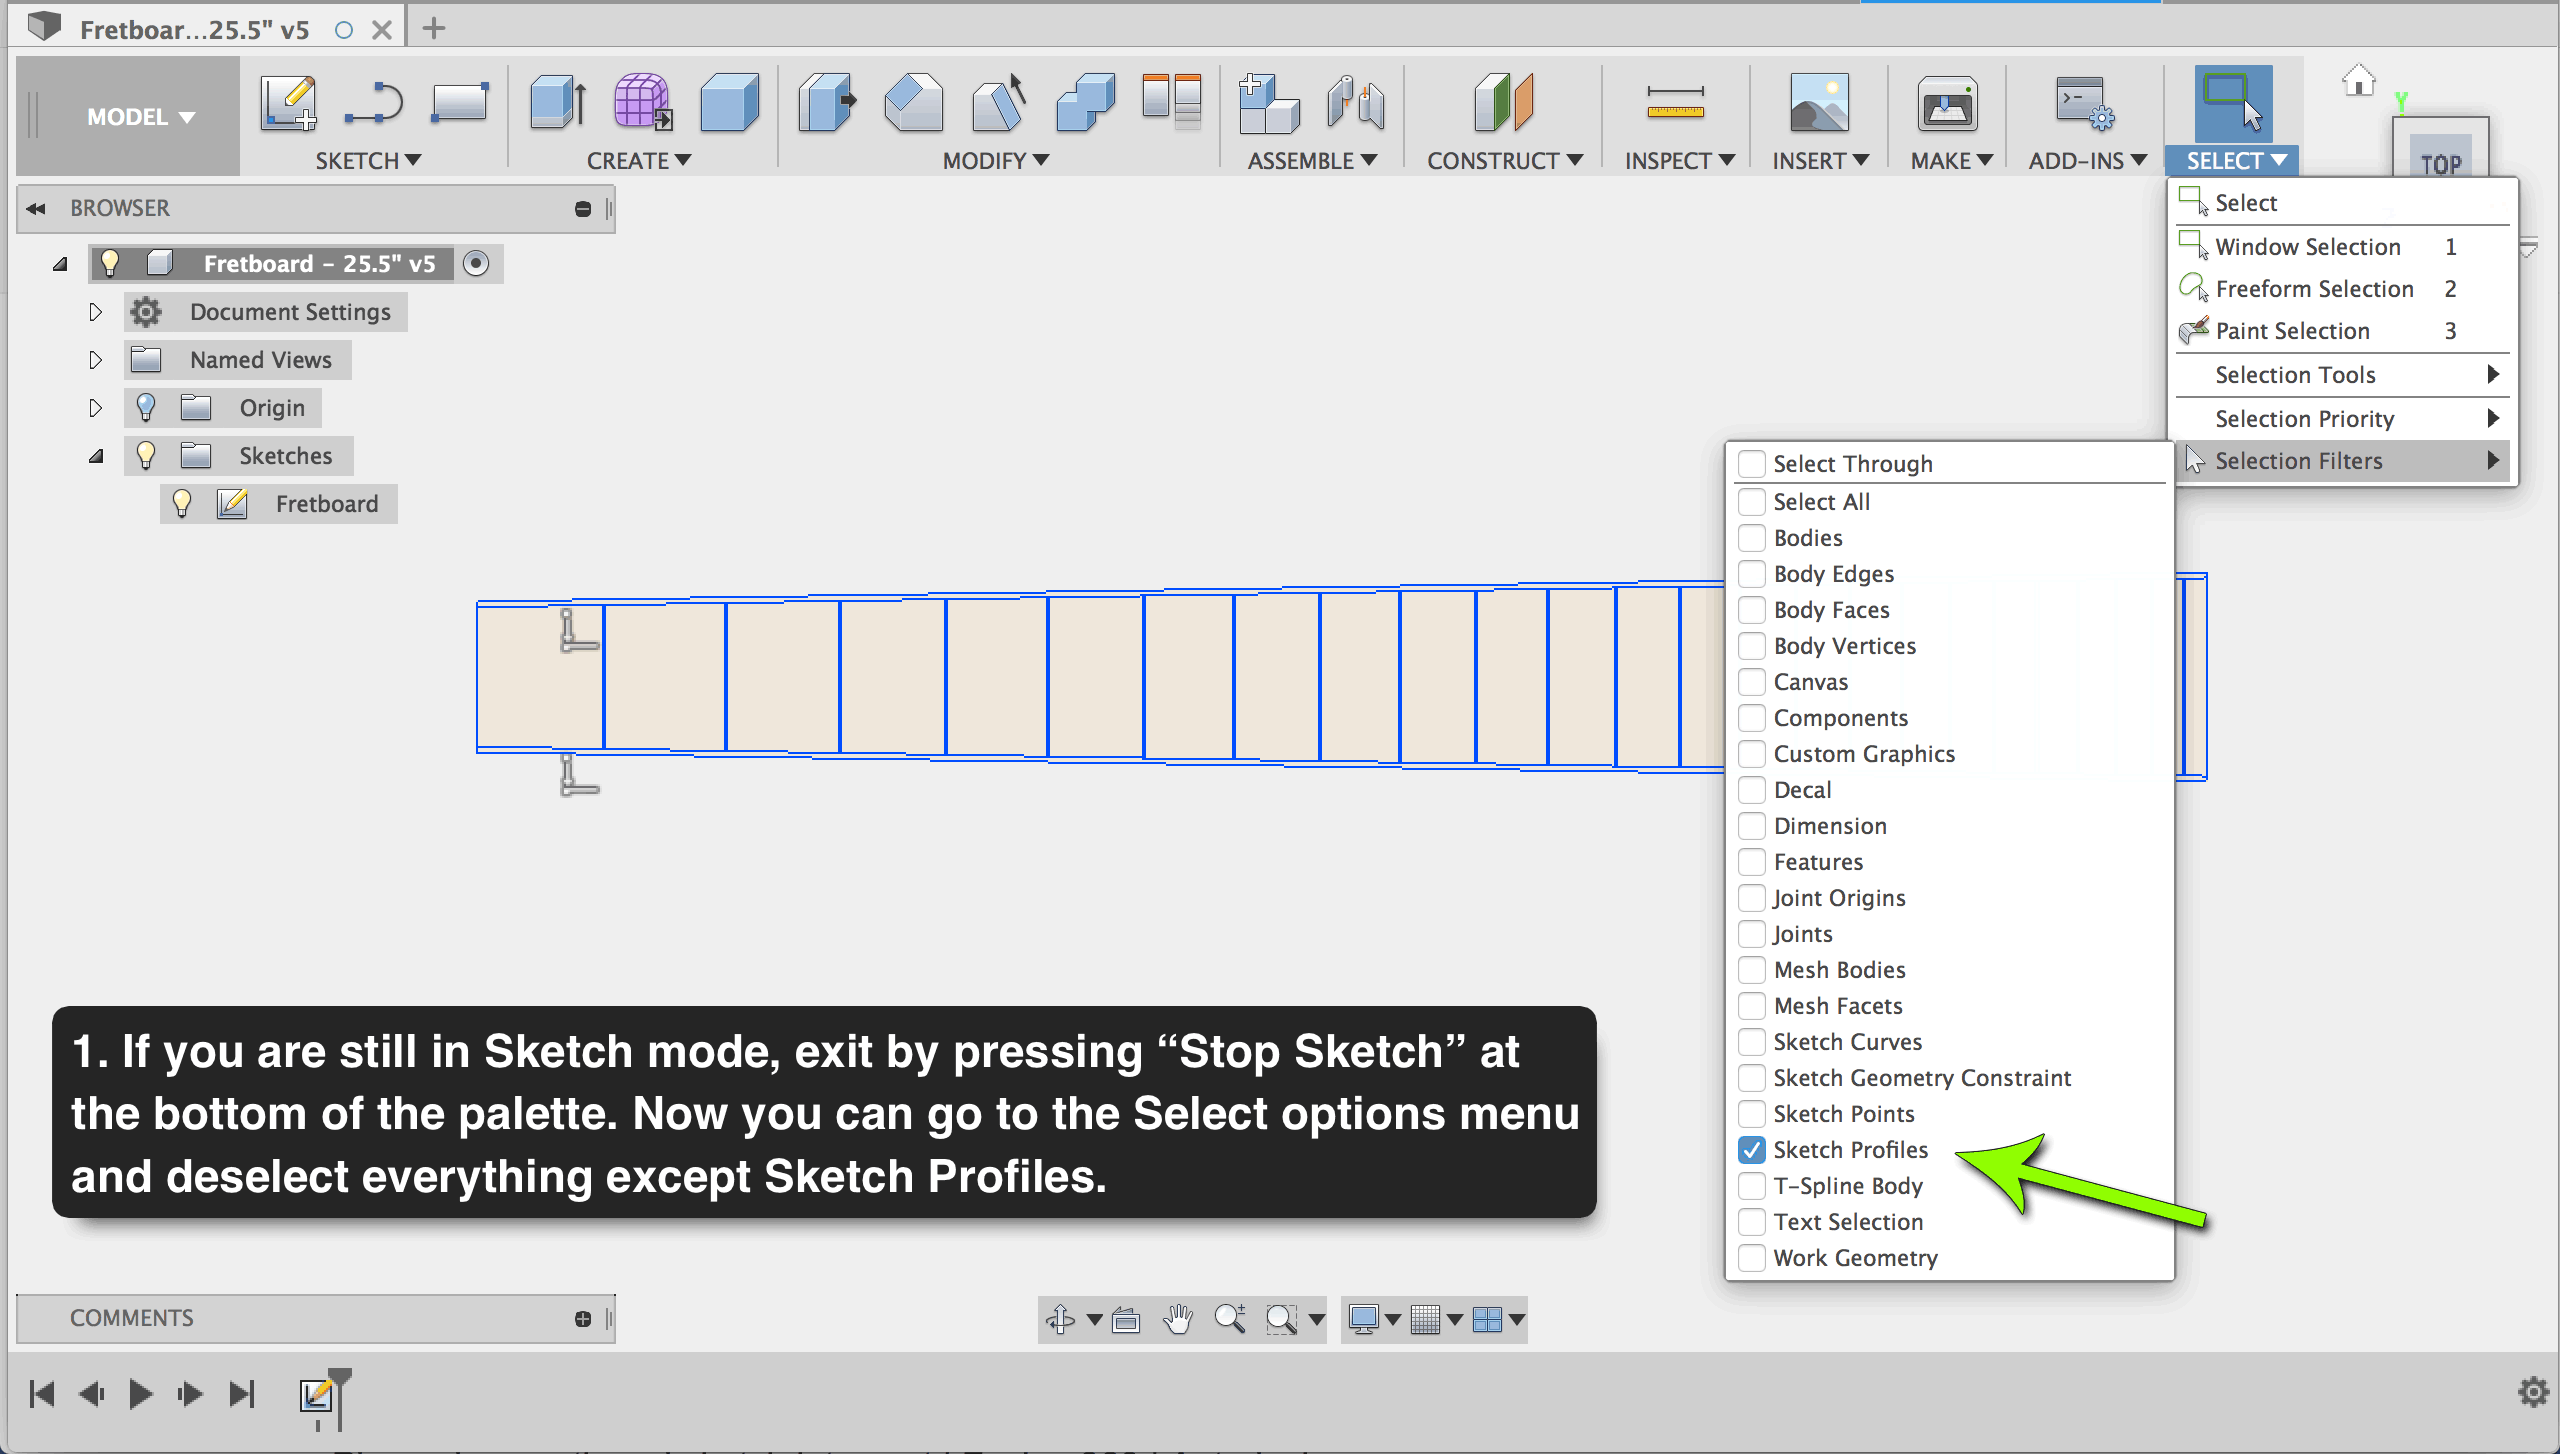
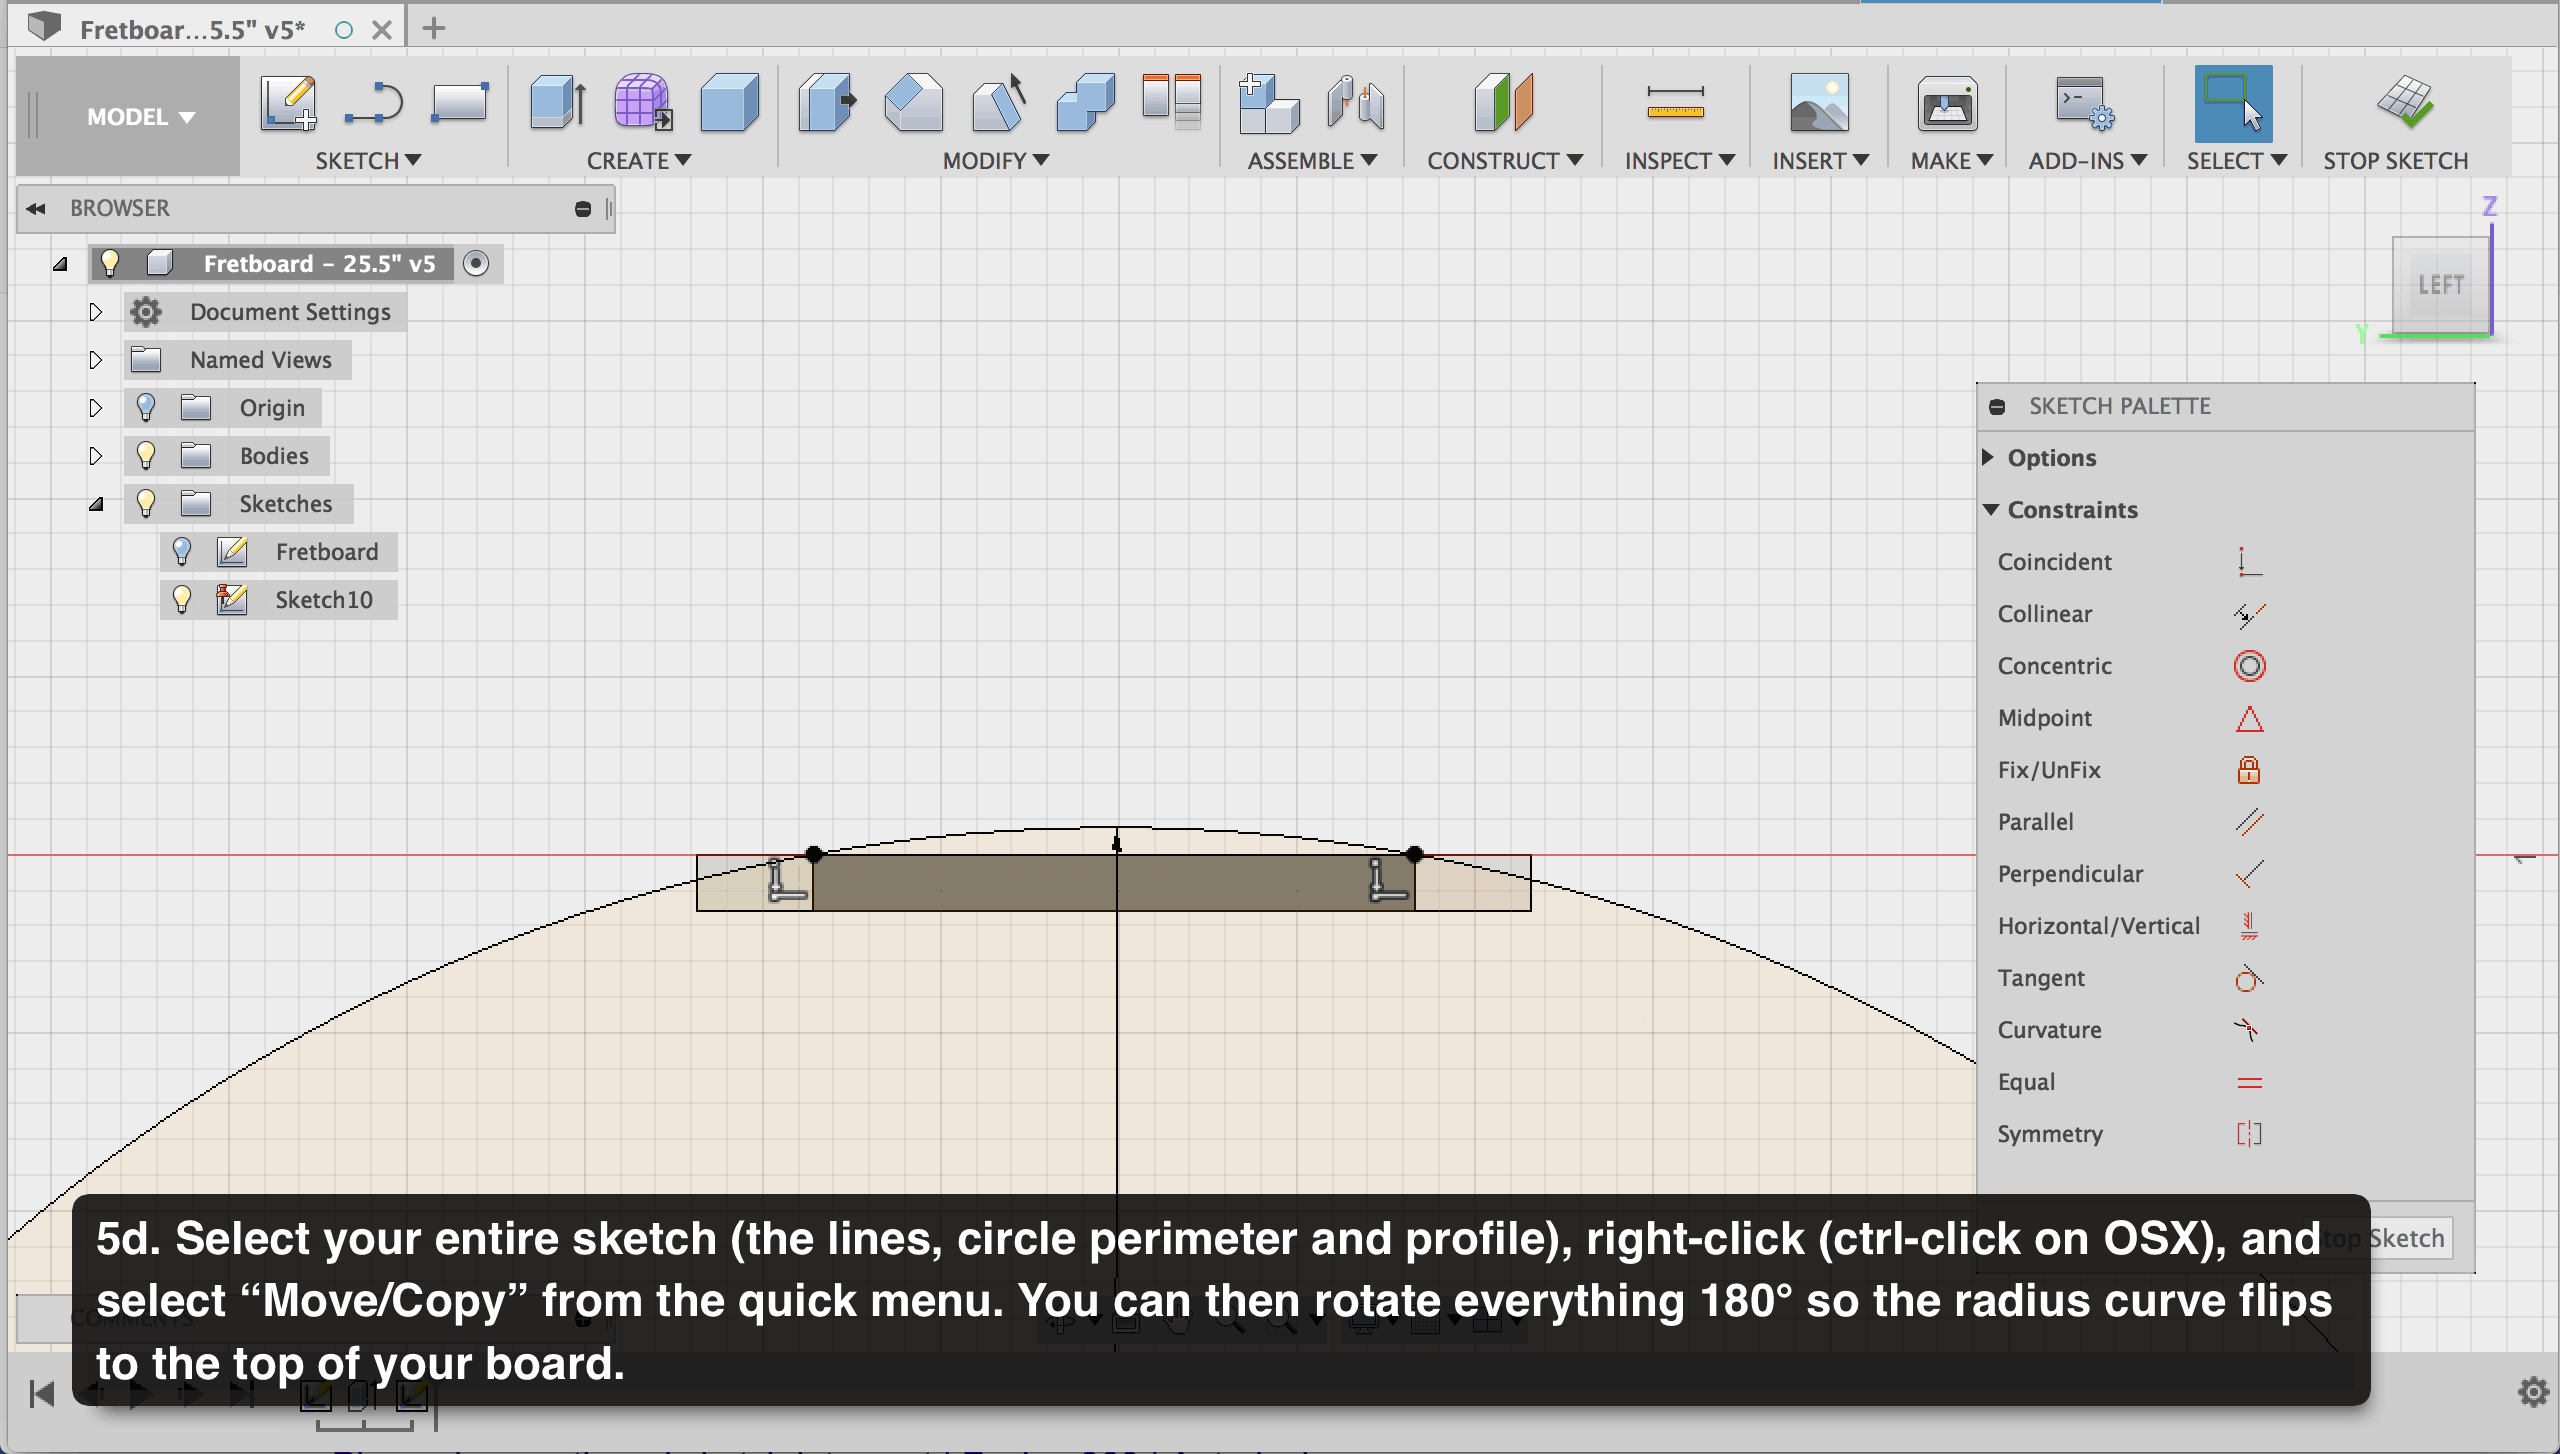
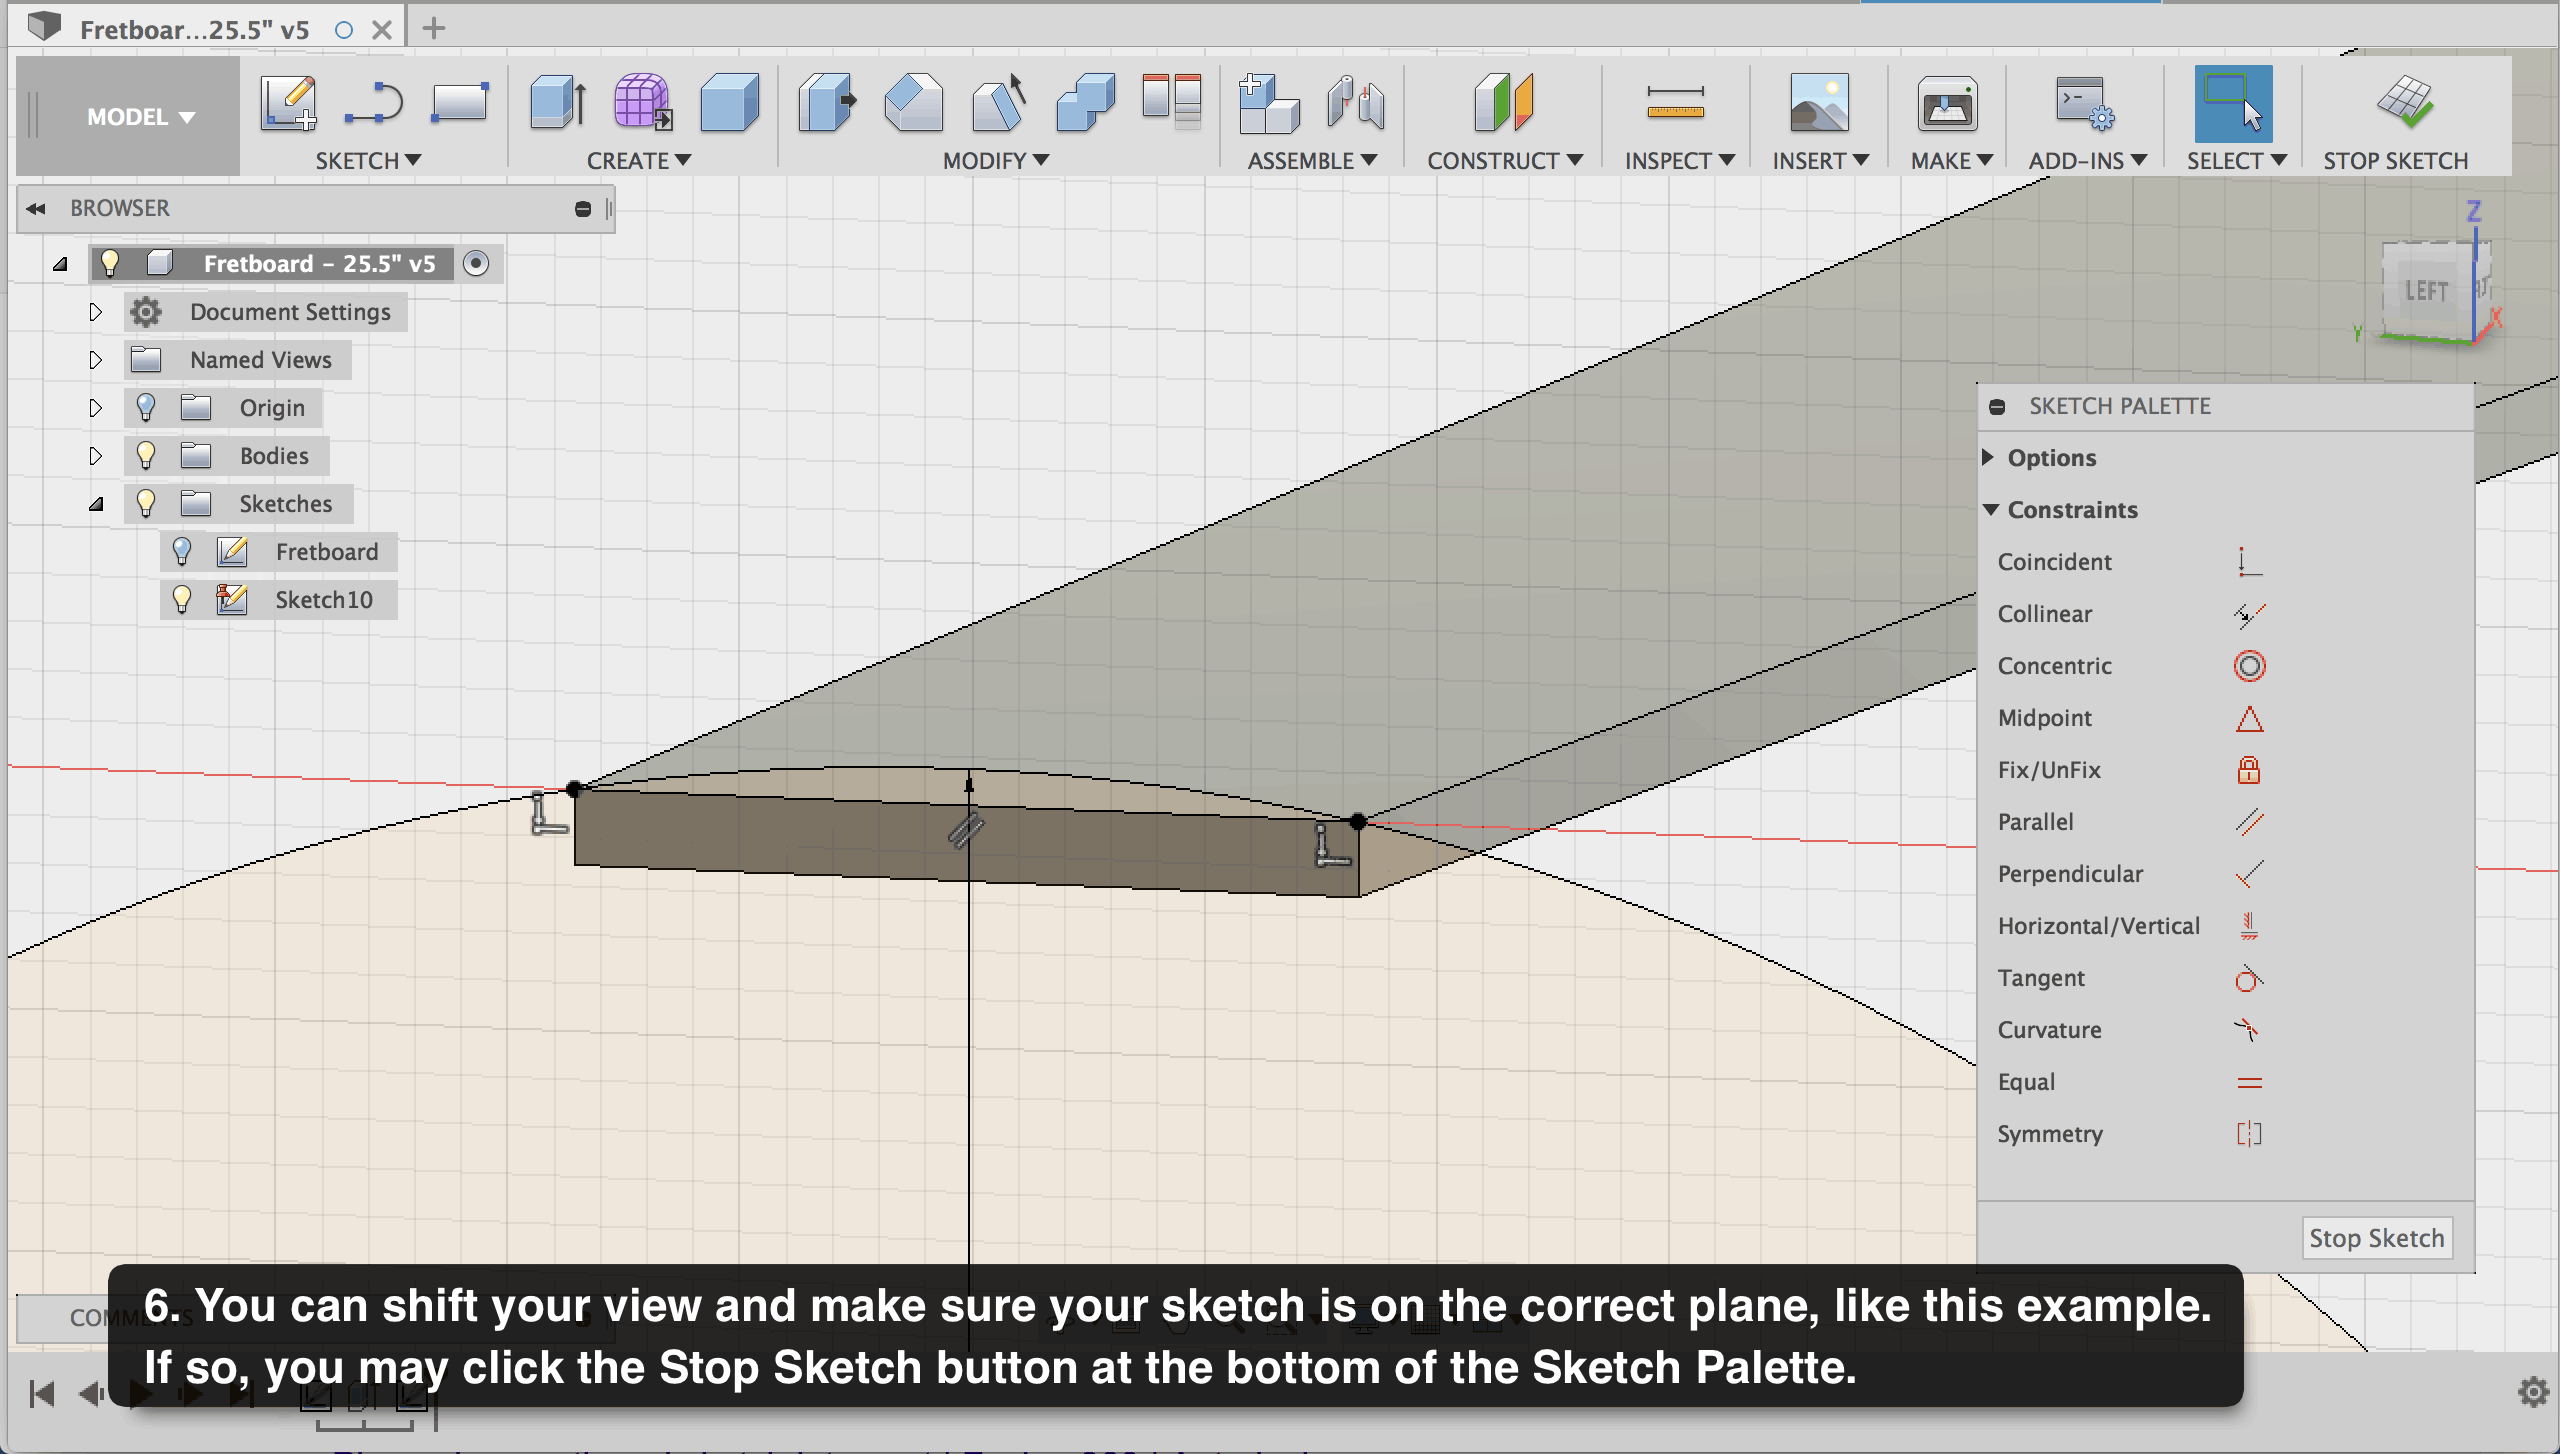
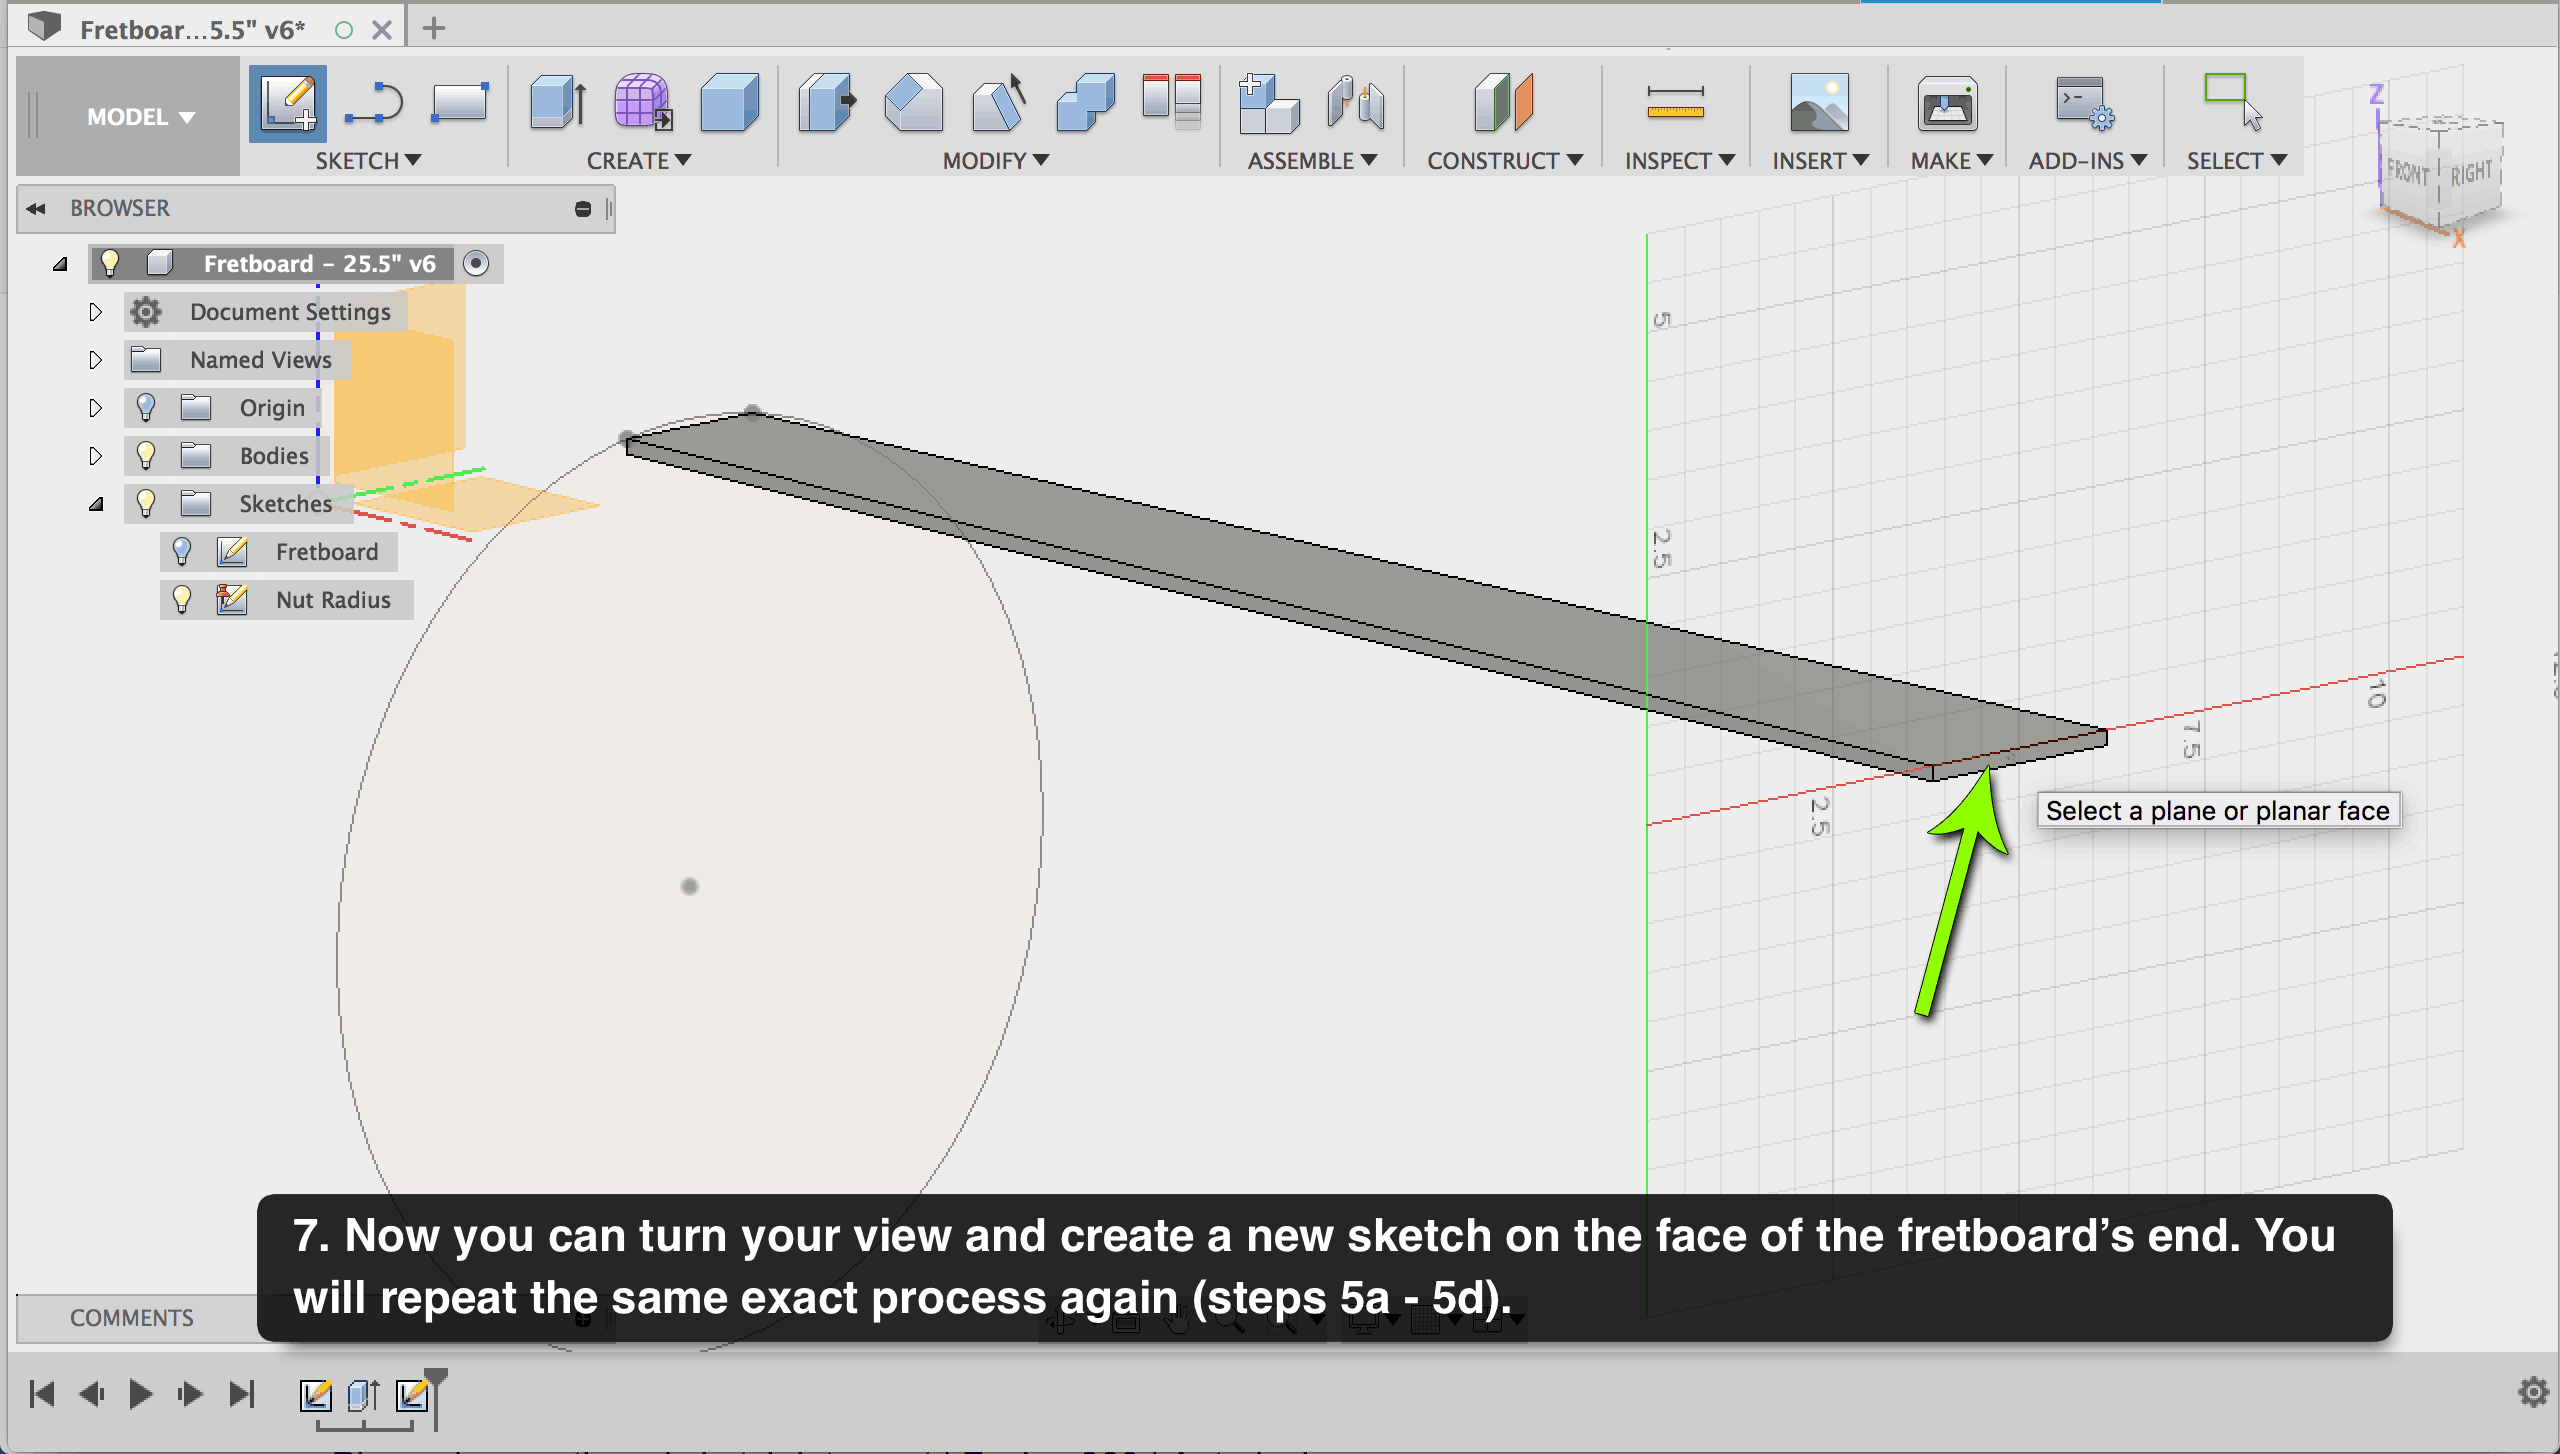
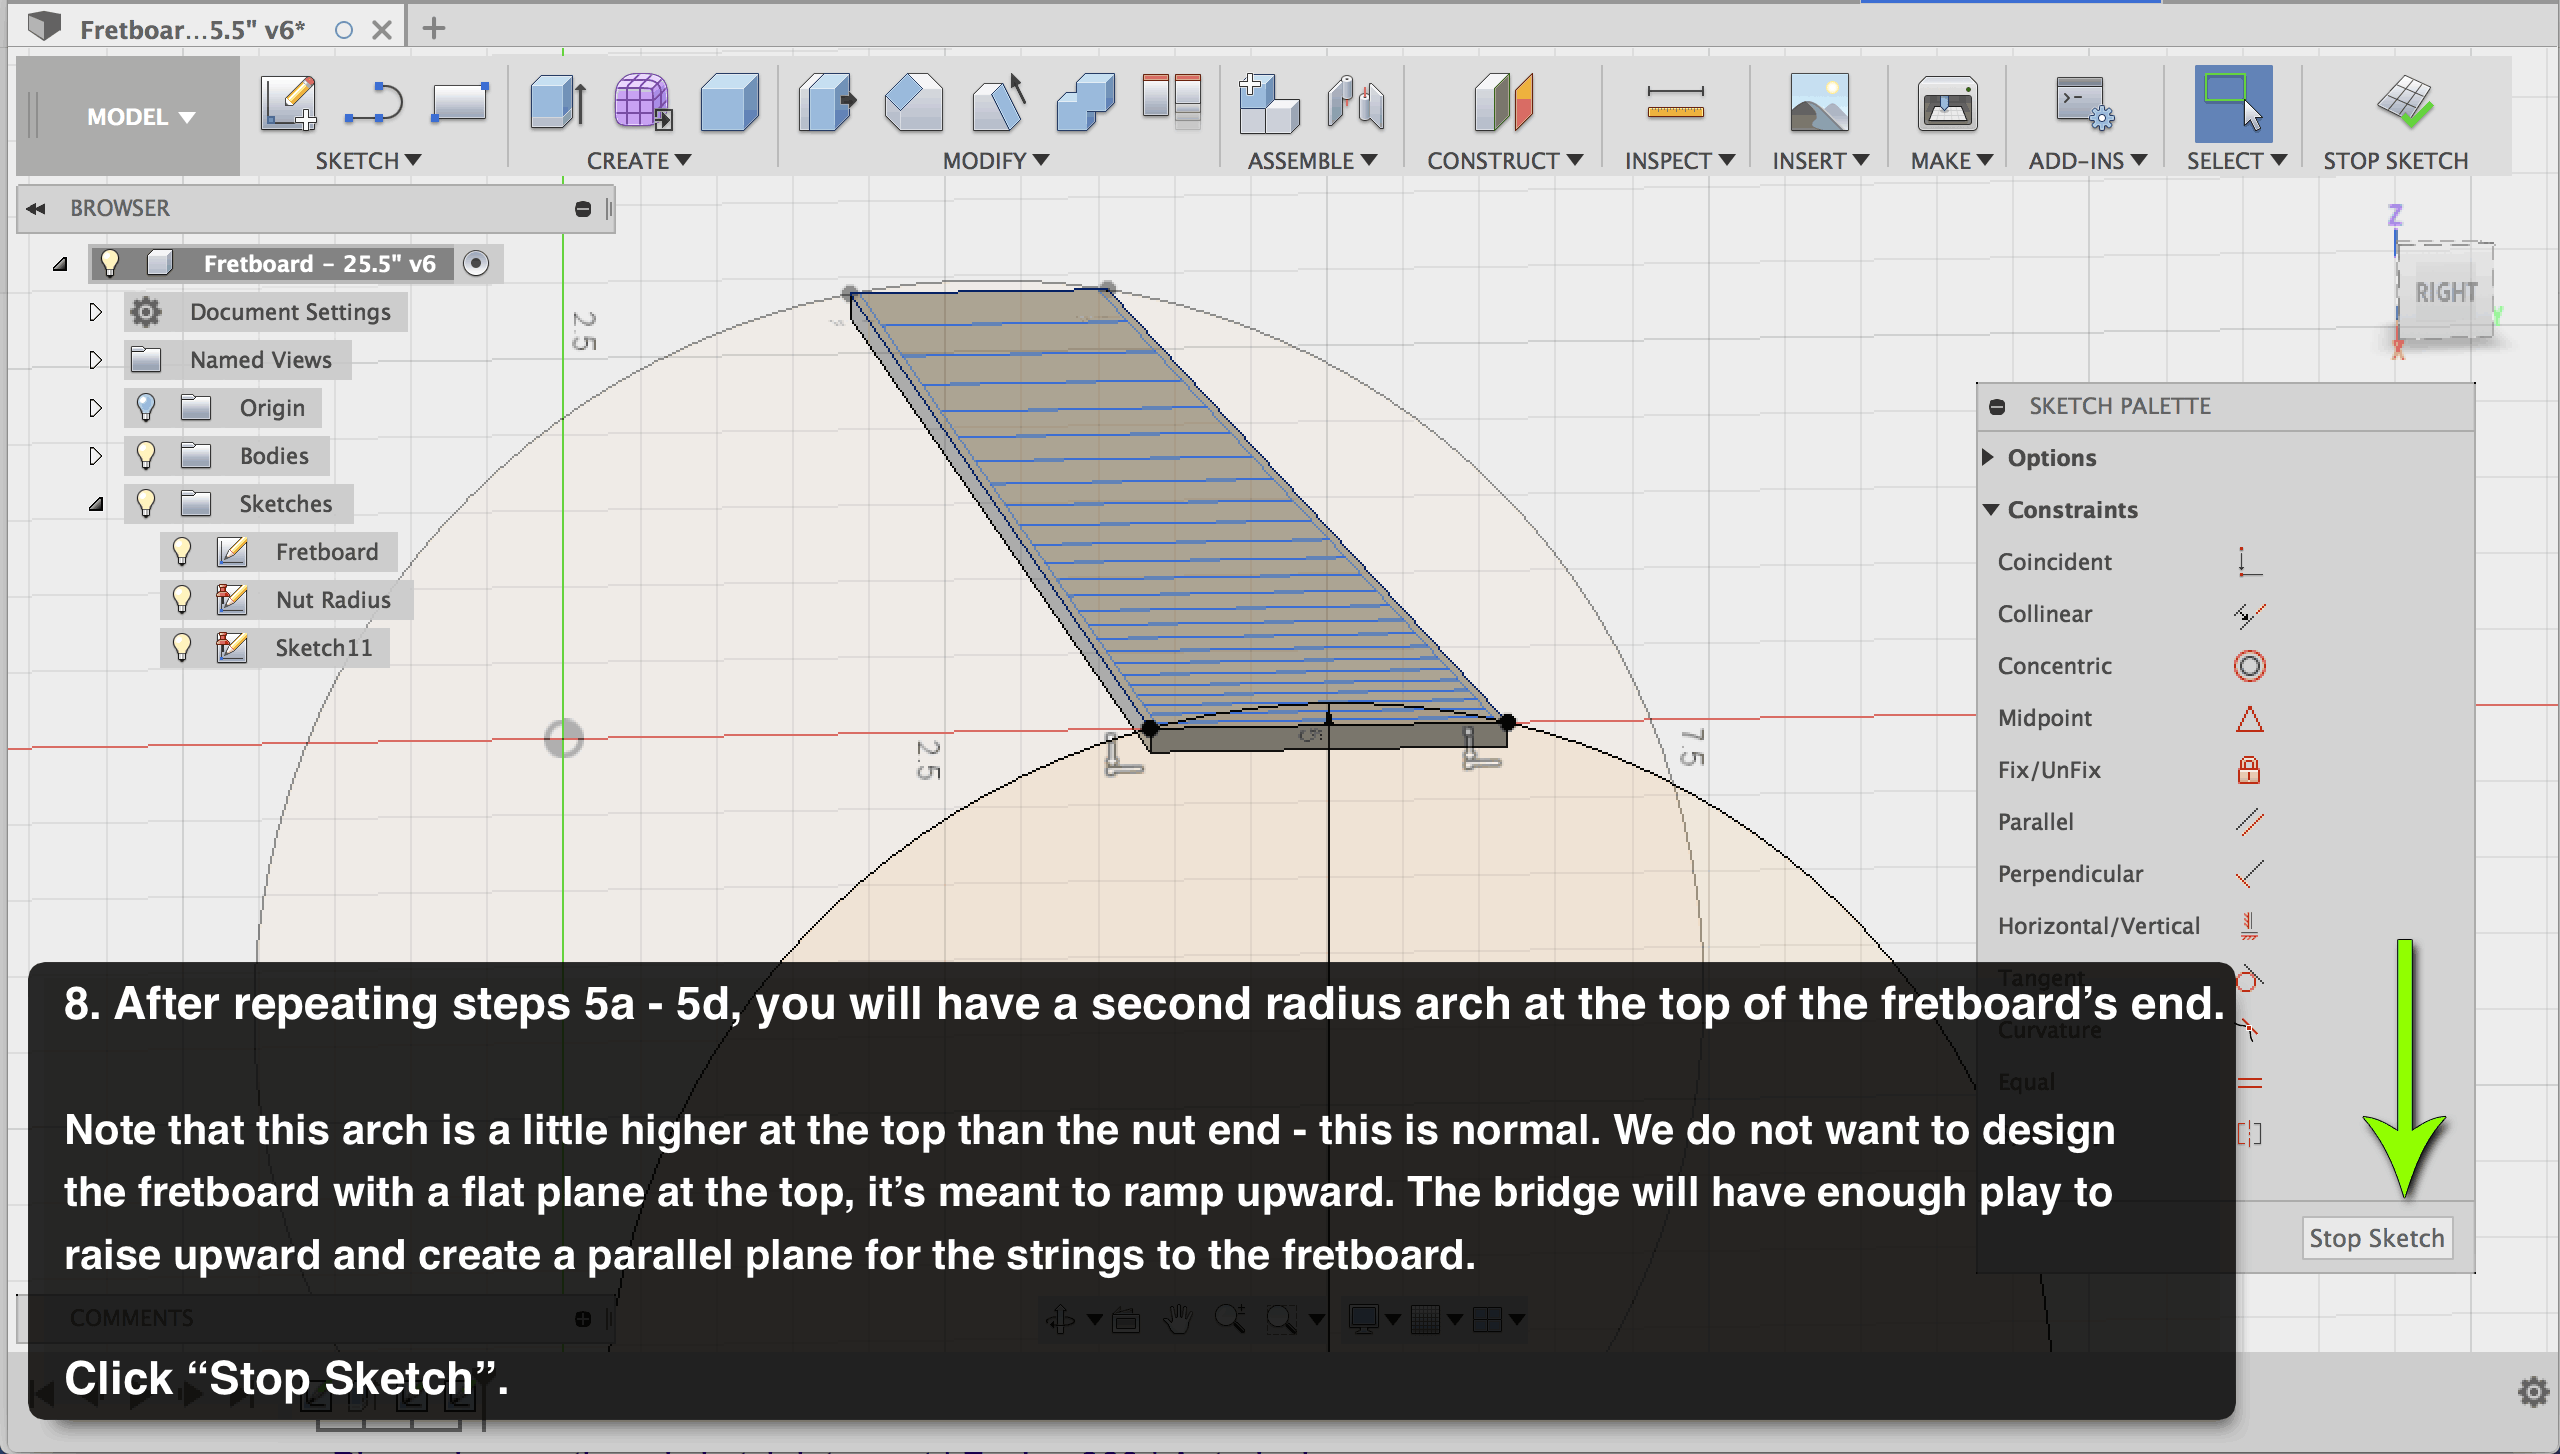
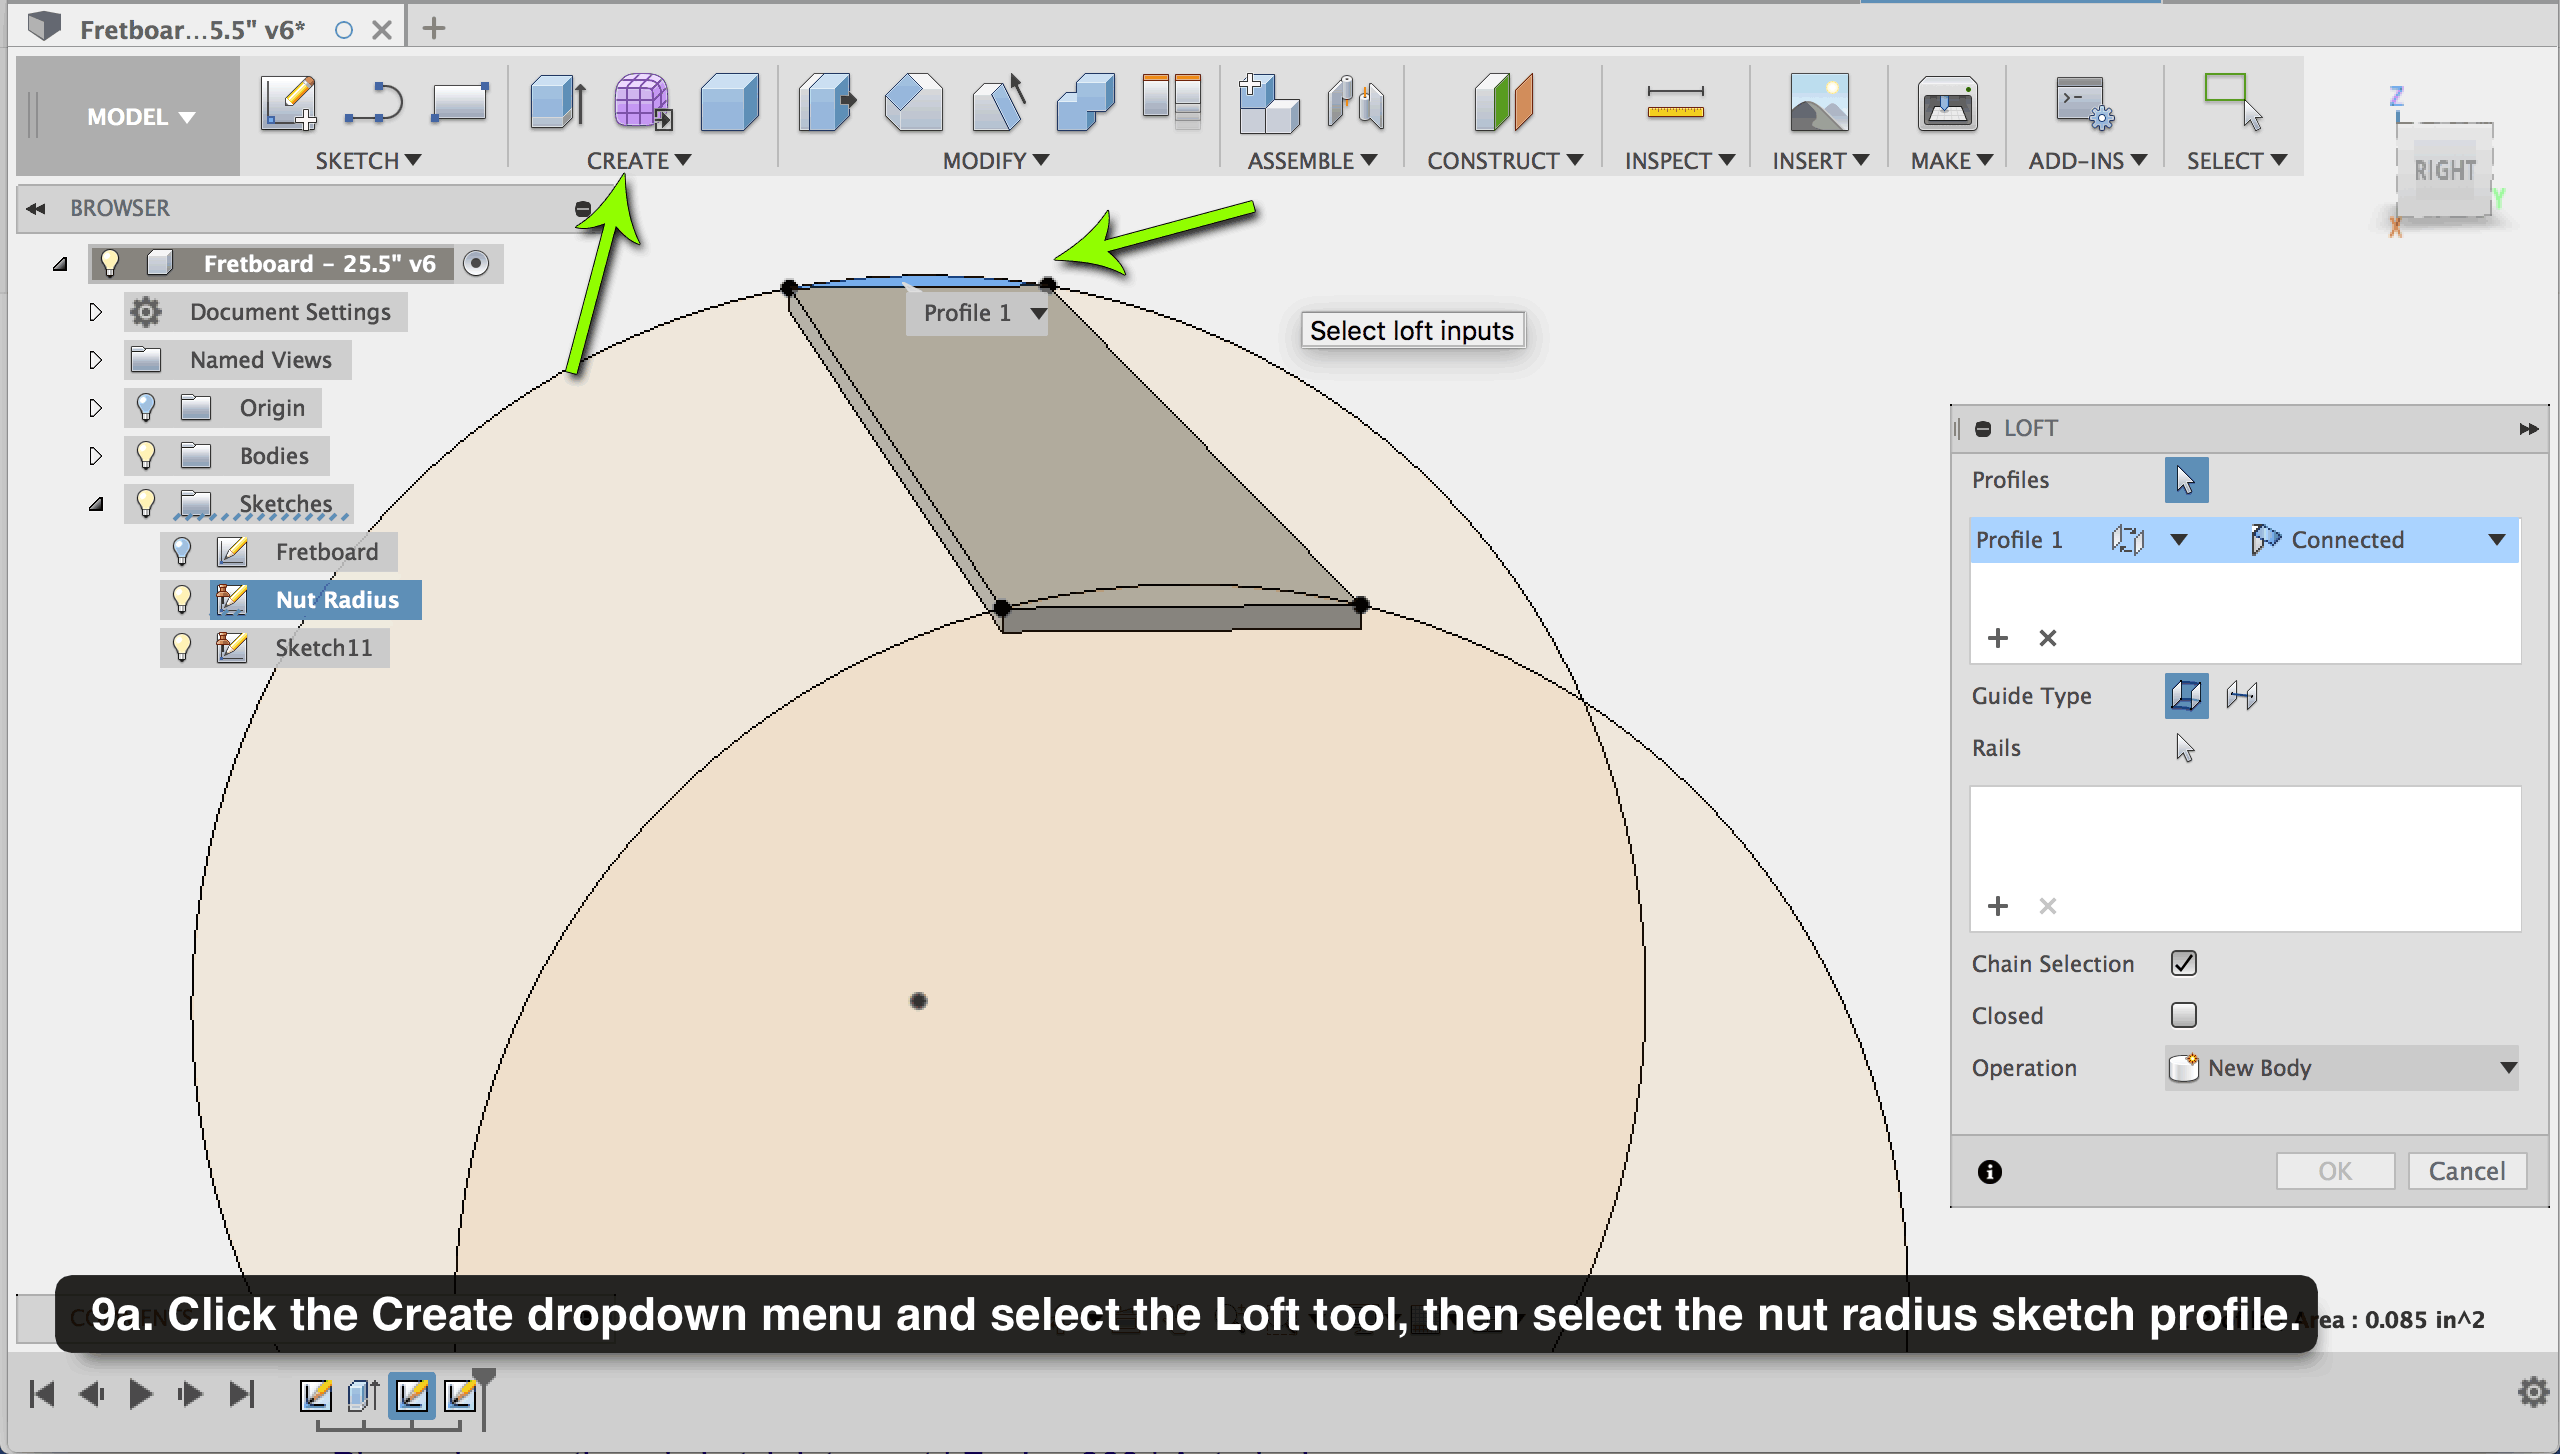
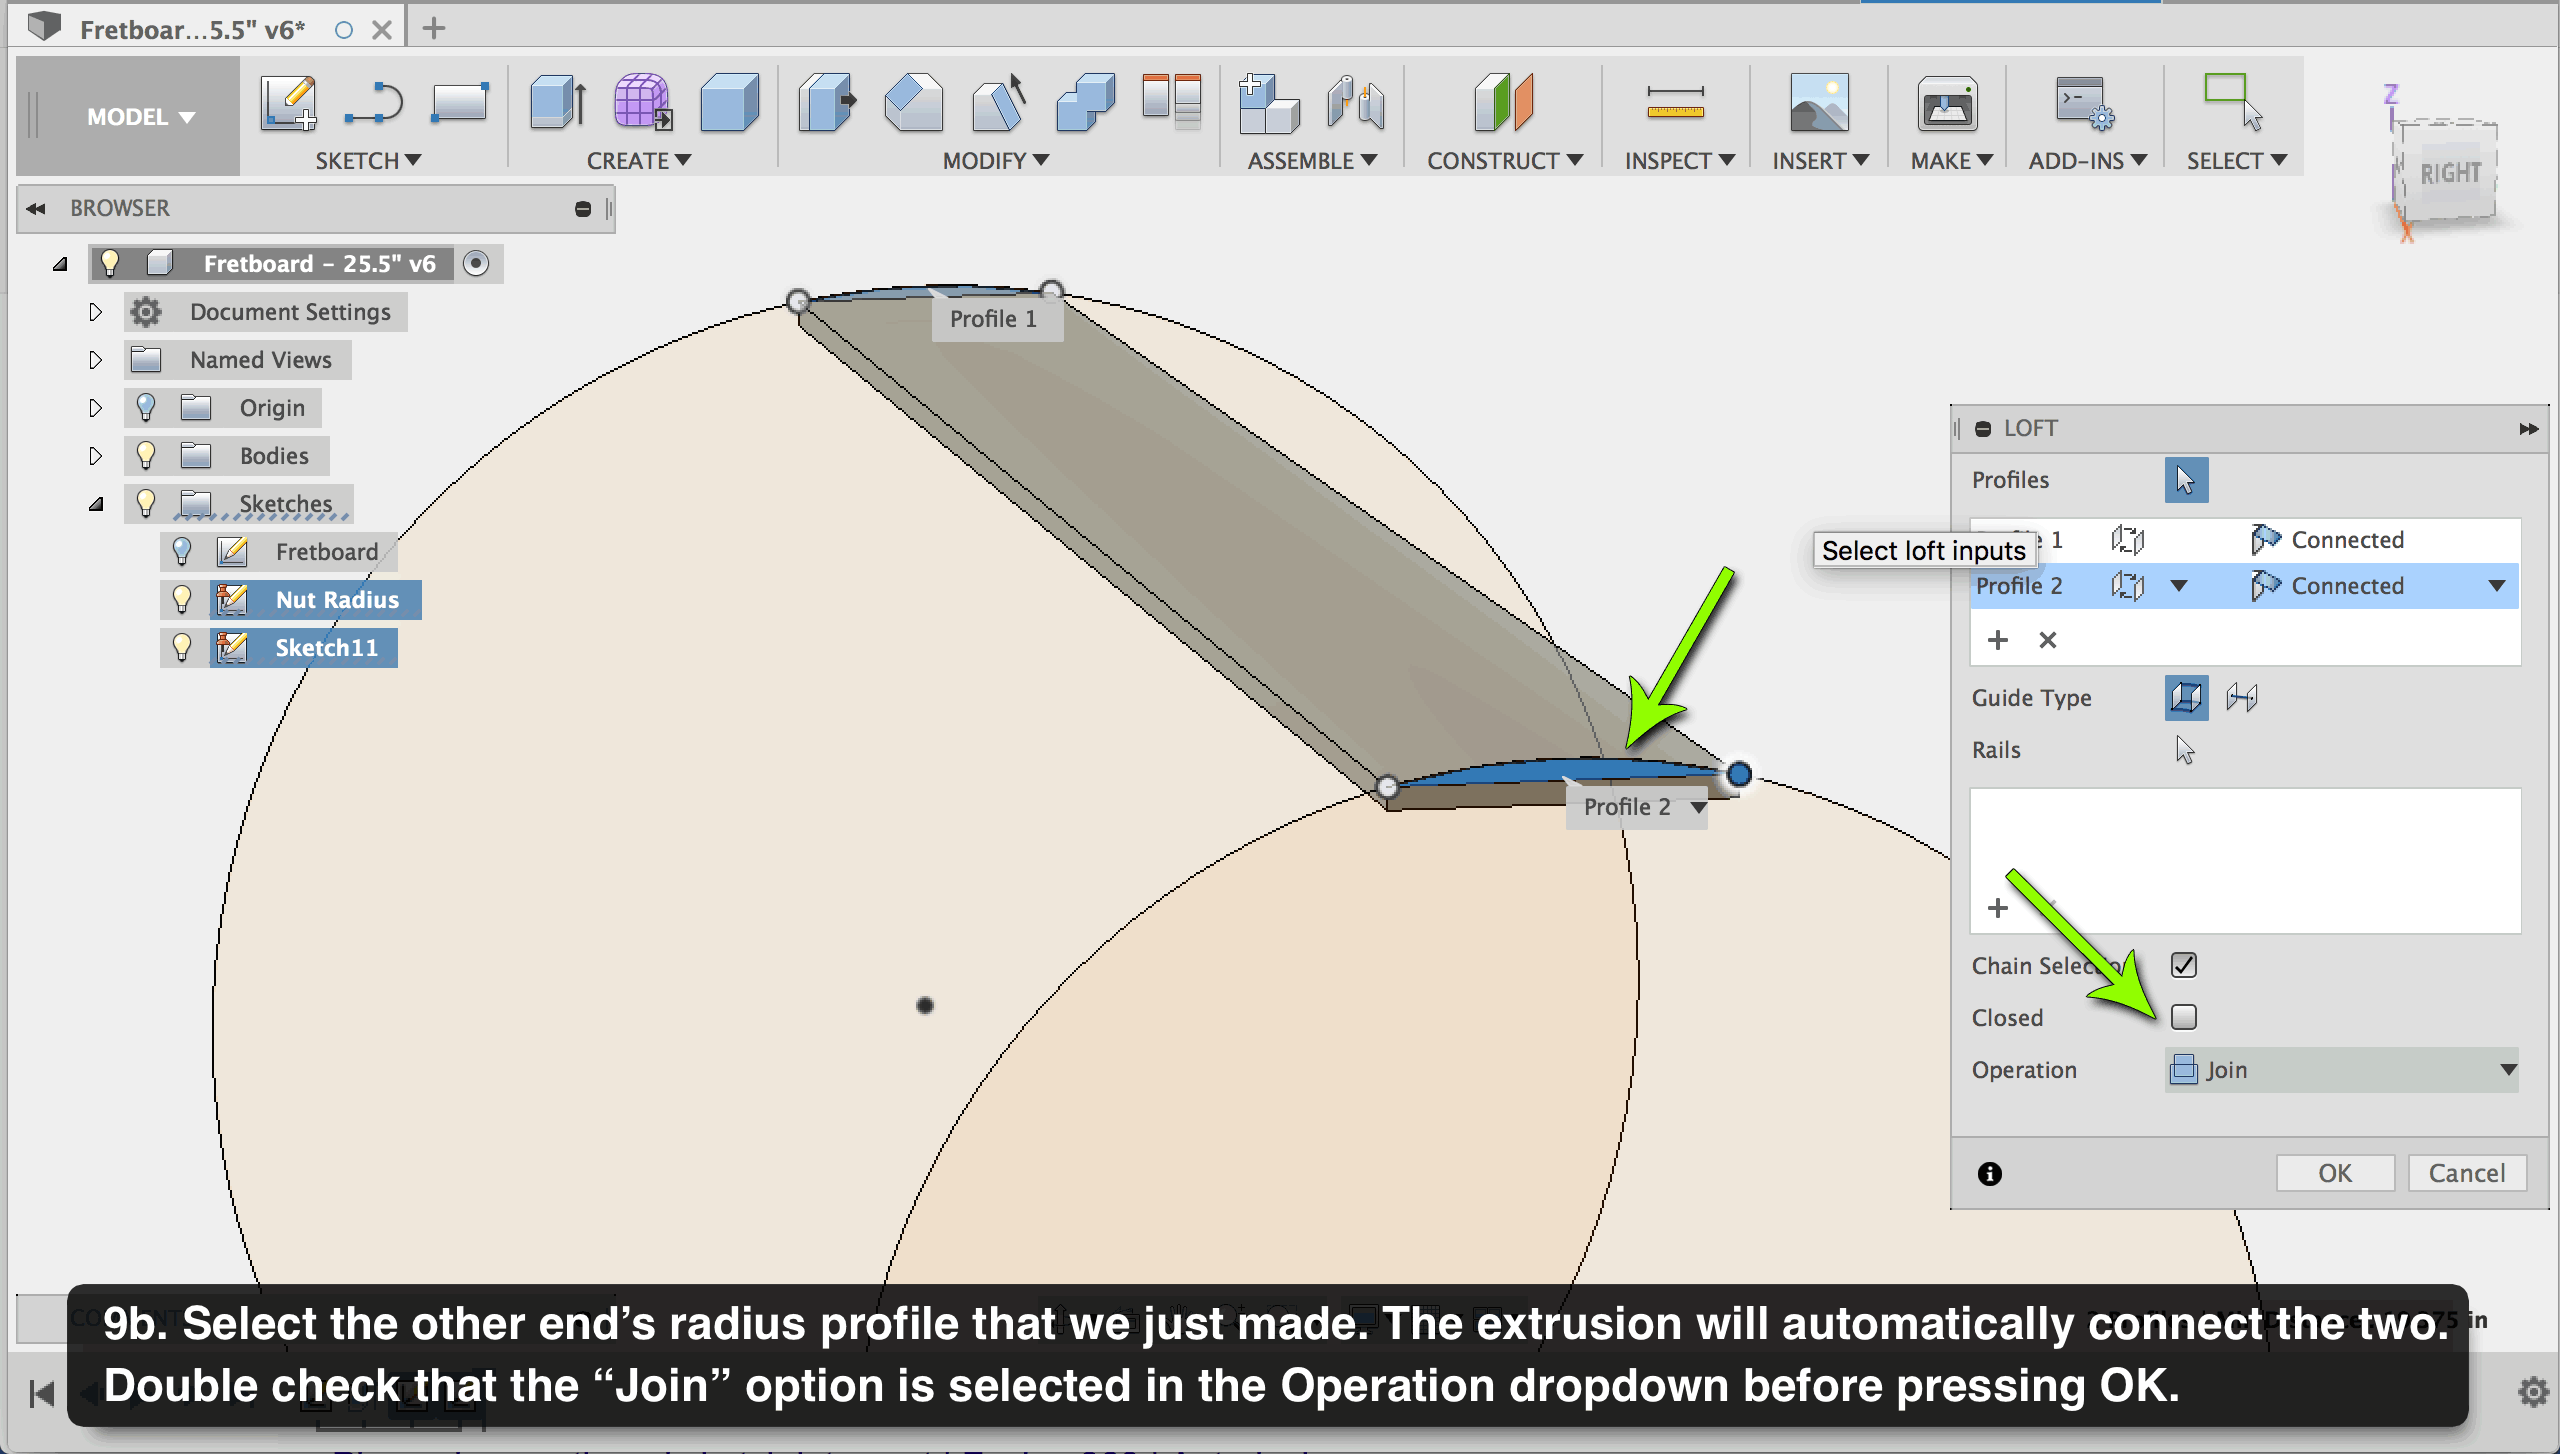
Part II: Extrusion & Radius


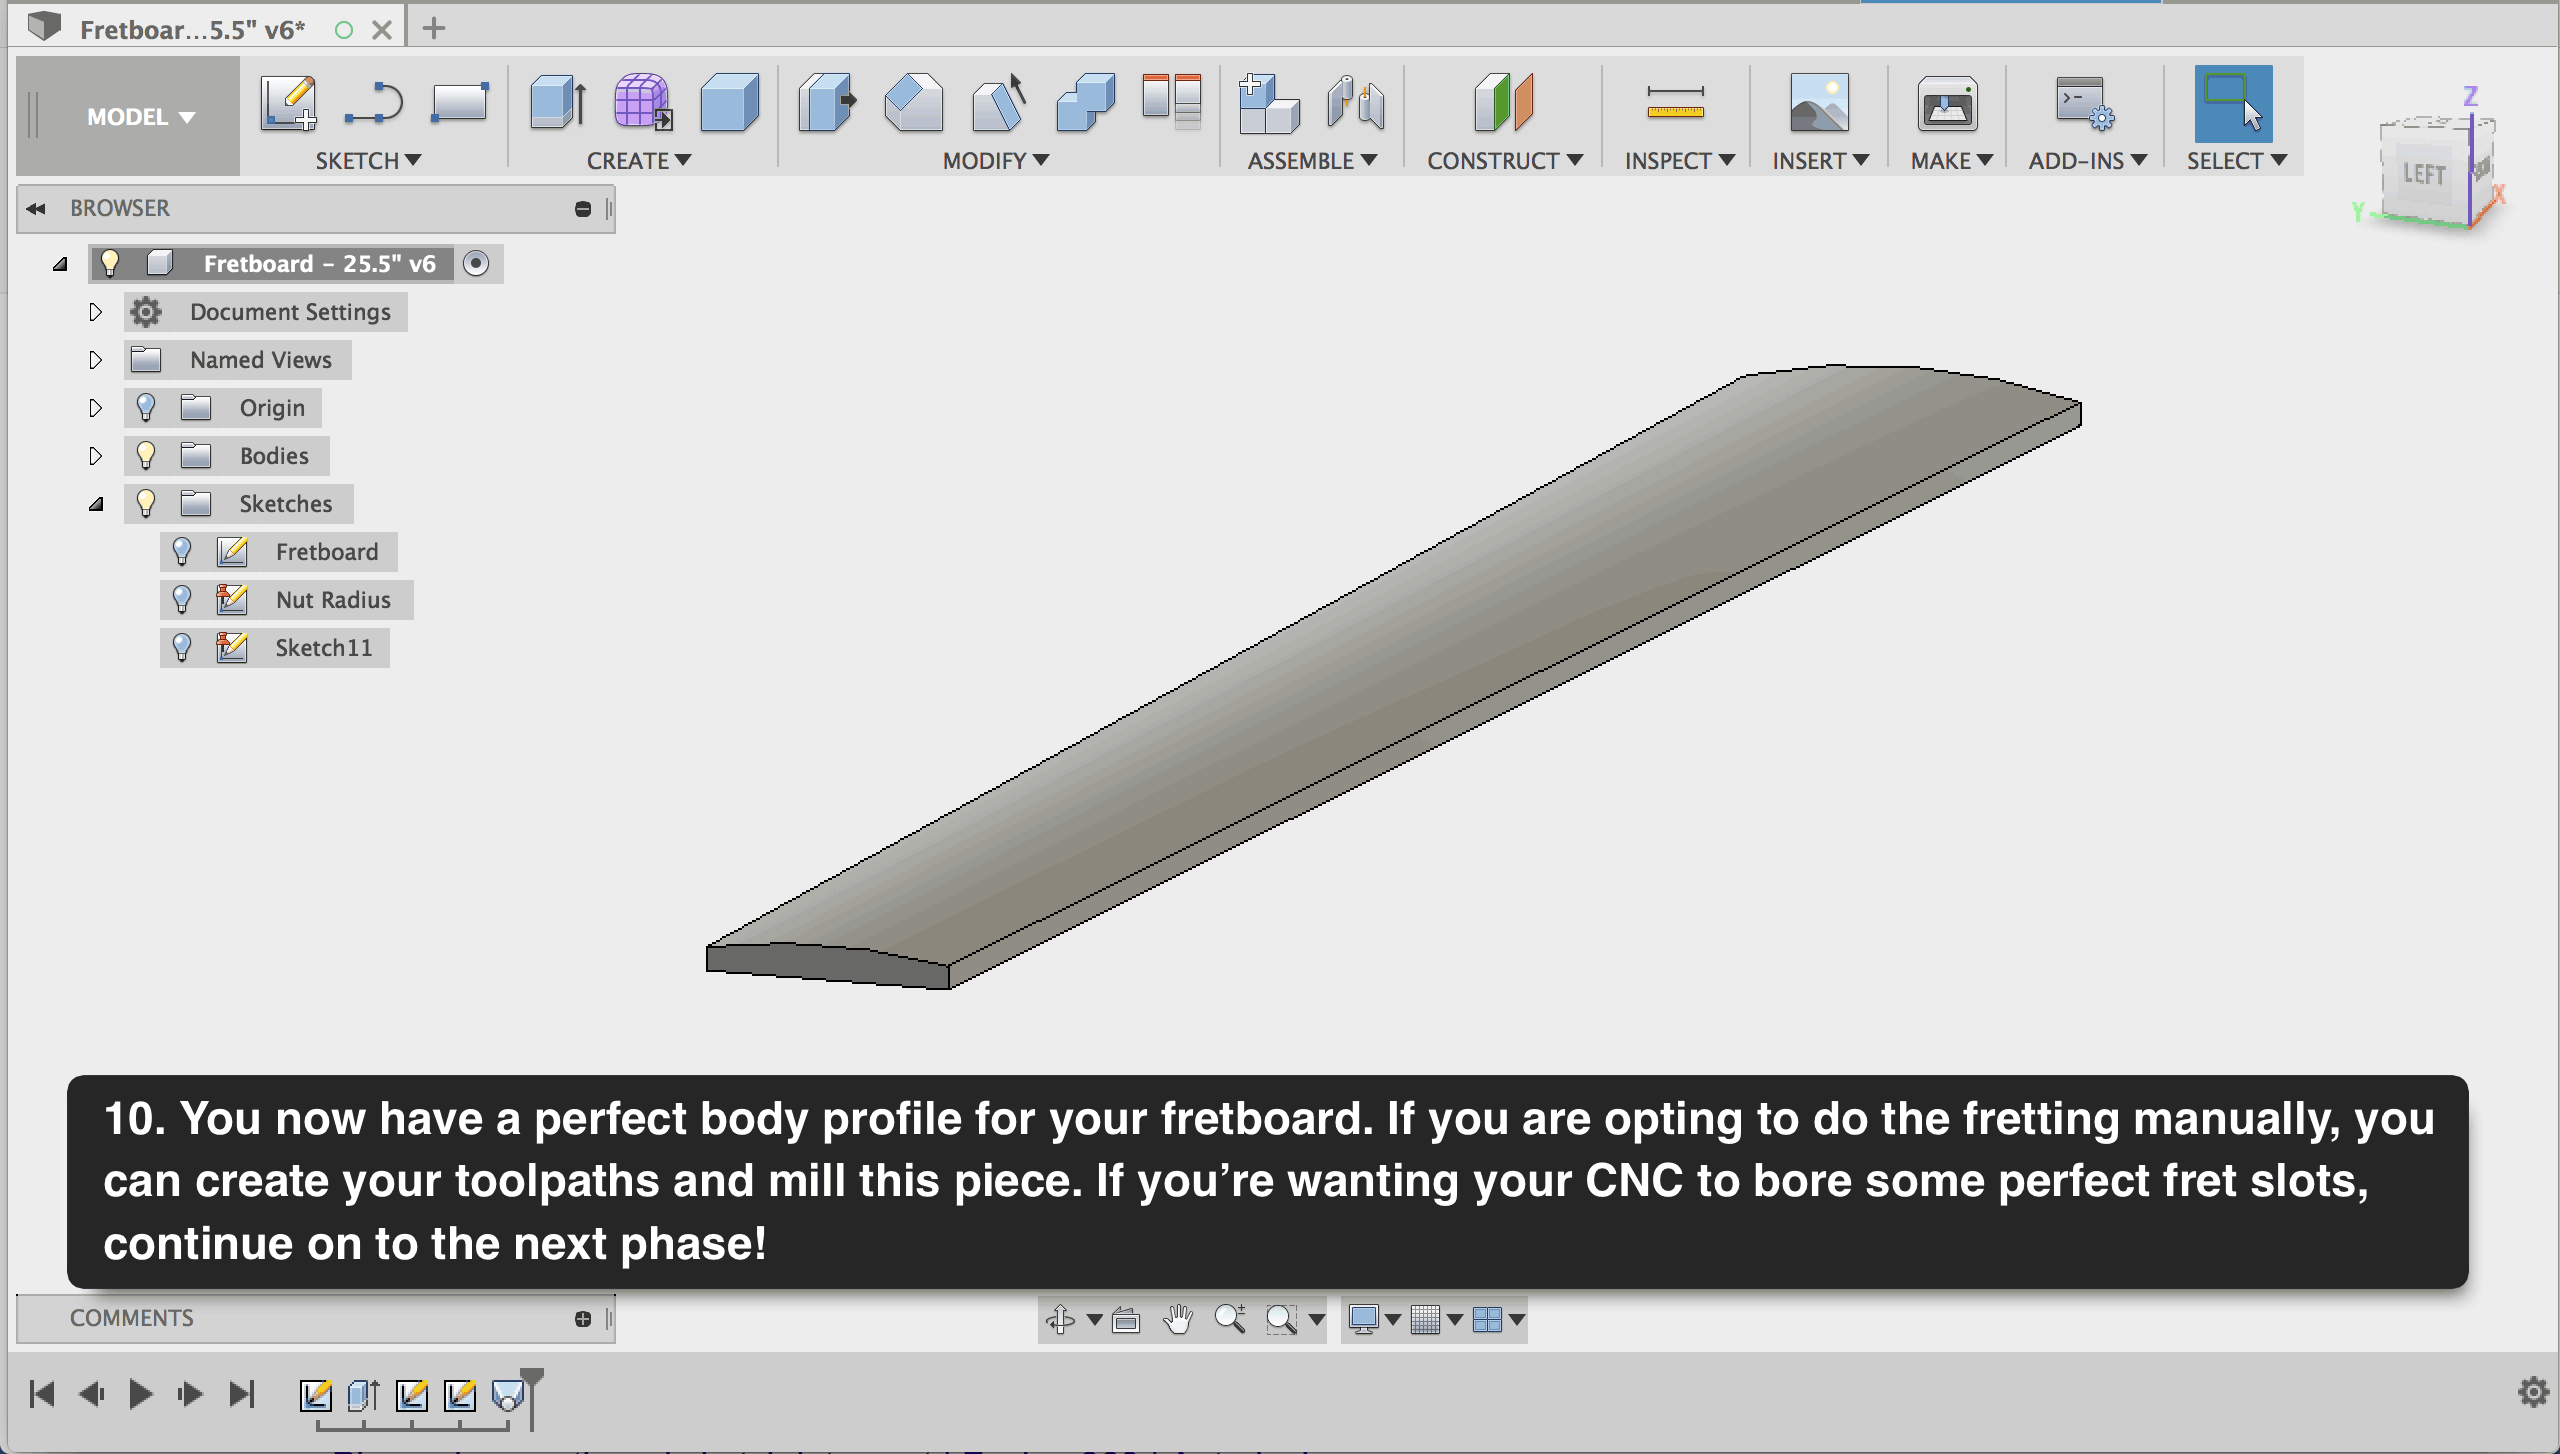
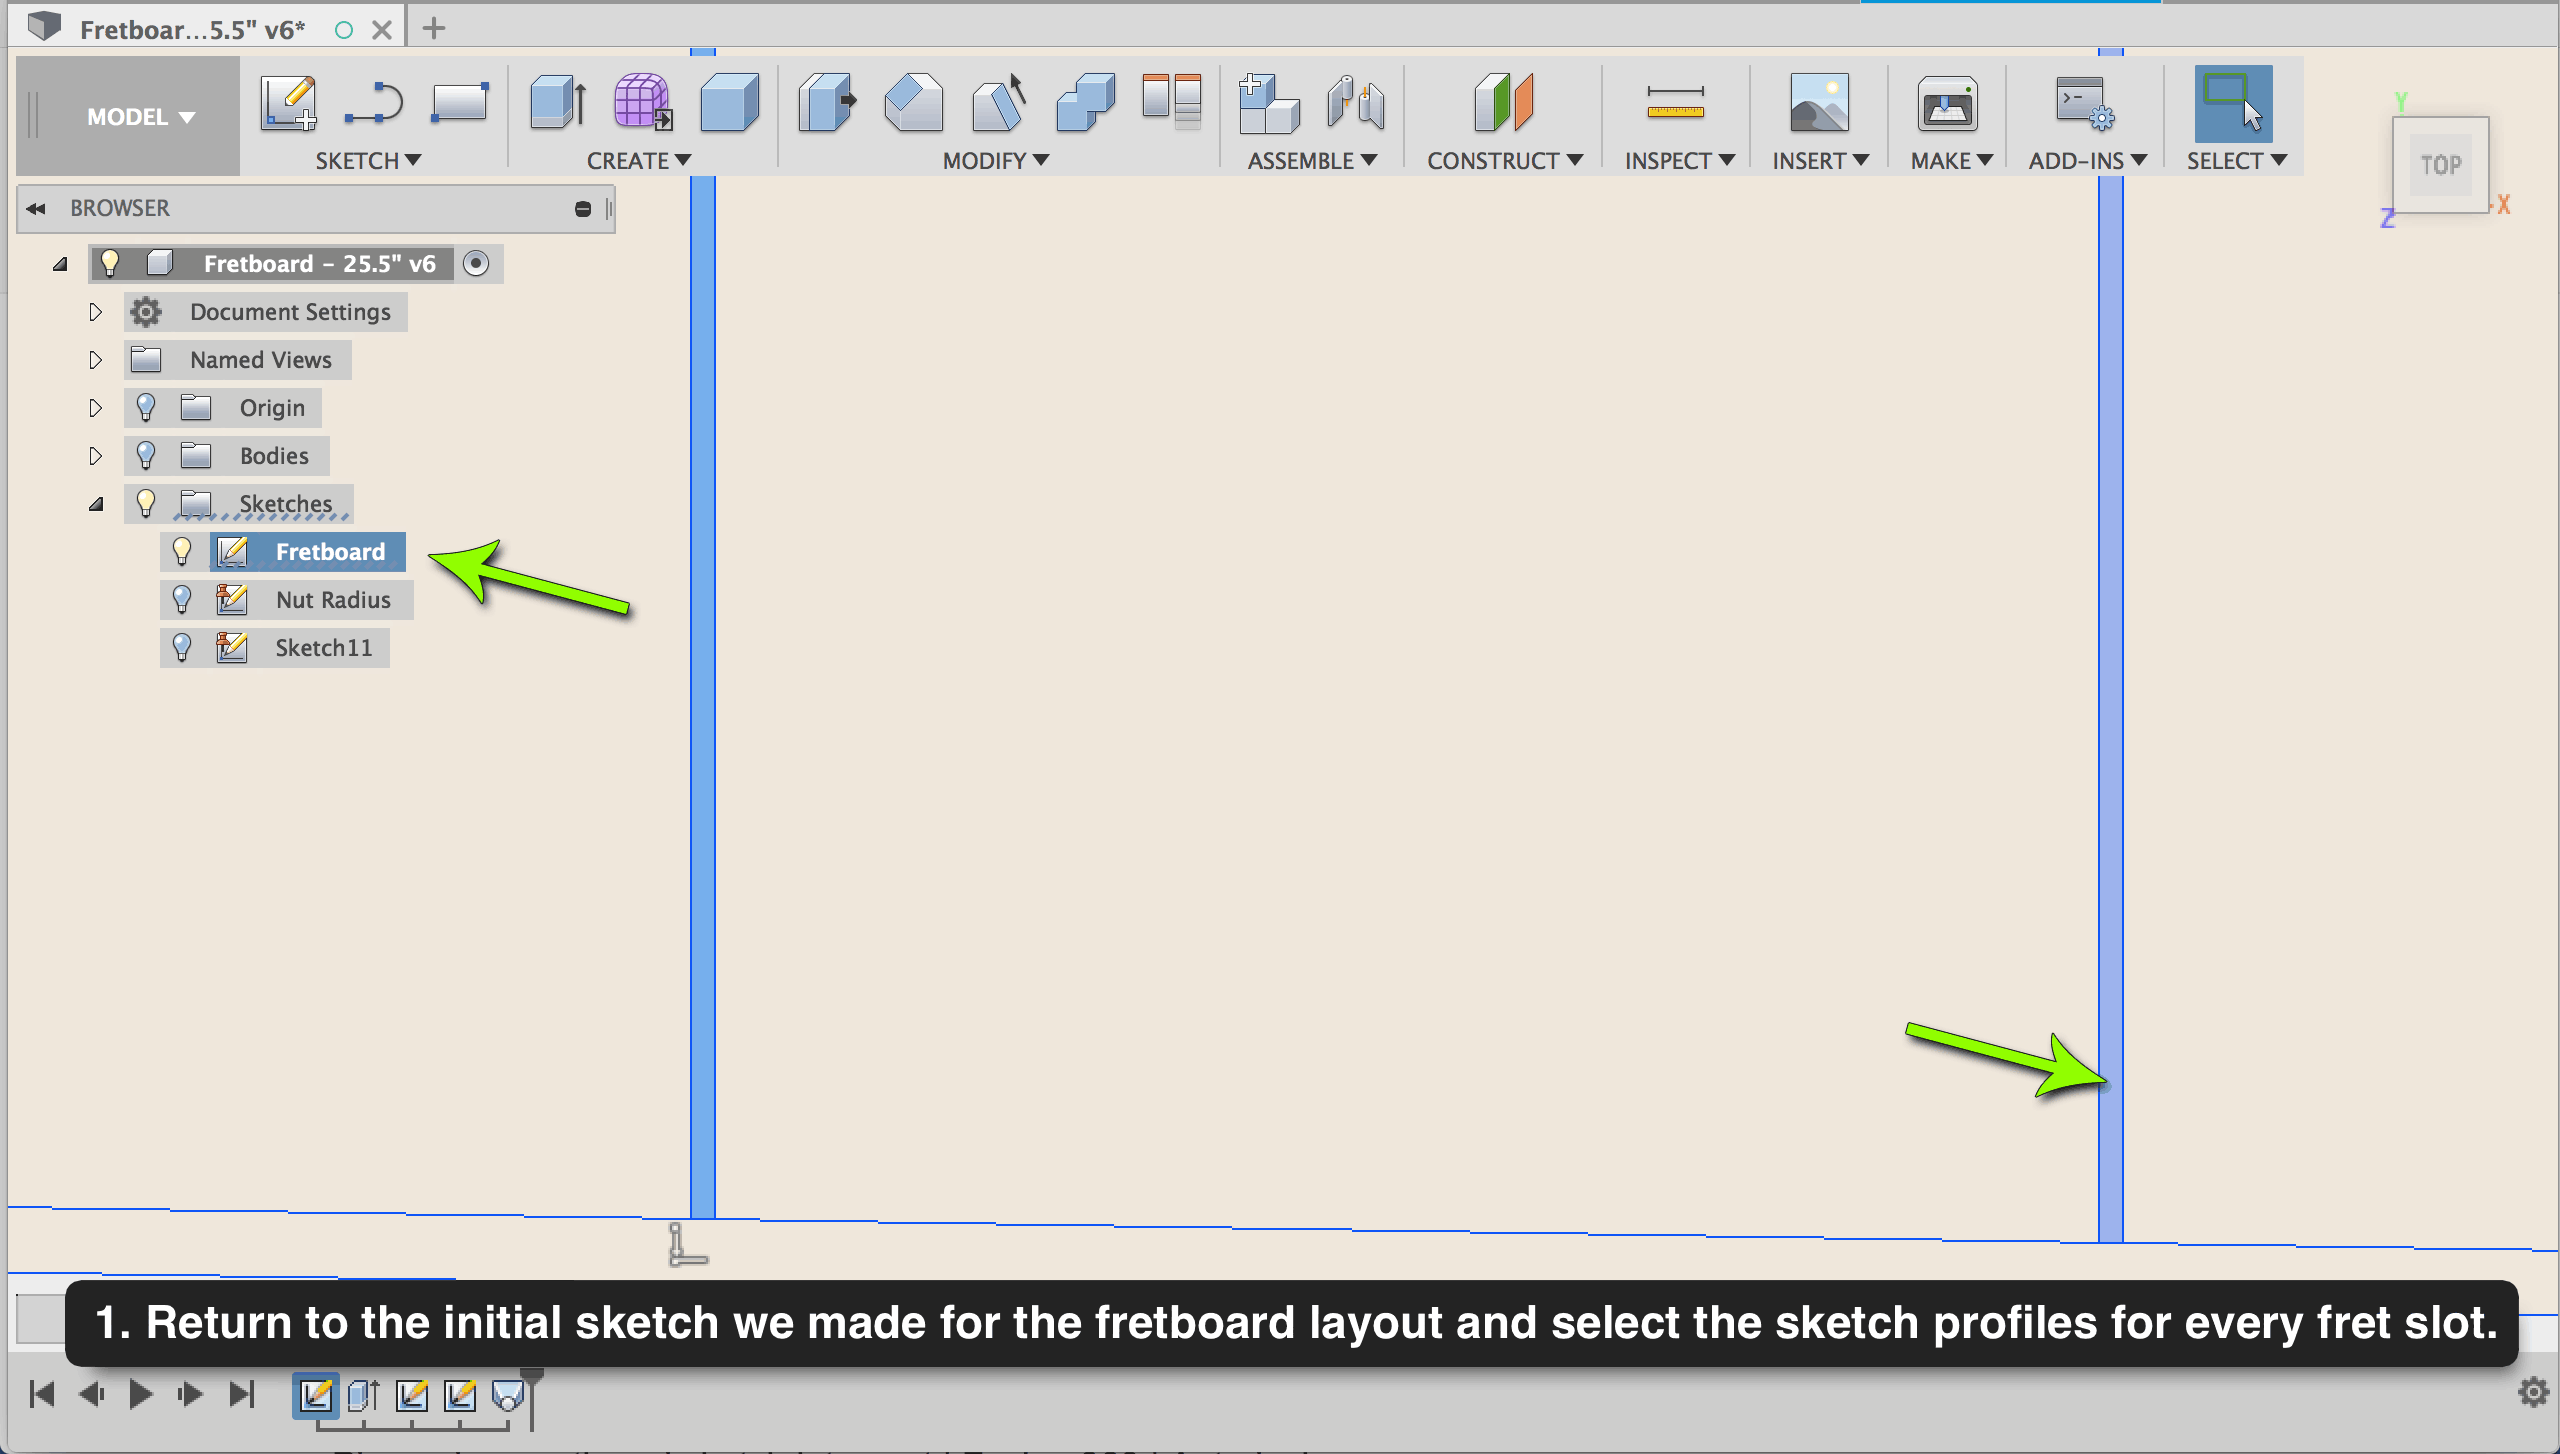
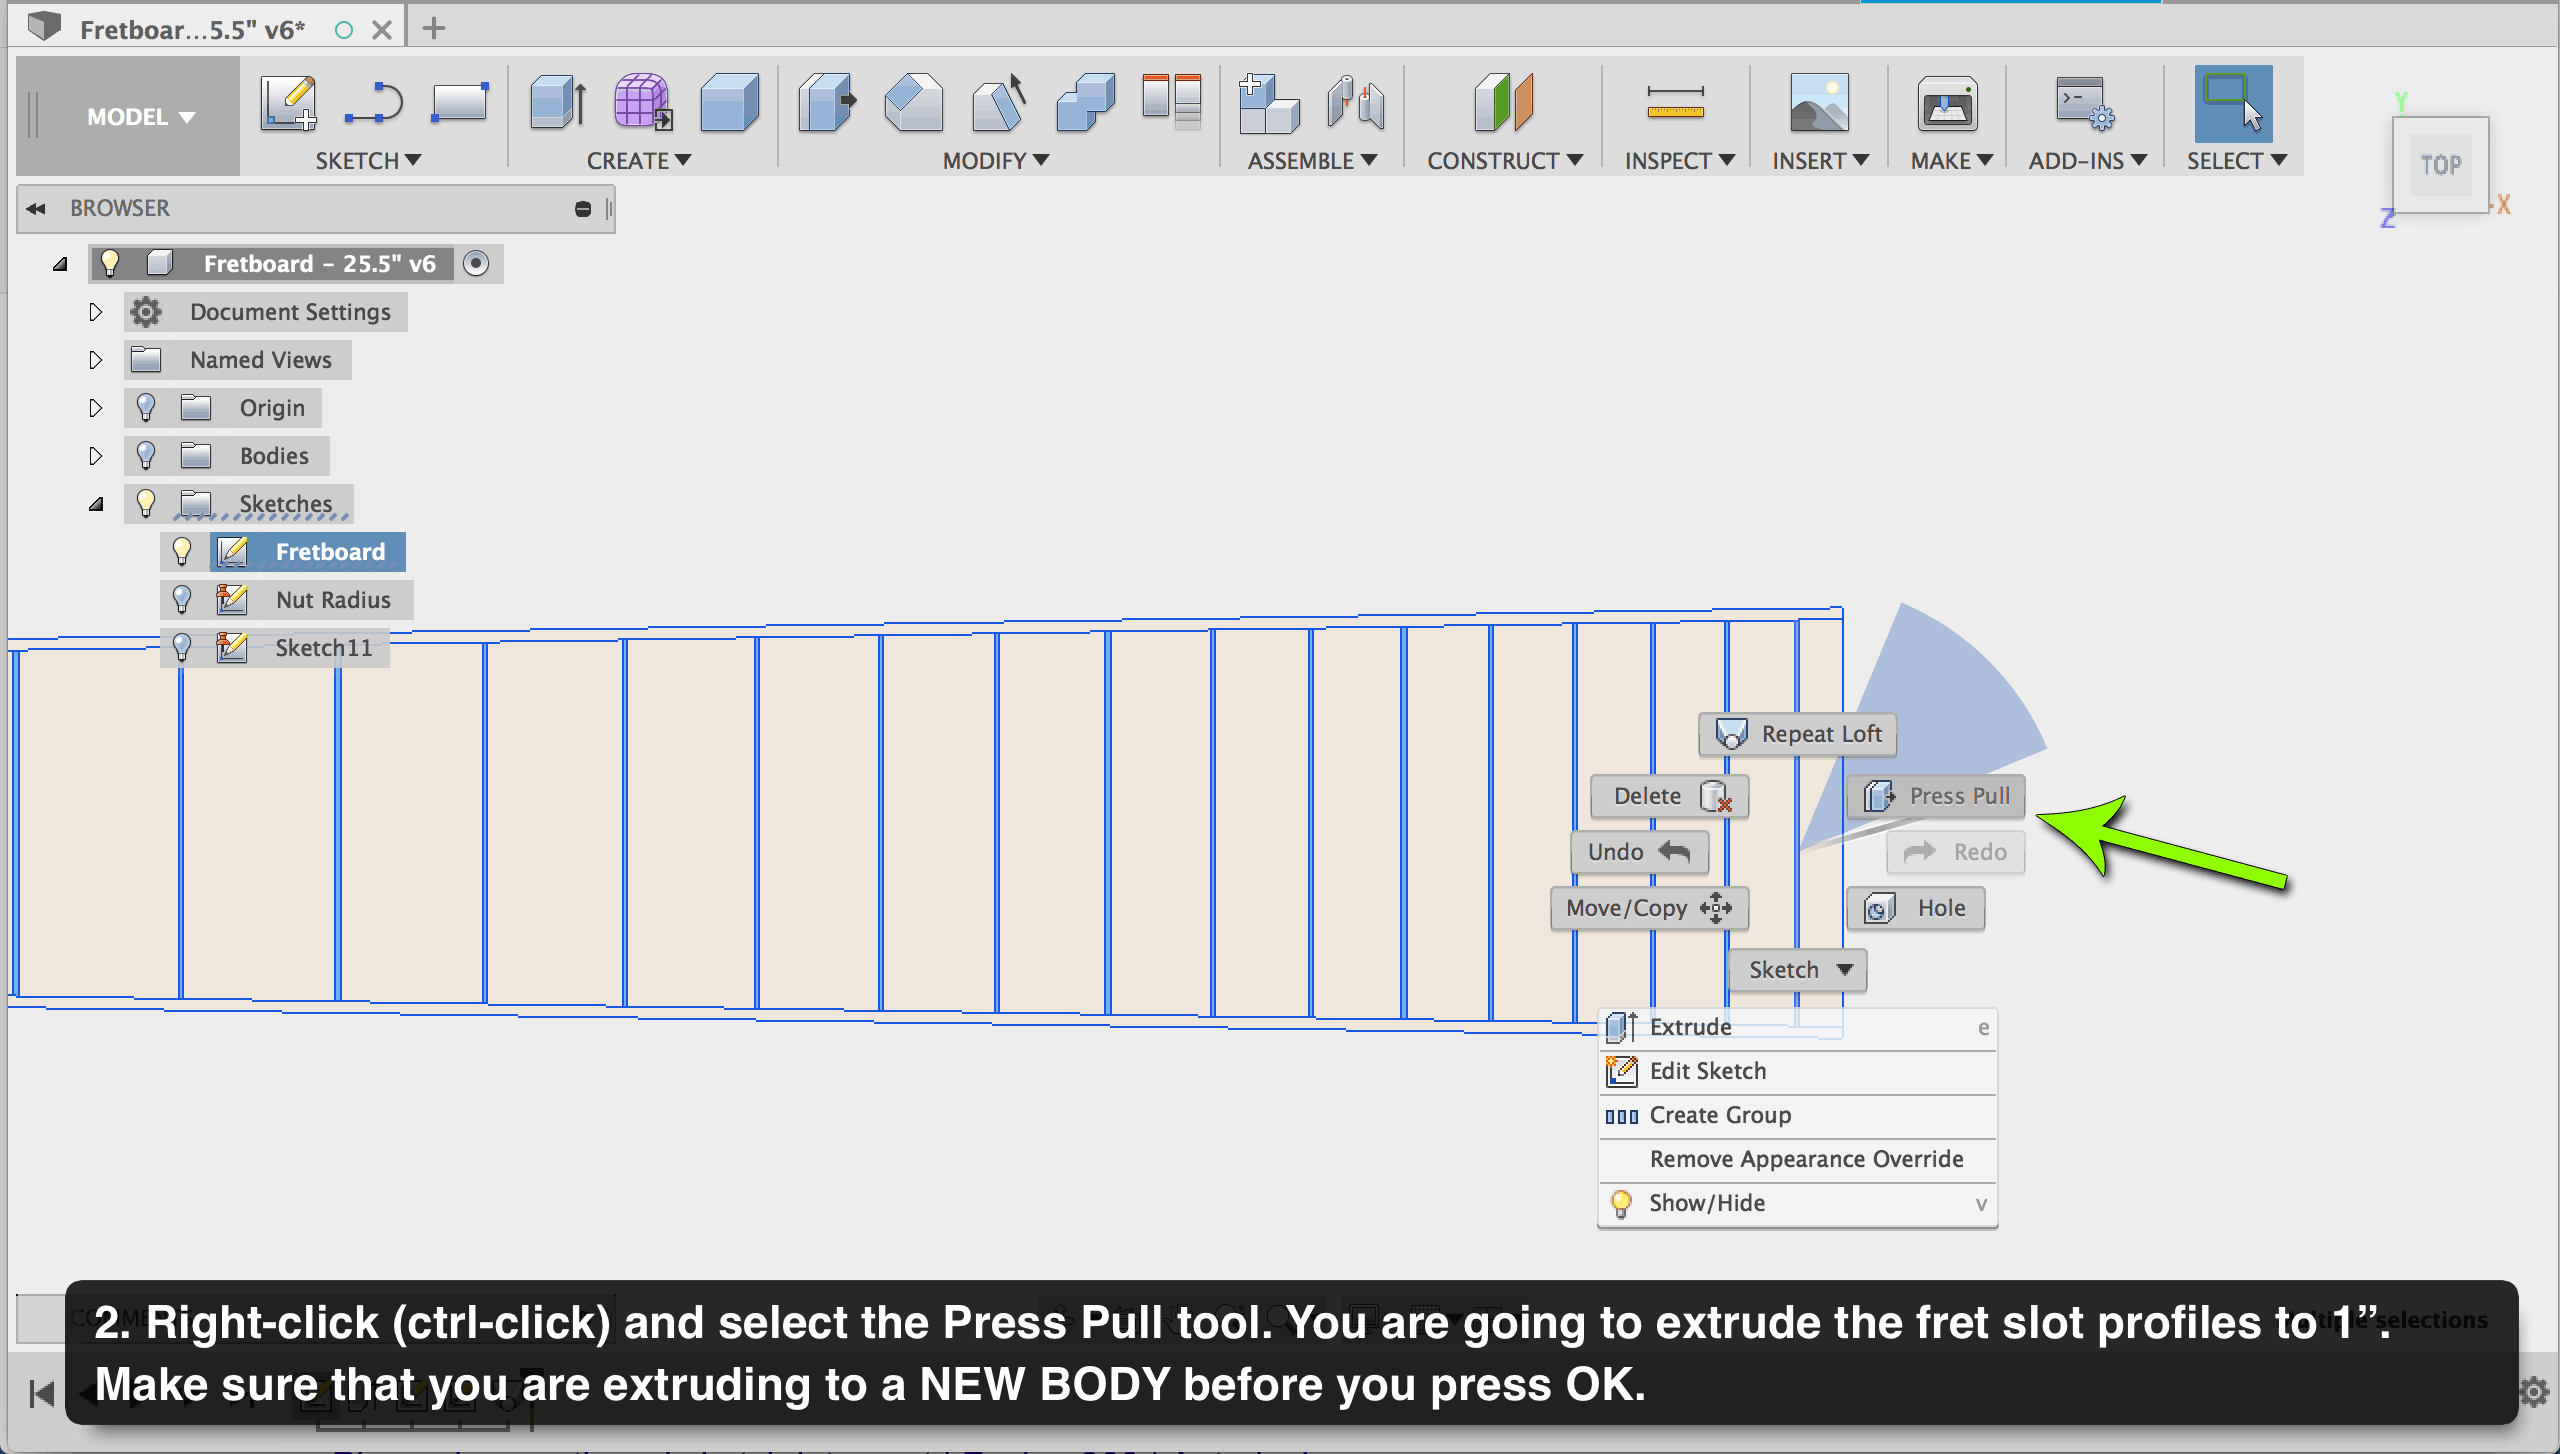
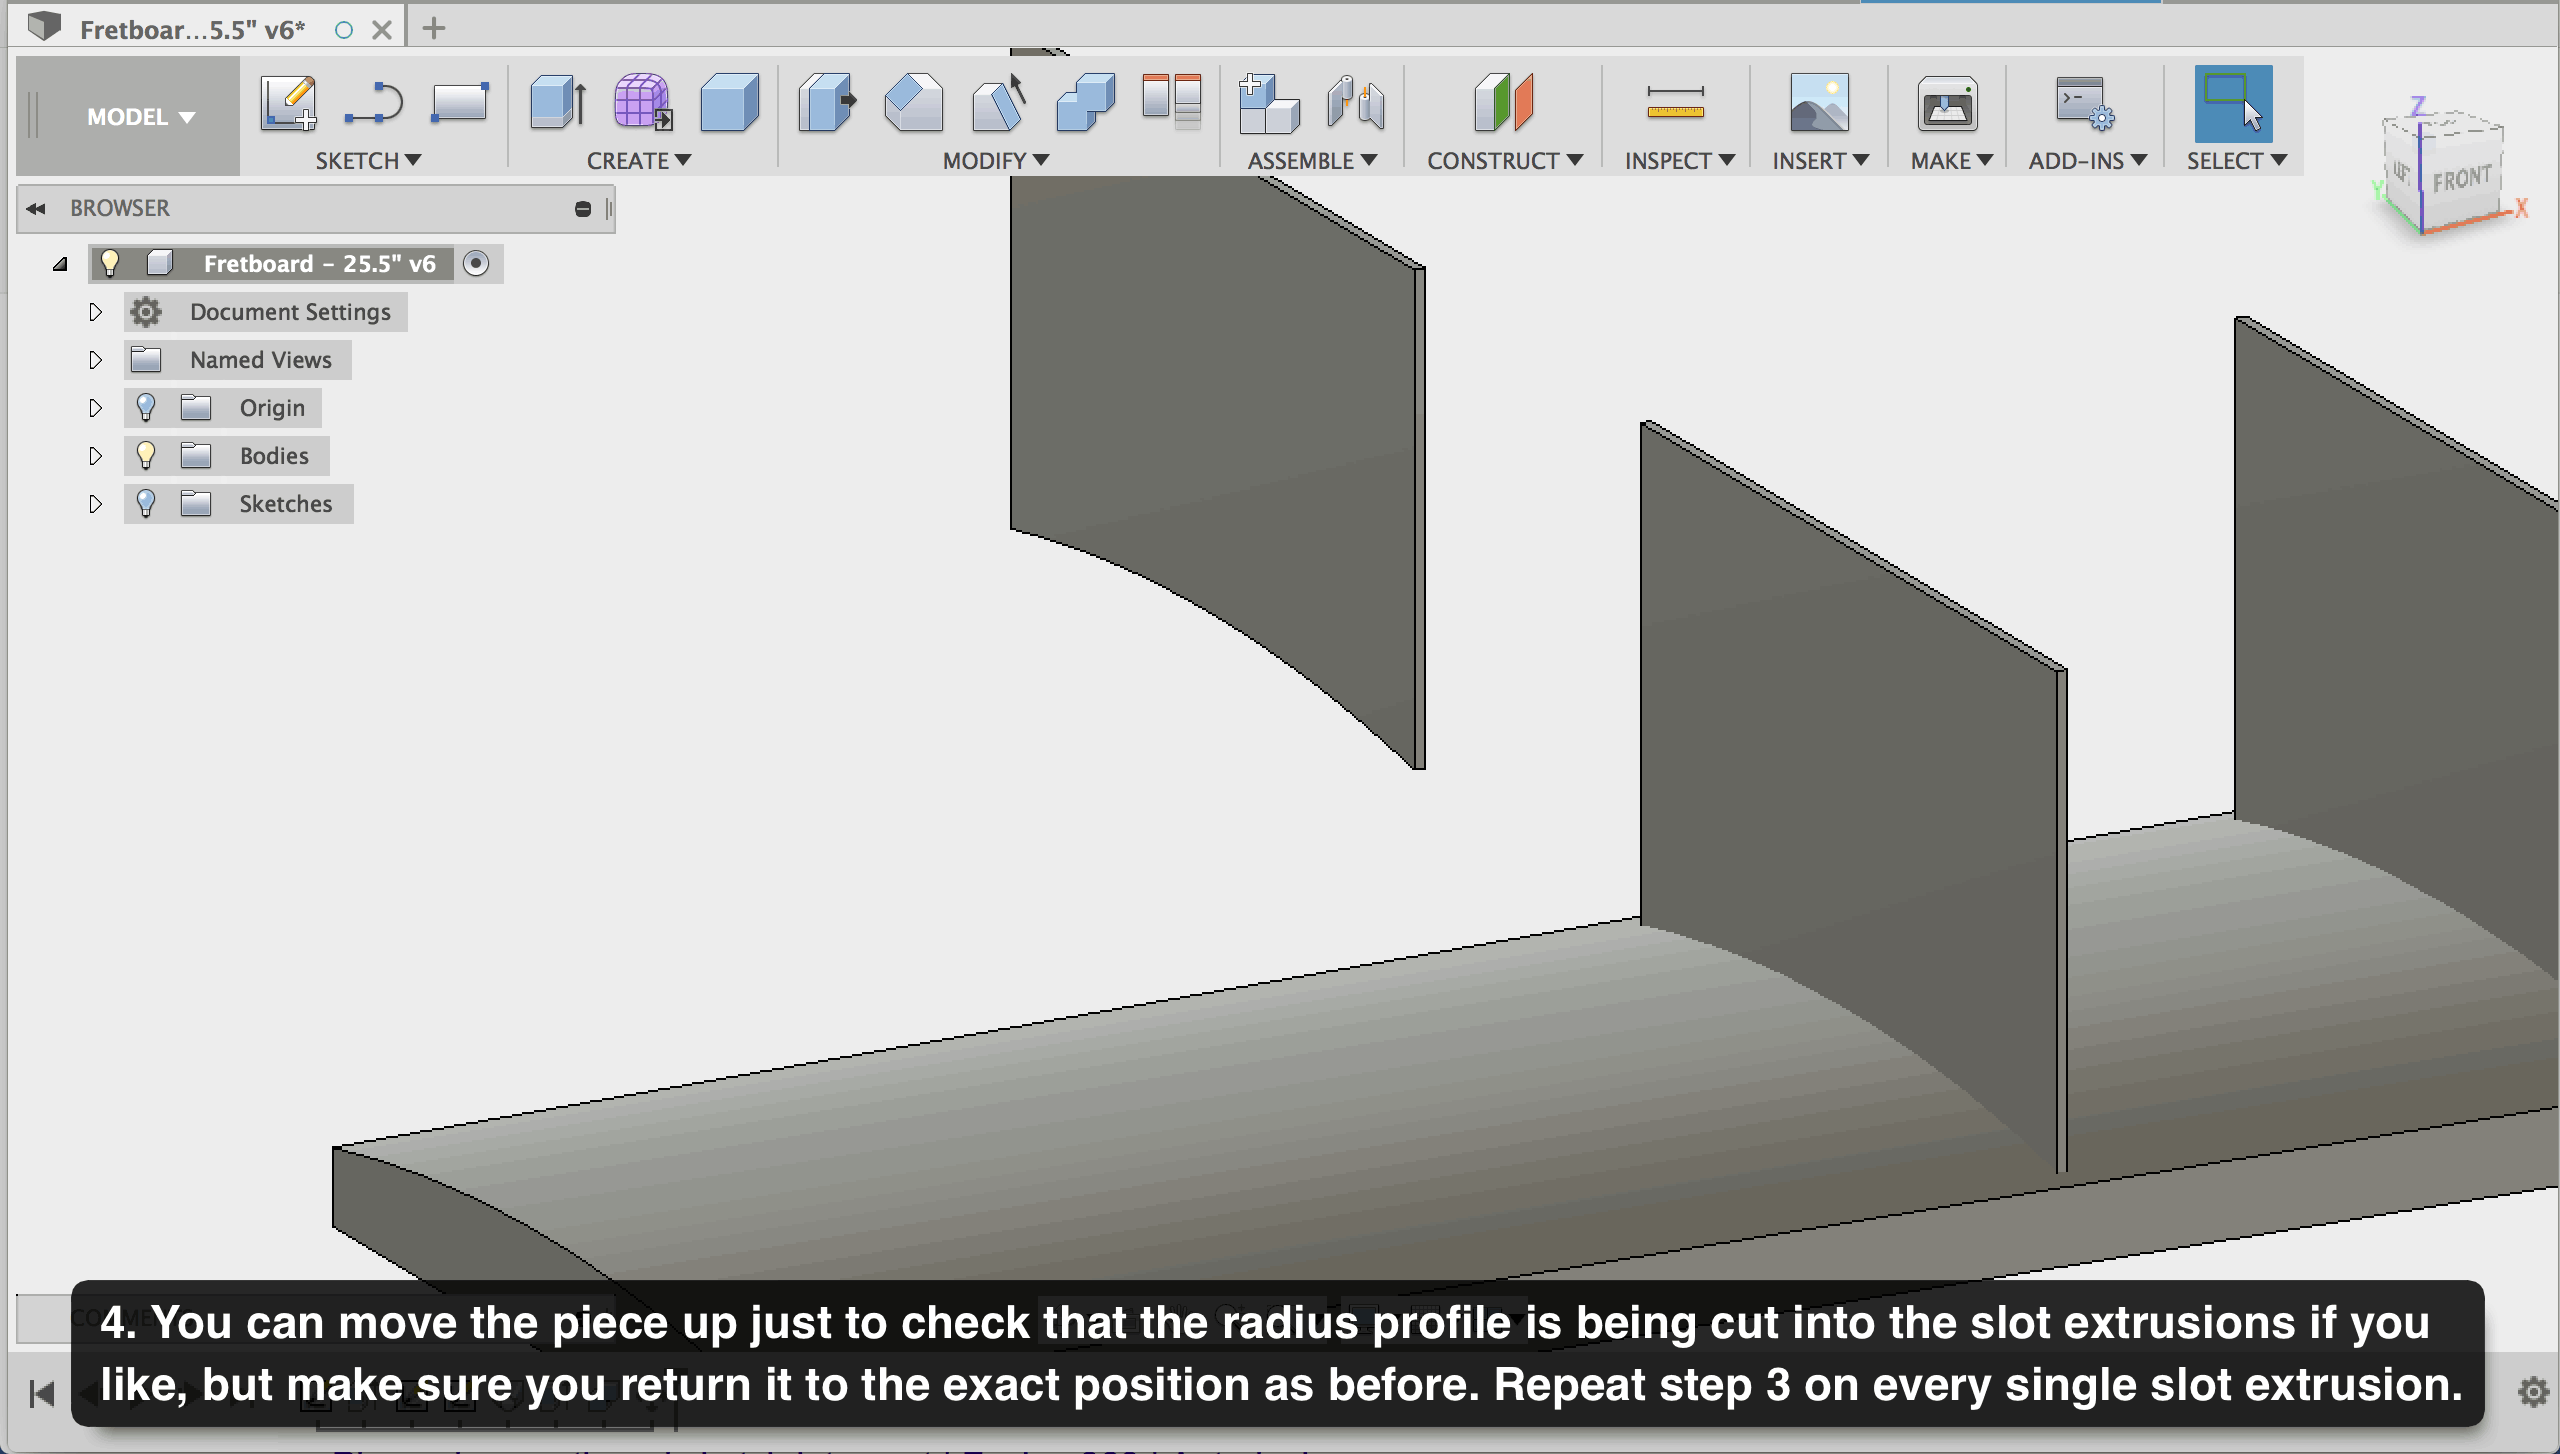
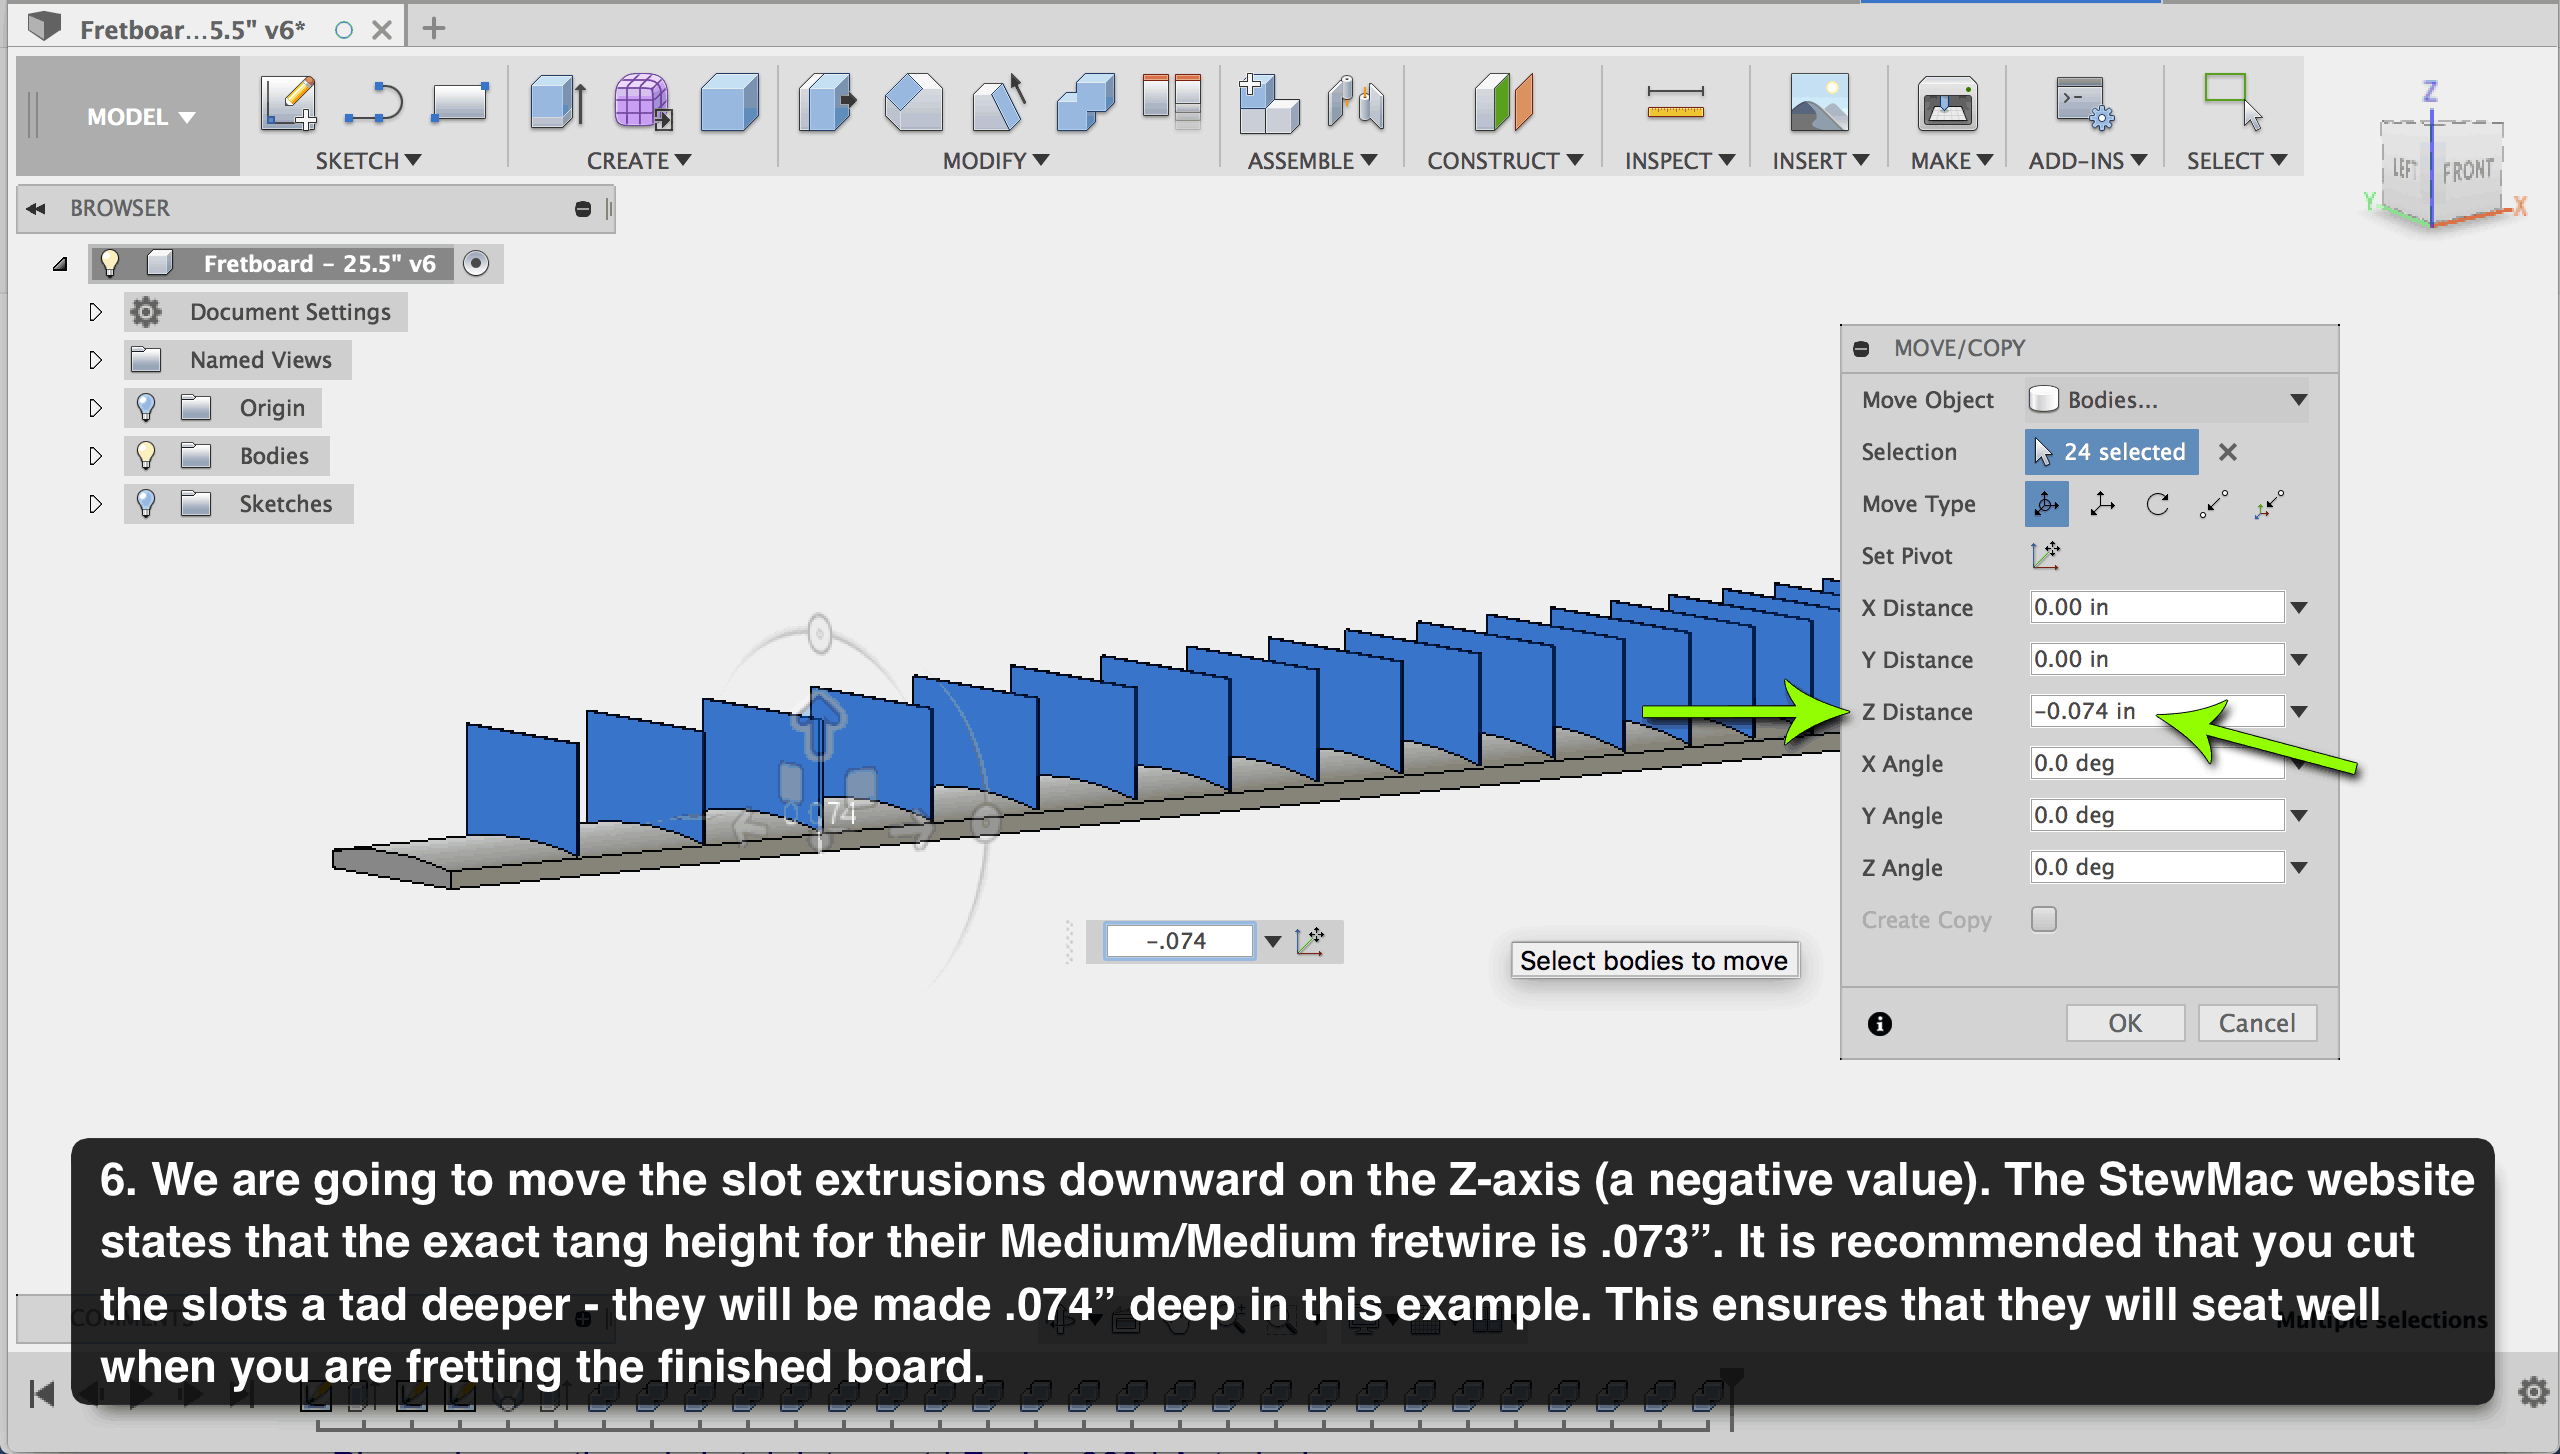
Part III: Cutting Fret Slots


There you have it – a perfect straight-radius fretboard with perfect slotting. The CAM process is going to come down to your own equipment and preferences, so the process for creating toolpaths has not been included here.