
When to Perform a Fret Dress
After performing a full setup on a guitar, chances are good that the instrument is going to need a fret dressing or a full refret.
Generally, manufacturers do a poor job with the fretboards on their production guitars. It’s not really their fault, it would be impossible to pump out guitars at such a high rate while giving each a perfect fret job. An excellent fingerboard and fret dress is one of the most important elements in guitar construction. Good fret work is the key to perfect intonation and playability.
Common reasons for a fret dress:
- Divots in the frets from playing that result in fret buzz, bad intonation, and difficult playing action.
- A rising tongue at the end of the fretboard. This results in the death of a note as the string hits the frets on the upper register and bends. This is a common defect from any factory and even custom manufacturers.
- Uneven frets. Multiple causes.
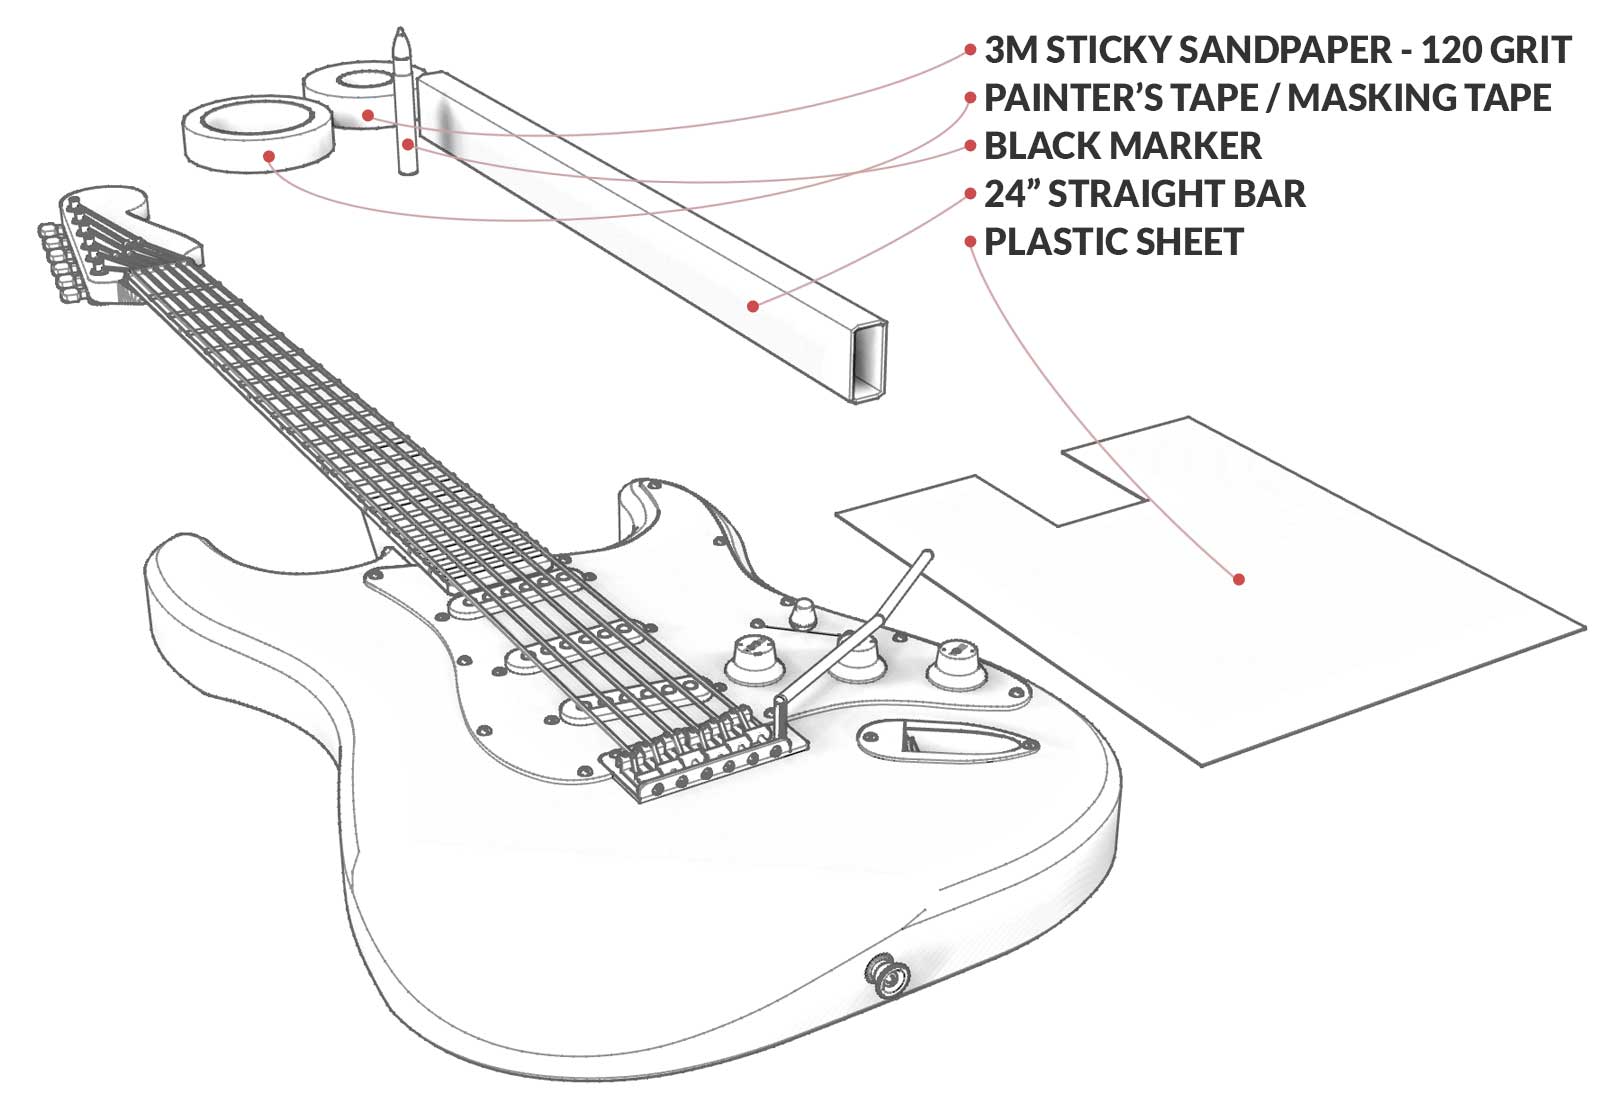
Tools You’ll Need
* Many of the tools you’ll need are already listed in the Lutherie Tools Guide.
* Links open in a new window.

How to Perform a Perfect Fret Dress
* Begin with a guitar that is fully set up to the string gauge and tuning that will be used.
1. Set the guitar’s relief to .012”. This is the starting point to level the frets or the fretboard. See the Guitar Setup Pro Guide for help there.
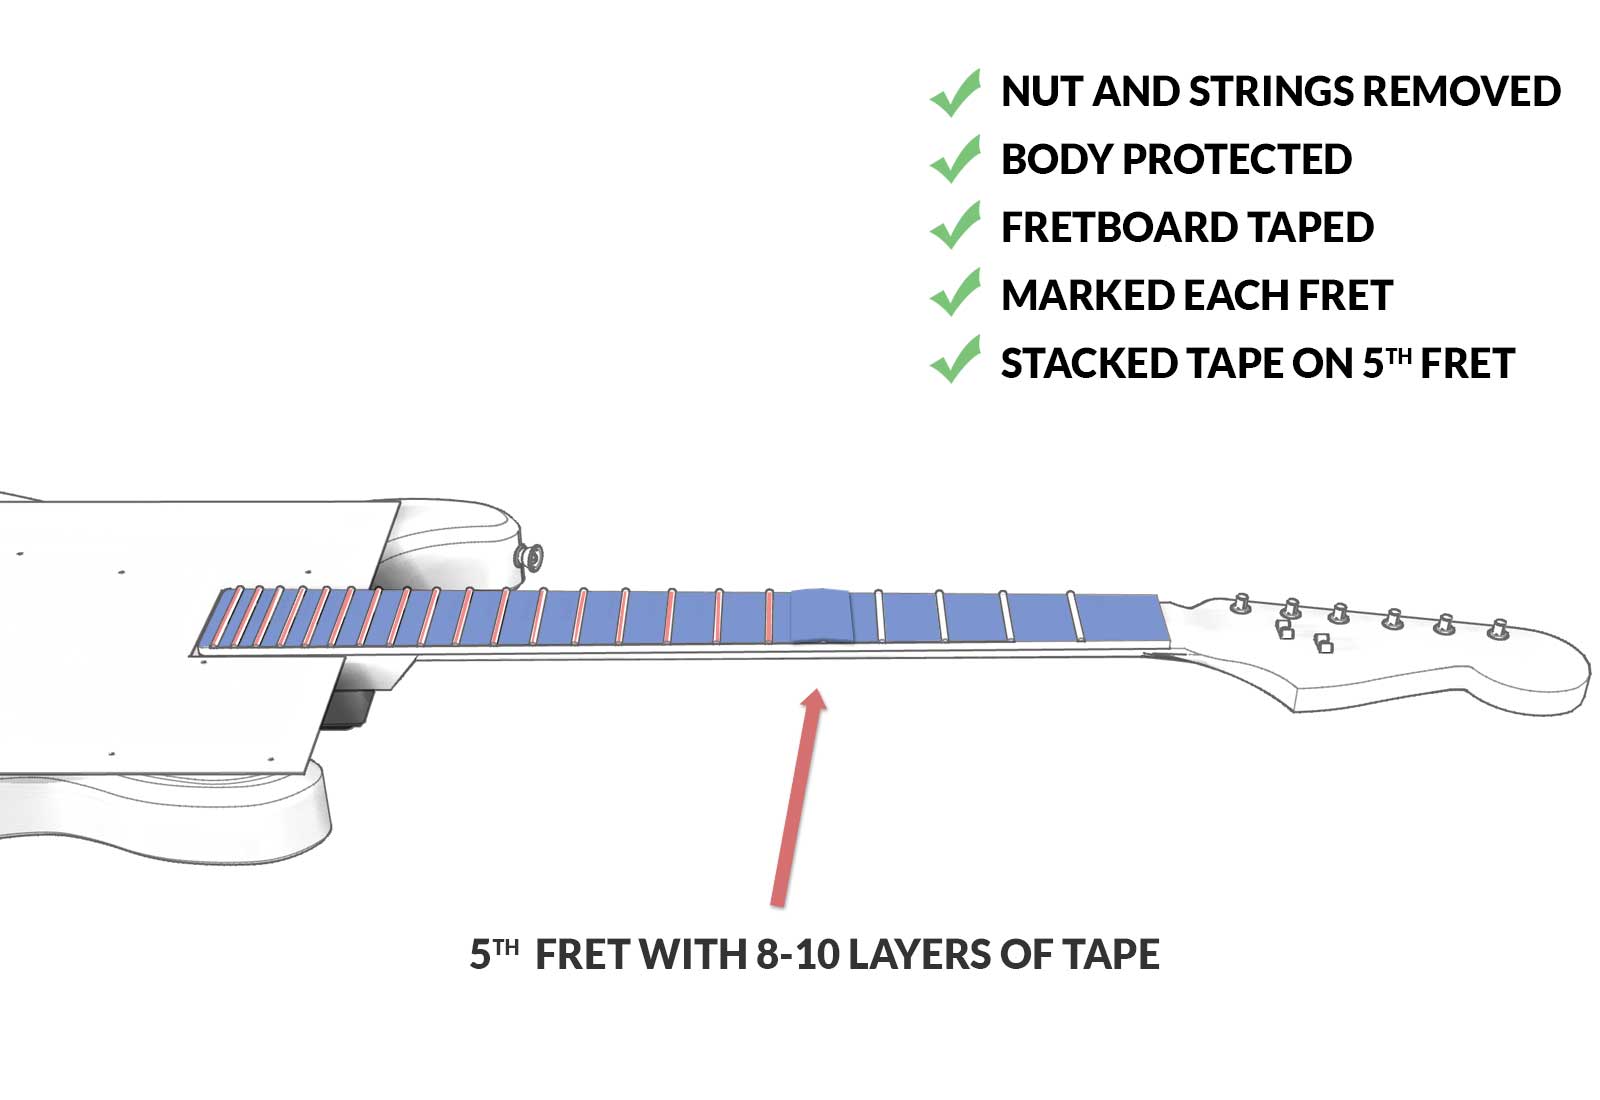
2. Loosen the strings and remove them at one end (either the bridge or the tuning pegs) – we want to use them again later, so it’s easier to keep them attached to the guitar. Bunch them up and tape them or put them somewhere they won’t be in the way.
3. Use plastic sheets and painter’s tape (low tack masking tape) to protect the guitar’s surfaces. Especially the headstock and the body below and around where the neck/fretboard ends.
4. Remove the nut and tuning machines that might be in the way – to make certain, you can lay a straight edge or straight sanding bar on top of the frets and see if comes in contact with anything over the headstock.
5. Tape up the fretboard with painter’s tape. You should de-tack the tape before laying it down by stretching it across your shirt or the table top and pulling it off a couple times. We want to be able to peel it off easily when finished.


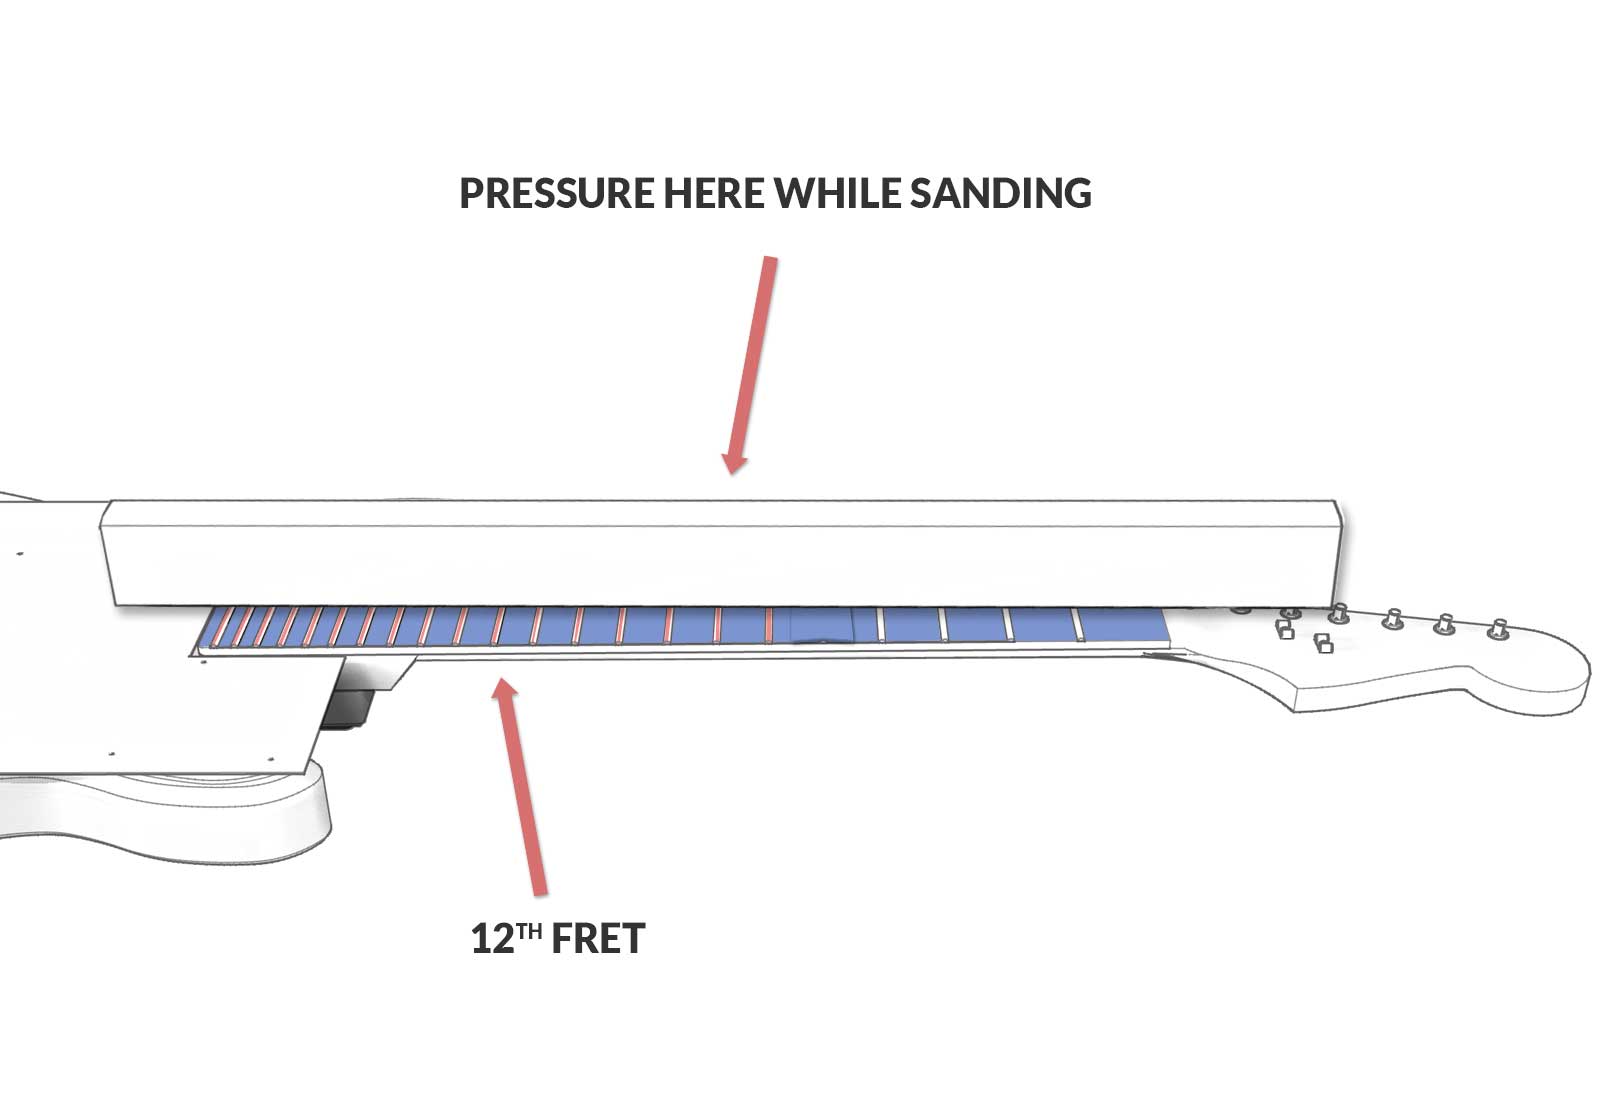
6. Place 8 – 10 layers of masking tape on the 5th fret. This is to create a very slight downward angle when leveling off the tongue of the fretboard. The tongue is going to be leveled first.
7. Place 120 grit 3M sticky sandpaper across 1/3 of the edge of a 24” straight bar.
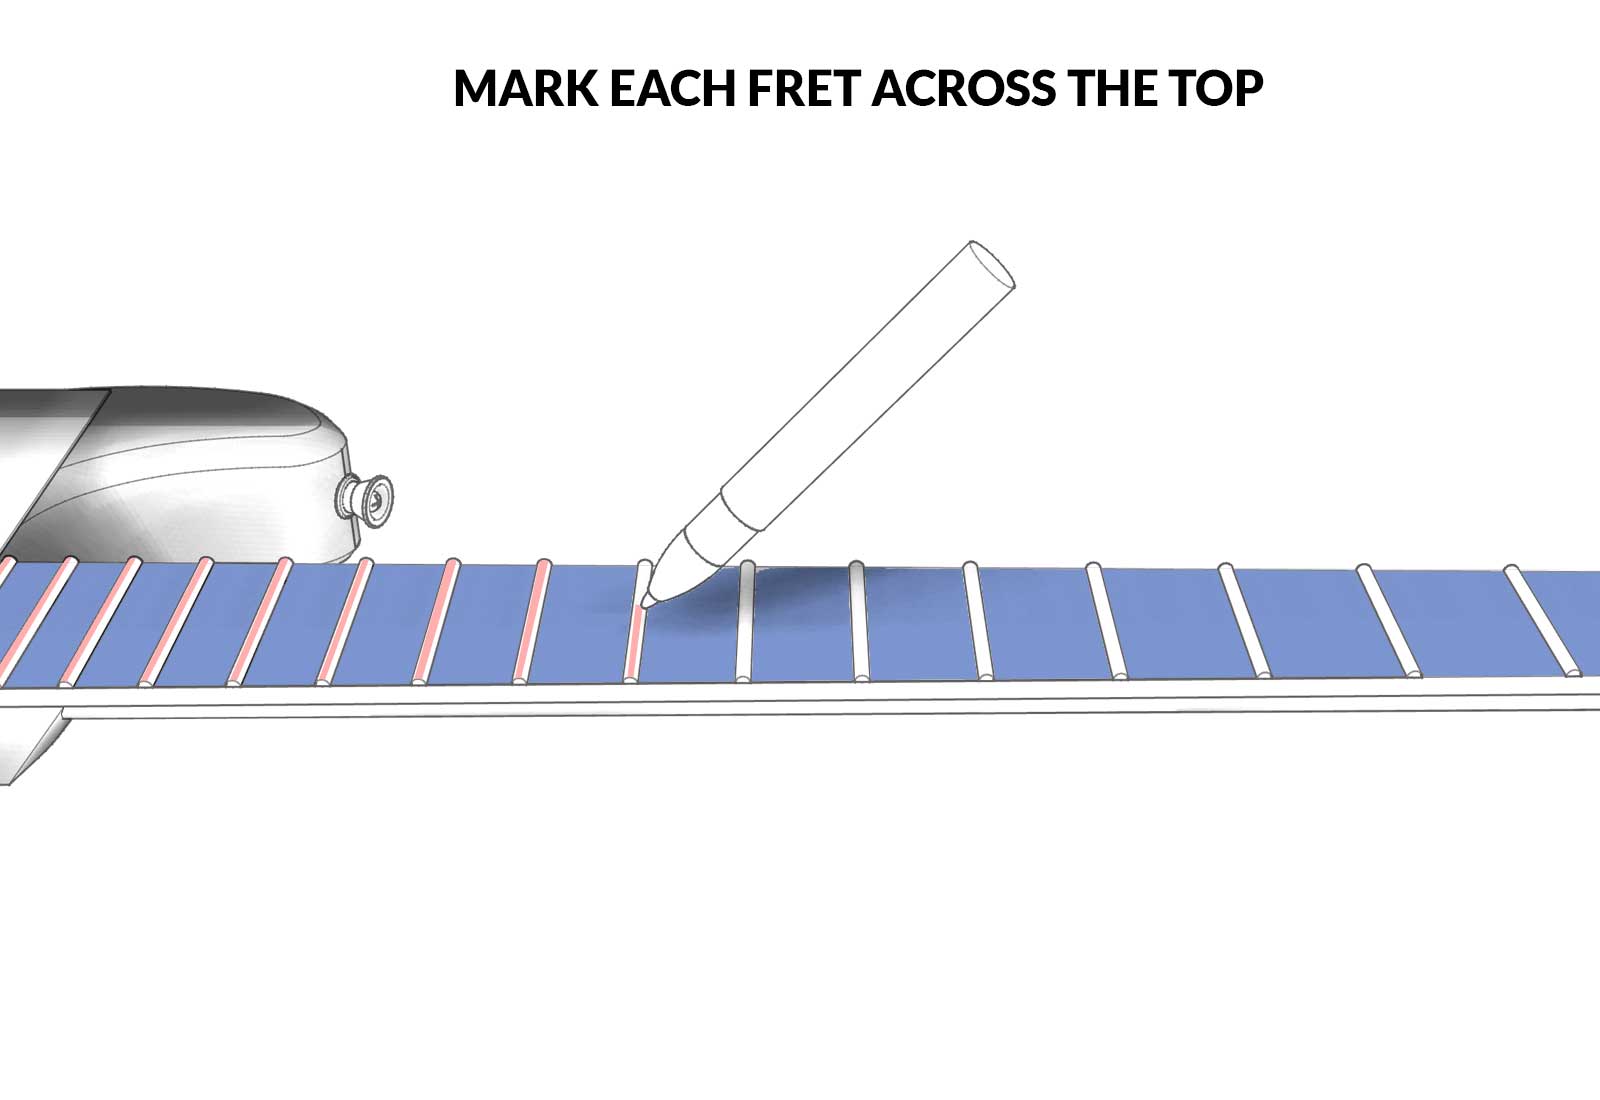
8. Draw a line across the tops of the frets with a black marker. This will help you track the progress of your sanding line by noting when they disappear – it will also keep your work even. We want perfect symmetry in sanding across the frets to maintain the radius.
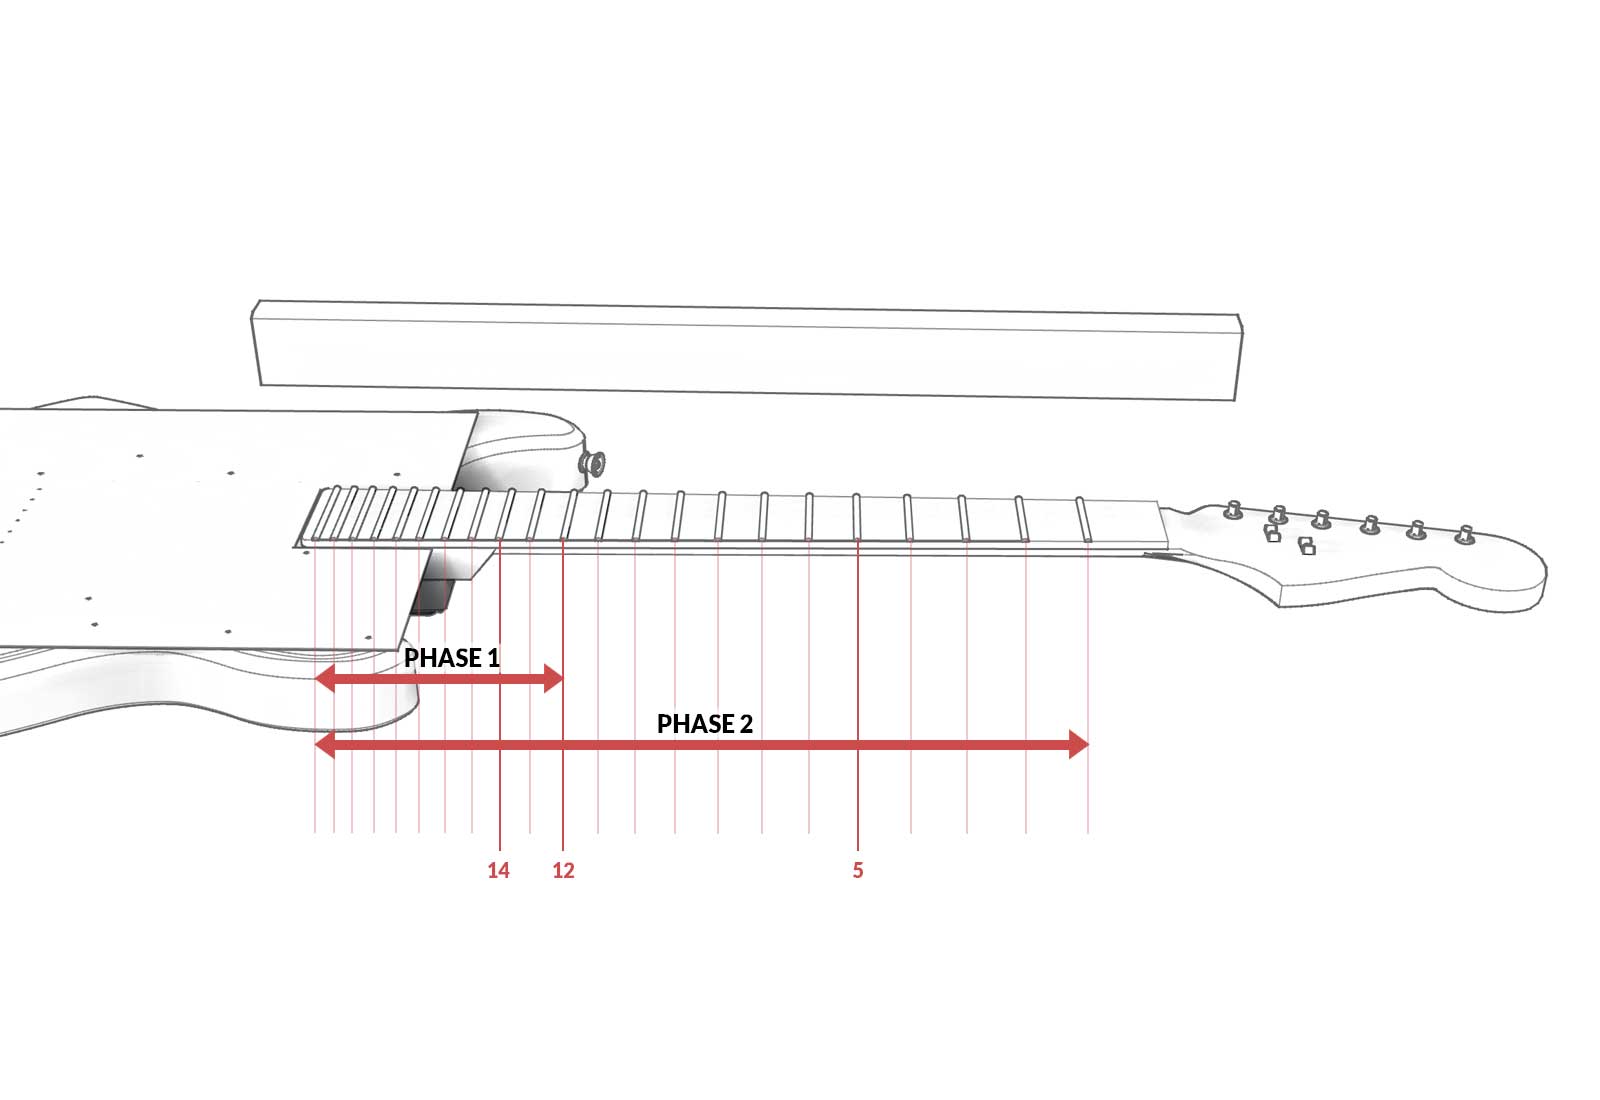
9. Lay the straight bar on the fretboard with the sandpaper facing downward at the frets (obviously) – the untaped end should be laying on the 5th fret that we taped up, and the sandpaper end laying across the upper frets / tongue.
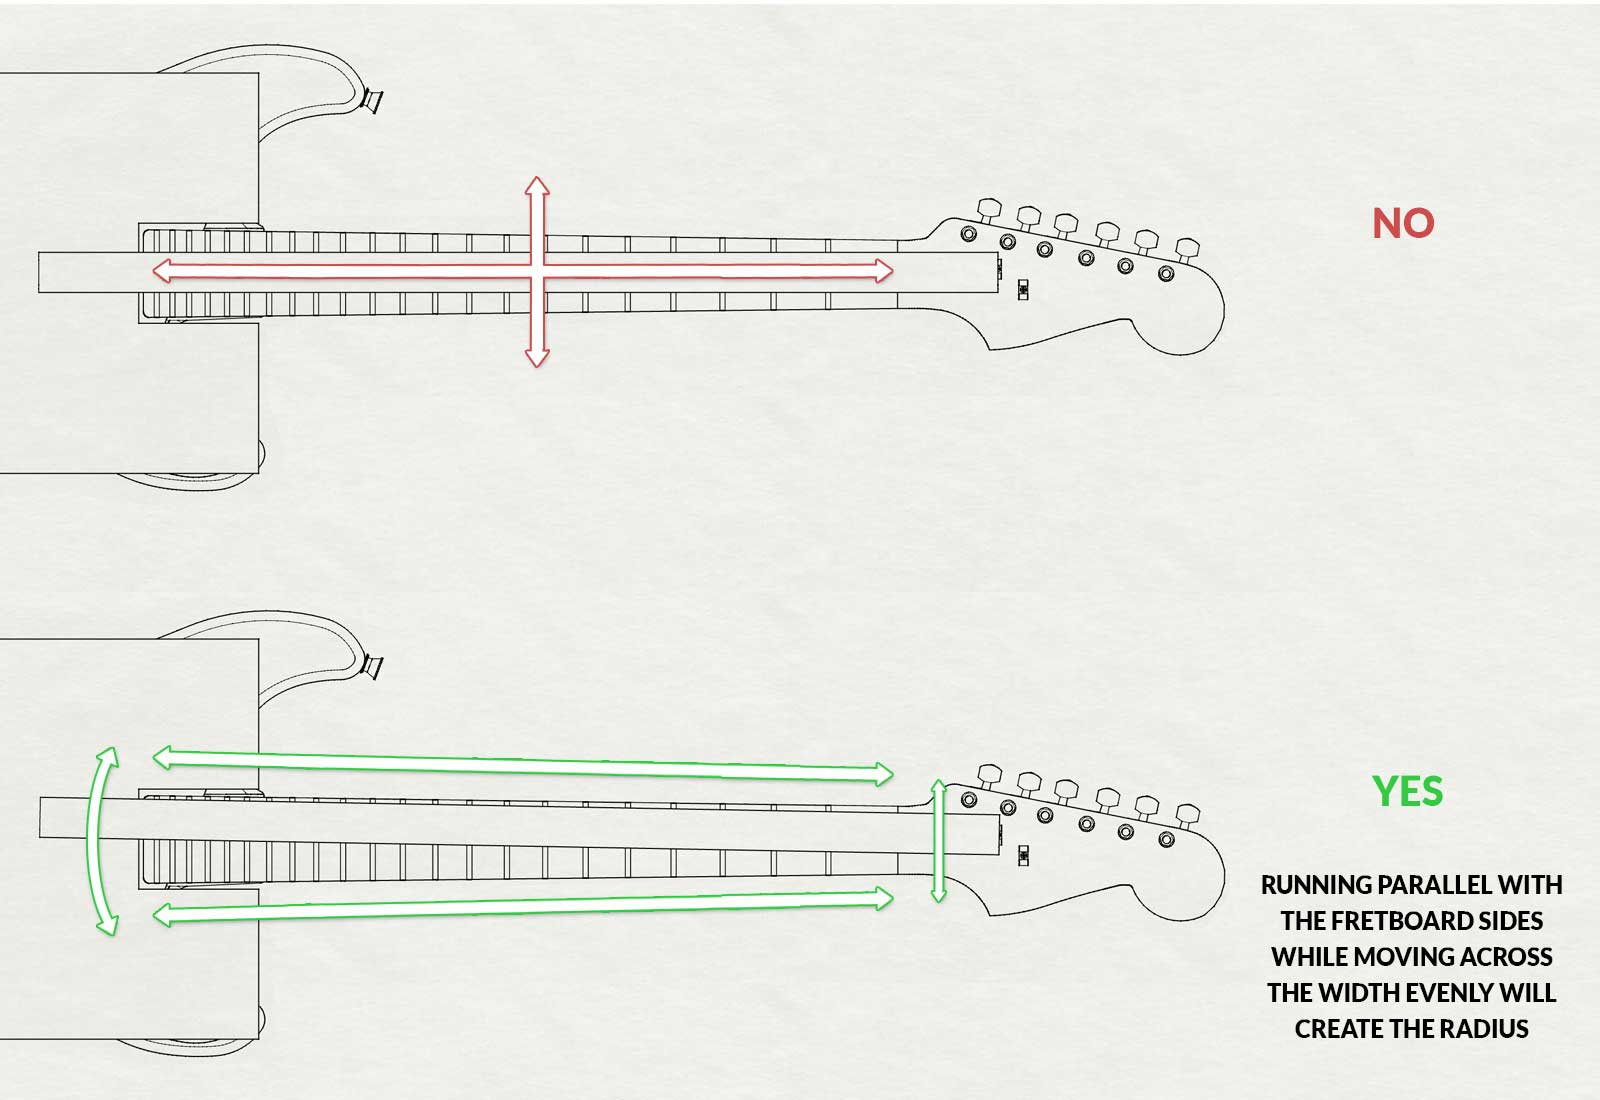
10. Work the straight bar back and forth lengthwise and evenly from side to side to trace the fretboard’s radius across the tops of the frets. You could also adjust your sanding pattern here to create a flatter radius in the upper frets to make a compound radius.
11. Check your sanding line more frequently as you approach the 14th / 12th frets. Once you’ve reached your fret mark (14 or 12, pick one) and the tops of all the frets from there to the end are leveled off evenly, you can stop. Now you have the fallaway needed to counter the rise in the fretboard’s tongue.
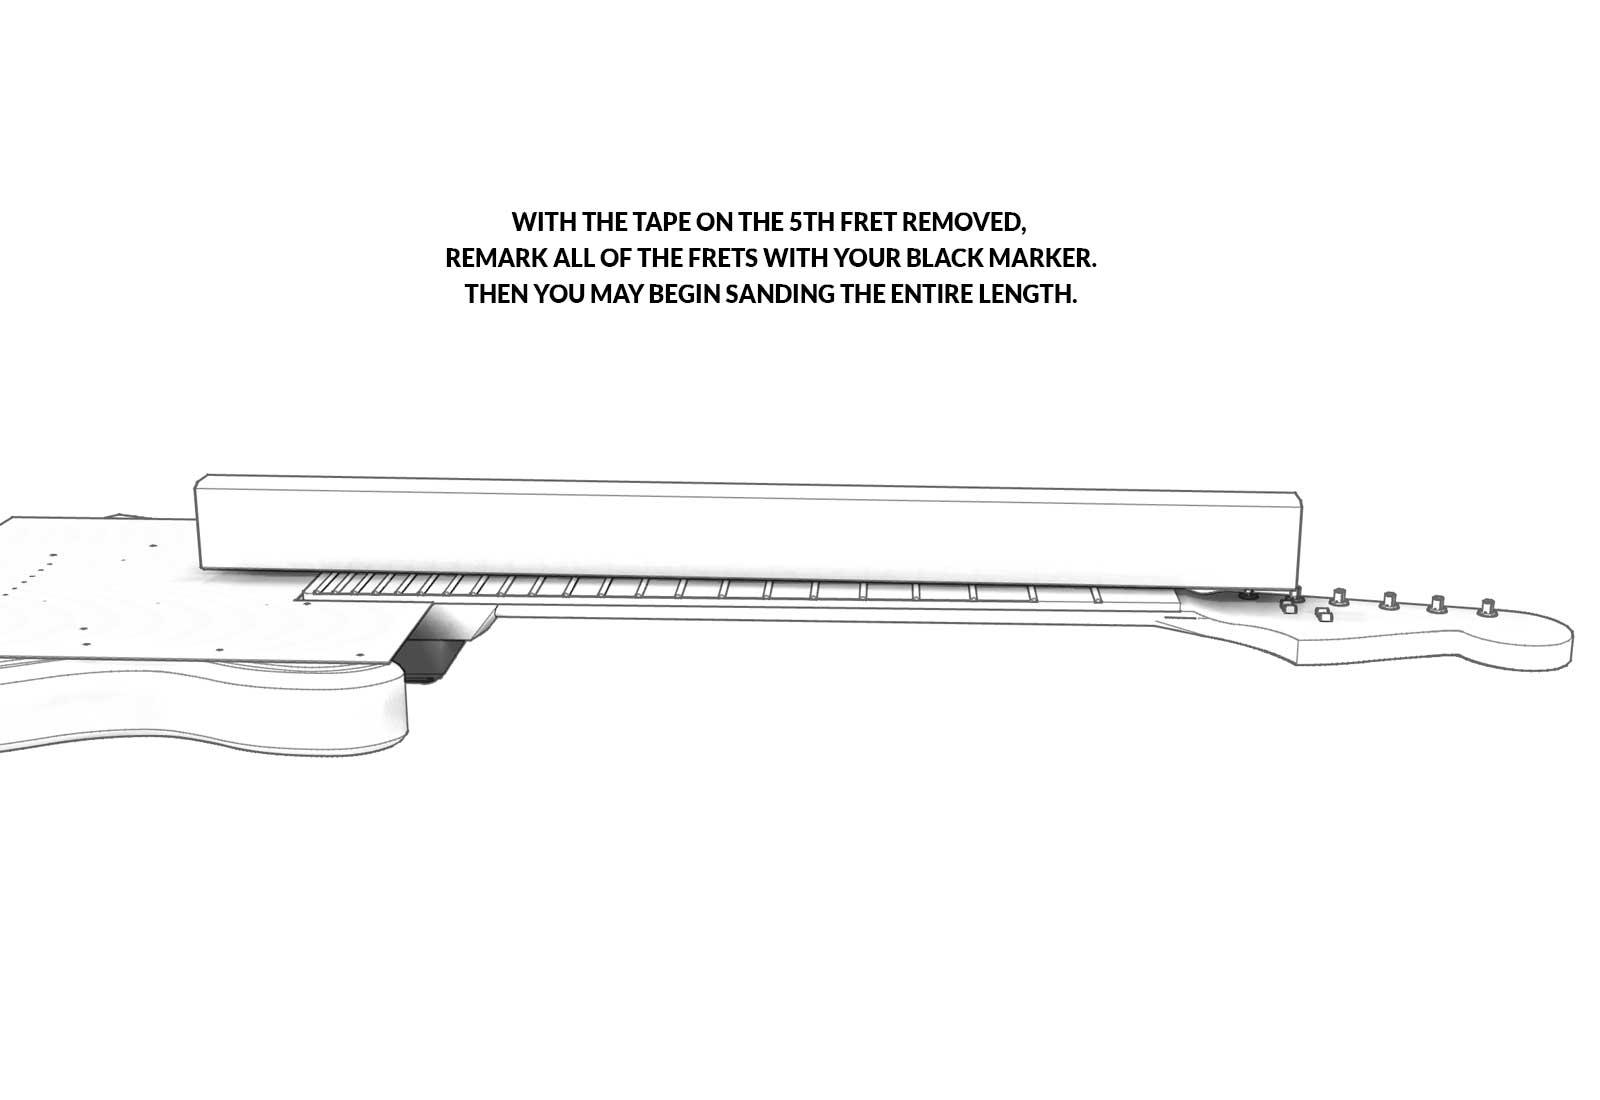
12. Remove the tape layers from the 5th fret.
13. Place 120 grit 3M sticky sandpaper across the entire length of the straight bar now. Mark all of the frets with your black marker again.
14. Sand the entire length of the fretboard with the same motions, making sure to keep your radius even across the length of the frets. The straight bar should clear the tongue with pressure centered around the 5th fret. Check your marker lines frequently and continue to sand until all the frets are leveled and marked from the sandpaper – stop as soon as you’ve hit the last low point.
15. Use a diamond crowning file to crown the frets. Leave a thin line across the top of each fret (this will be rolled off when polishing).
16. Round the fret ends using a safe edge micro file. Polish the fret ends along with the rest of the fret.
17. Start polishing the sides of the frets with 220 grit sandpaper, then 320, and then 400.
18. Use the 400 grit paper to remove the thin line we left with the crowning file before by rounding it into your fret’s profile.
19. Continue upward with 600, 800, and then 1000 grit sandpaper. Your fingers should hurt by now.
20. Finally, go over every fret with 000 steel wool. After that, you’ll want to polish them with a little Tarnite and some paper towel.
21. Remove fretboard tape and take the opportunity to rehydrate the fretboard (if it’s un-lacquered hardwood) with a bit of lemon oil. Then, replace the tuning heads & nut, re-string and tune up.
That’s all there is to it! You can now address a number of fretboard, buzzing, action, and playability issues – and also make a drastic improvement to any factory production guitar on the market.
Performing a complete refret is sometimes required when a fret dressing can’t address issues of particular severity. Refretting is a major task, but the fret dressing process you just learned is also the second half of a refret job.