

When is refretting a guitar necessary?
Performing a complete refret job is about as big as a job can be in guitar lutherie – but don’t let that scare you away. If it’s done poorly, you can usually salvage the job by pulling the frets again and giving it another try. It’s an extremely valuable skill to have, and the core requirement for a perfect action. If you’ve read the fretdress guide, you already know some of the major steps required for refretting.
I don’t know if I’ve done a good job convincing you that this is a task you should endeavor, but I can assure you that by the time you’re finished, you’ll have a much deeper understanding and of the guitar’s neck mechanics as a bonus. This knowledge will help you diagnose and perform any fret or action-related jobs with more confidence and accuracy.
Learning how to refret your guitar will also give you most of the skills required for fretting a blank fretboard. This is required reading for anyone wanting to build their own guitar.

When diagnosing a guitar, you need to know when to perform a complete refret, partial refret, or a regular fretdress. There’s a huge difference in required effort. A fretdress can solve a lot of issues on its own, but sometimes you need to address problems at the root of the matter: the fretboard itself. Let’s look at some neck issues and see what’s required to fix them:
1. High Fret

Cause: Fretboard shrinkage (dried wood), improperly seated fret, or pushed inward from a fall or being struck.
Solution: Partial refret
2. Rising Tongue

Cause: Mostly affects bolt-on necks. Can be caused by a number of things – humidity changes, an improperly set truss-rod, poorly selected neck wood, poor fretwork, etc. Many times, the issue isn’t with the fretboard itself, but the neck wood.
Solution: Complete refret
3. Twisted Neck
Cause: Similar to a rising tongue, there are a number of issues that could cause a twisted neck – but it mostly comes down to poor wood selection.
Solution: Throw the neck in the garbage. Aside from that, a fretdress or a complete refret can help counter the issue by leveling the plane again. Shimming the neck is also helpful in some cases, but I’d prefer to throw it in the garbage if that’s the case. This is not a permanent solution, but sometimes the neck wood can settle after a period (usually when it’s not properly dried/aged at the time of milling). In such cases, a refret can restore the neck’s function for an extended time – but you won’t know until you try it.
4. Worn Frets

Cause: Playing + time + general wear = flattened crowns, chips & notches, dead skin/grime buildup, uneven action, etc.
Solution: A fretdress will solve most cases, but fret-wire has a lifespan and you’ll need to assess whether there’s enough metal left to take another dressing without bringing the frets too low. If so, a complete refret will be needed.
5. Player Discomfort

Cause: This is a given really – if a guitarist has any issues with their fretboard’s radius or fret wire thickness, there’s no reason not to make the change.
Solution: Complete refret
Step by Step: A Professional Guitar Refret
Refretting Tools
(click to see product pages on Amazon – links open in new windows)
Step 1 – Setup the guitar.
- Support the neck with shot bags or a good fitting caul.
- Protect the guitar.
- Guitar should be set up with desired string gauge and tuning. Especially be sure that the relief is set to .012”.
- This is the starting point for a refret, fretdress, or initial fretting of a new instrument. This method takes into consideration the reaction of the wood and trussrod to the string tension. This state becomes the constant from which the plane of the fingerboard is defined.


Step 2 – Remove the frets.
- Oil rosewood and ebony fingerboards liberally with lemon oil to condition and reduce chipping. In some cases you may leave a heavy coat of oil sit overnight. Drip or spray a little water on the fingerboard to produce steam. Heat the frets with a clothes iron or soldering iron until they bubble and steam. Rest iron on a wood block while not on the frets.
- Nip the corner of fret with the fret removing pliers. Slowly work pliers under and across the bottom of the fret crown until the fret is removed from the slot. Heat frets as needed. Several frets can be heated at a time. Remove all frets.

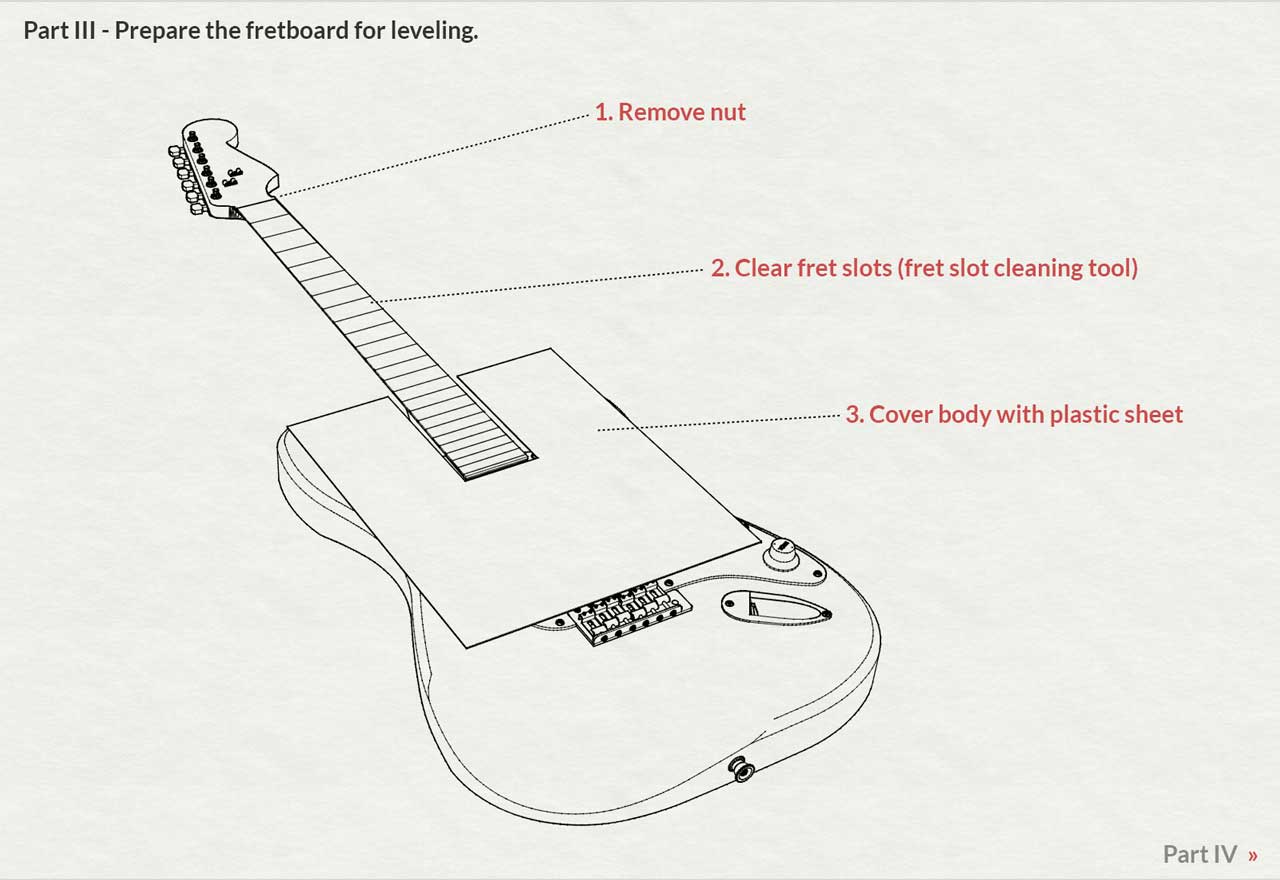
Step 3 – Prepare the fretboard for leveling.
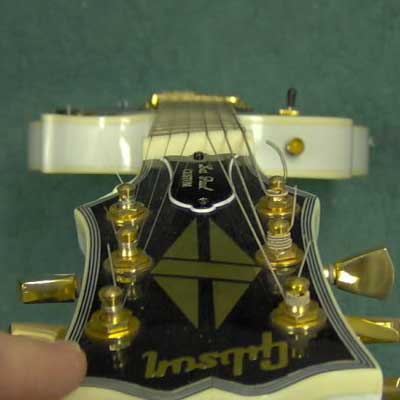
- Remove nut. Remove machine heads if necessary. Any hardware directly above or below the fretboard could potentially be struck by the sanding bar when surfacing the fretboard, so it’s best to be safe and remove them entirely.
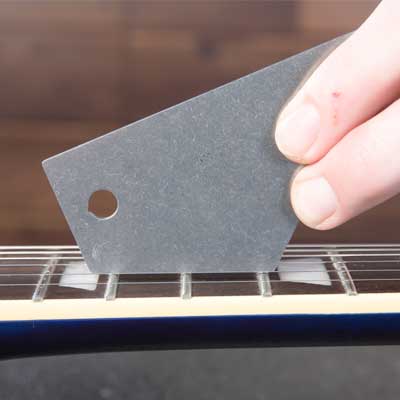
- Use the hook on your fret slot cleaning tool to scrape out any old glue and debris left in the slot.
- If you haven’t already, make sure that you’ve laid a plastic sheet across the body to protect against scratches, dents, or sawdust.
Step 4 – Fill the fret slot ends.
- To achieve a pro dress on the fret slot ends, fill the slot ends with 1/16” strips of matching or contrasting wood. Glue in strips. After glue sets, clip strips leaving them flush with side and top of fingerboard.
- It’s also common to use wood glue and sawdust from the fretboard to create a paste that will have the same appearance as the fretboard when dried. Some people prefer to wait until after the frets are in to do this – as long as the fret tangs are clipped inward with a little bit of room, that’s perfectly acceptable.

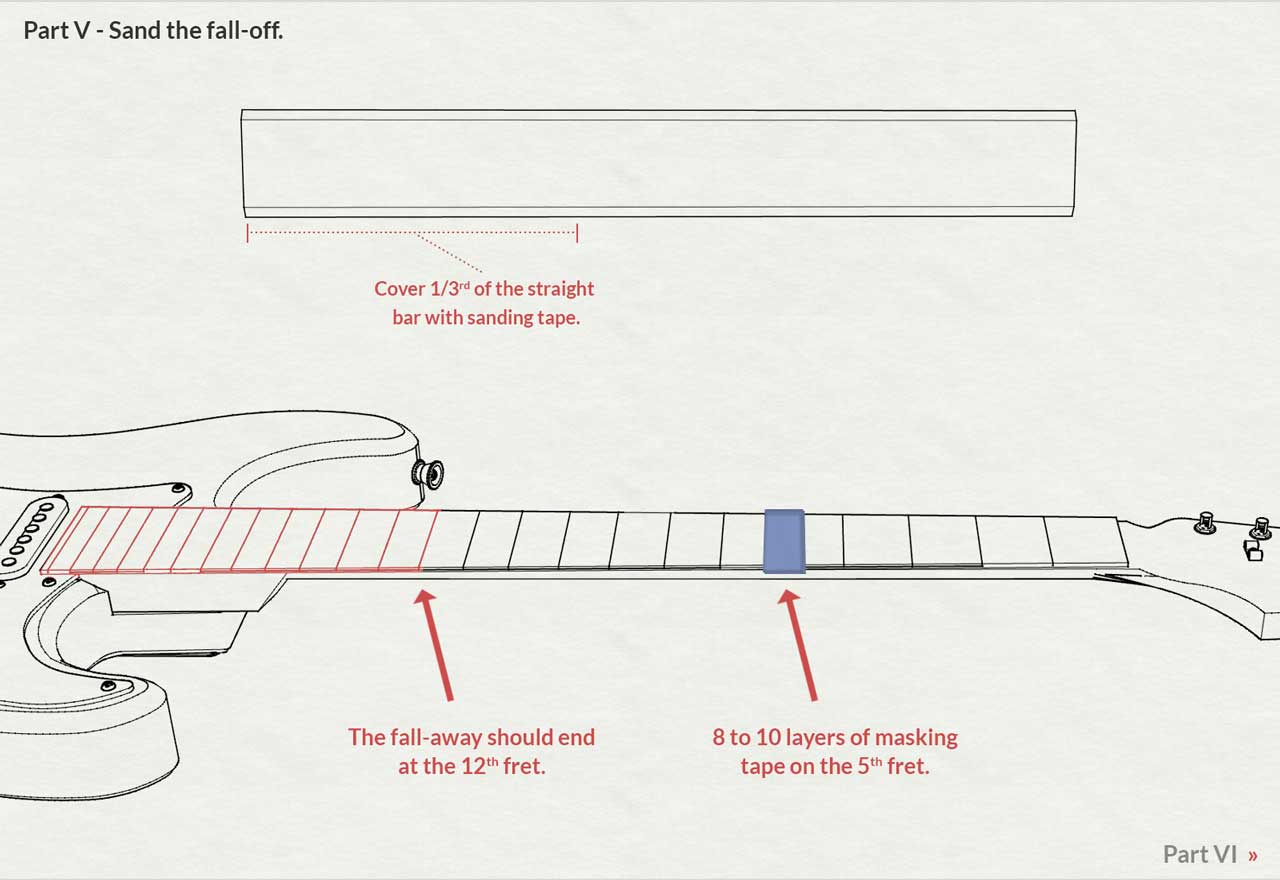
Step 5 – Sand the fretboard’s fall-off.
- Similar to a fret dress, build tape to 8 – 10 layers at the 5th fret to achieve fall away when planing the fingerboard.
- According to condition of the inlays and fingerboard use 80 grit or 120 grit sandpaper on the 24” straight bar.
- Cover 1/3rd of the edge of the bar with sandpaper and plane the tongue of the fingerboard from the end of the 12th fret maintaining the existing or desired radius.
- You may need to mark the fingerboard with chalk to make sure a plane is achieved.
Step 6 – Sand the rest of the fretboard.
- Remove tape from the 5th fret and put a whole strip of sandpaper on the edge of the straight bar.
- Plane the length of the fingerboard with the bar maintaining the radius and applying pressure between the 1st and 12th fret.
- Repeat process with finer grits of sandpaper up to 240 on the bar.

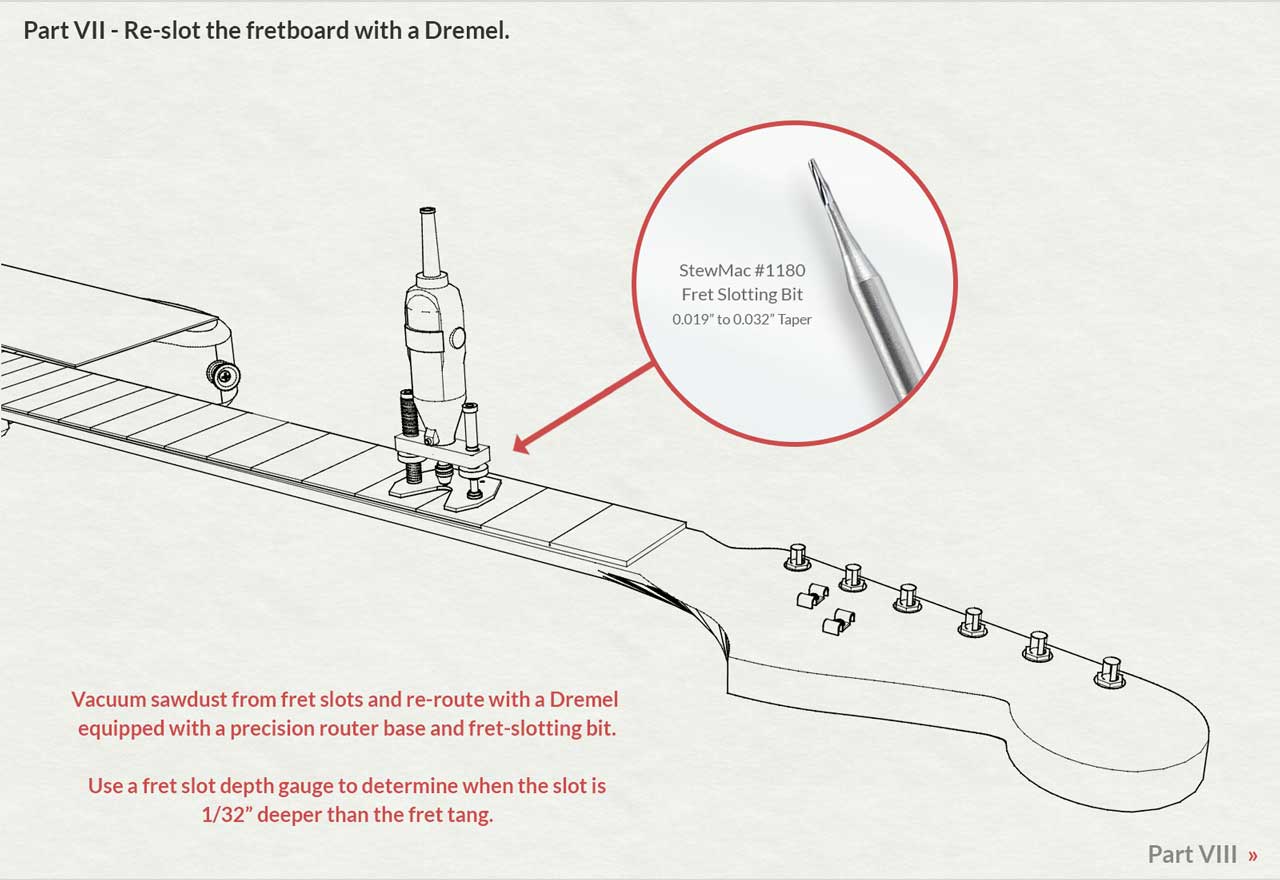
Step 7 – Re-slot the fretboard with a Dremel.
- Slot fret slots to the proper depth with a Dremel tool and precision router base. Stewmac #1180 tapered fret slotting bits are best for this job. Be careful not to cut through the filled slot ends. Gradually work bit down to 1/32nd inch deeper than the fret tang.
- Stop the Dremel and clean off the bit as it accumulates. You will have to clean the slot with your slot cleaning tool and vacuum cleaner several times as you use the Dremel to deepen the slots.
- In some cases the slot may need to be deeper if it requires excessive force to insert fret.
- Be careful with the bit – they are expensive. Work slowly and deliberate. Control the machine. Leave pro dress strips 1/16” wide.
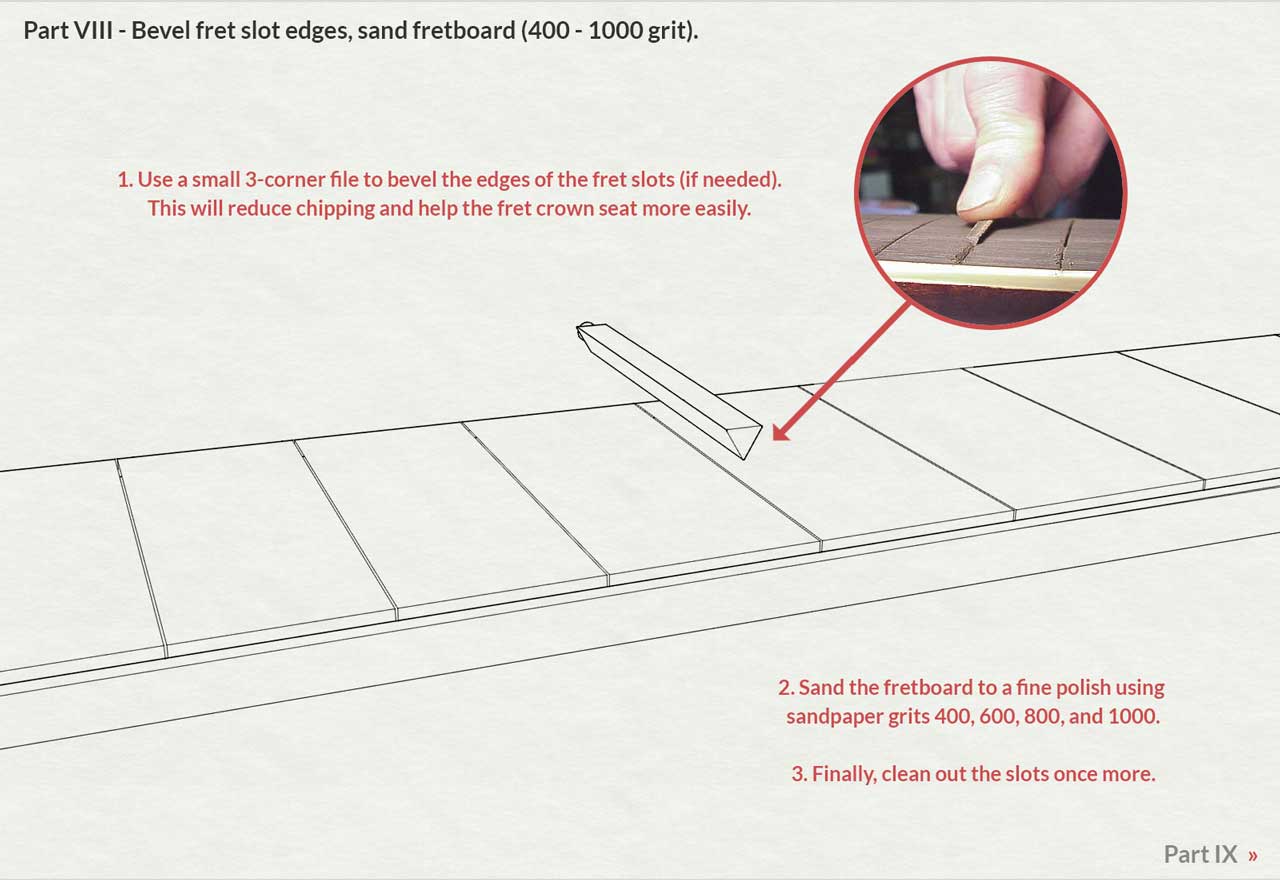
Step 8 – Bevel fret slot edges and polish the fretboard.
- Now polish the fingerboard with 400, 600, 800, and 1000 grit sandpaper by hand.
- Bevel the top of the slots with a three corner file.
- Clean and vacuum the slots one last time.
Step 9 – Radius and cut the fret wire.
- Choose the fretwire that is closest to the existing or desired fret size.
- Clean fretwire with naptha.
- Radius the fret wire.
- Match radius to fingerboard with slight overbend.
- Cut 3/4” off each end of the radiused fretwire section. This is the part that the radius machine misses and leaves straight.
- It helps to have a fret wire index with 24 holes.
- Cut fretwire 1/4” longer than the fret slot on all fret slots.
- Nip fret tangs with the fret tang nipper 1/32” inside of the pro-dress strips.
- Clean any remaining tang with a small file, careful not to get into the crown.

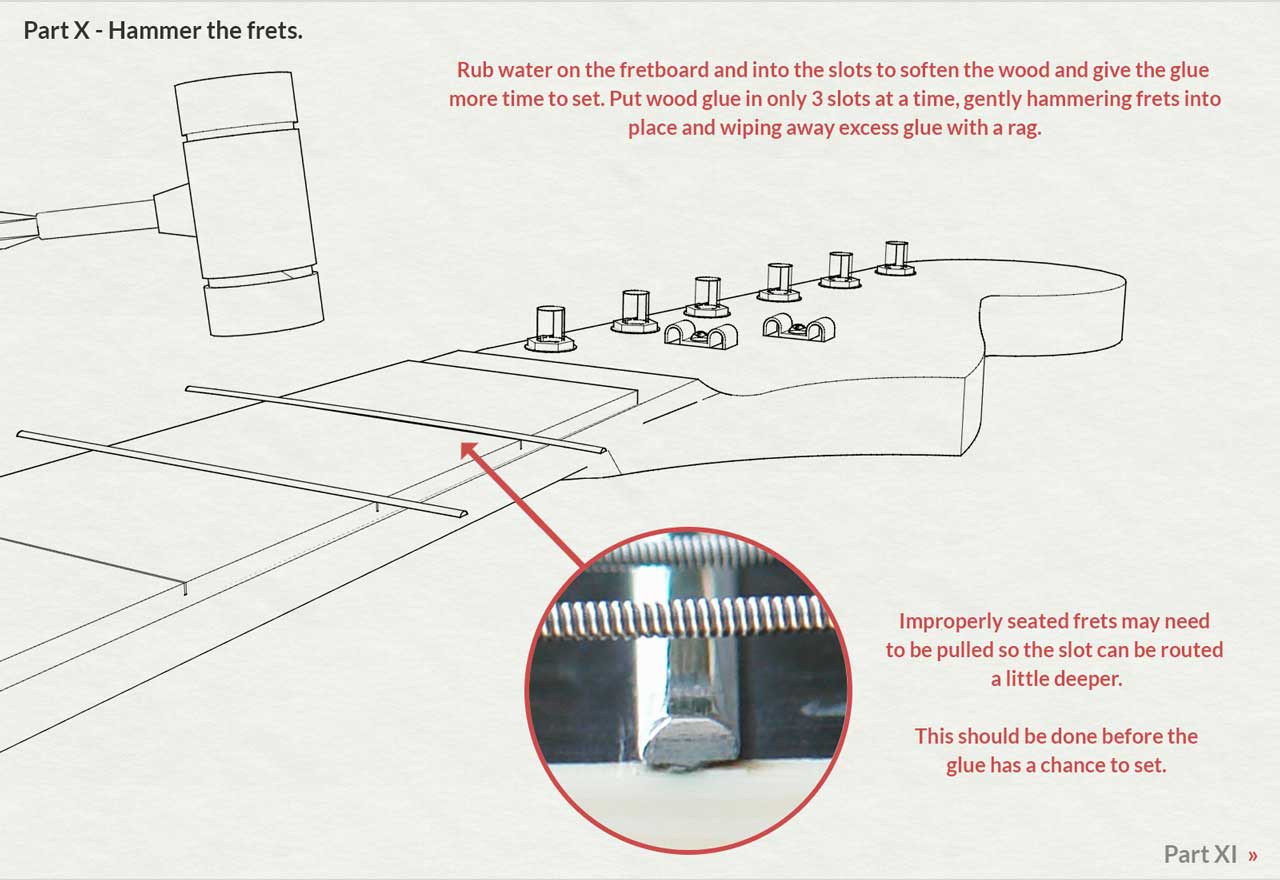
Step 10 – Hammer the frets.
- Test fit a couple frets into the tongue of the fingerboard. It should require only heavy finger pressure or light tapping with the fret hammer. This is usually where the slots need to be deepened.
- Try to remove test fret wire without bending it. Make a new fret if needed.
- Dampen fretboard with water to soften wood and increase working glue time.
- Work wood glue into frets 3 or 4 at a time.
Tap fret firmly into slots with a deadblow hammer. - Clean the remaining glue and see that the fret has seated tightly against the fingerboard.
- If fret will not seat against fingerboard, either the slot is not deep enough or the fret wire is improperly radiused.
- Re-examine slots and frets and deepen before proceeding.
- If the first frets seat properly, proceed with the rest of the fingerboard.
Leave a little water after cleaning the glue to slow the glue from setting.
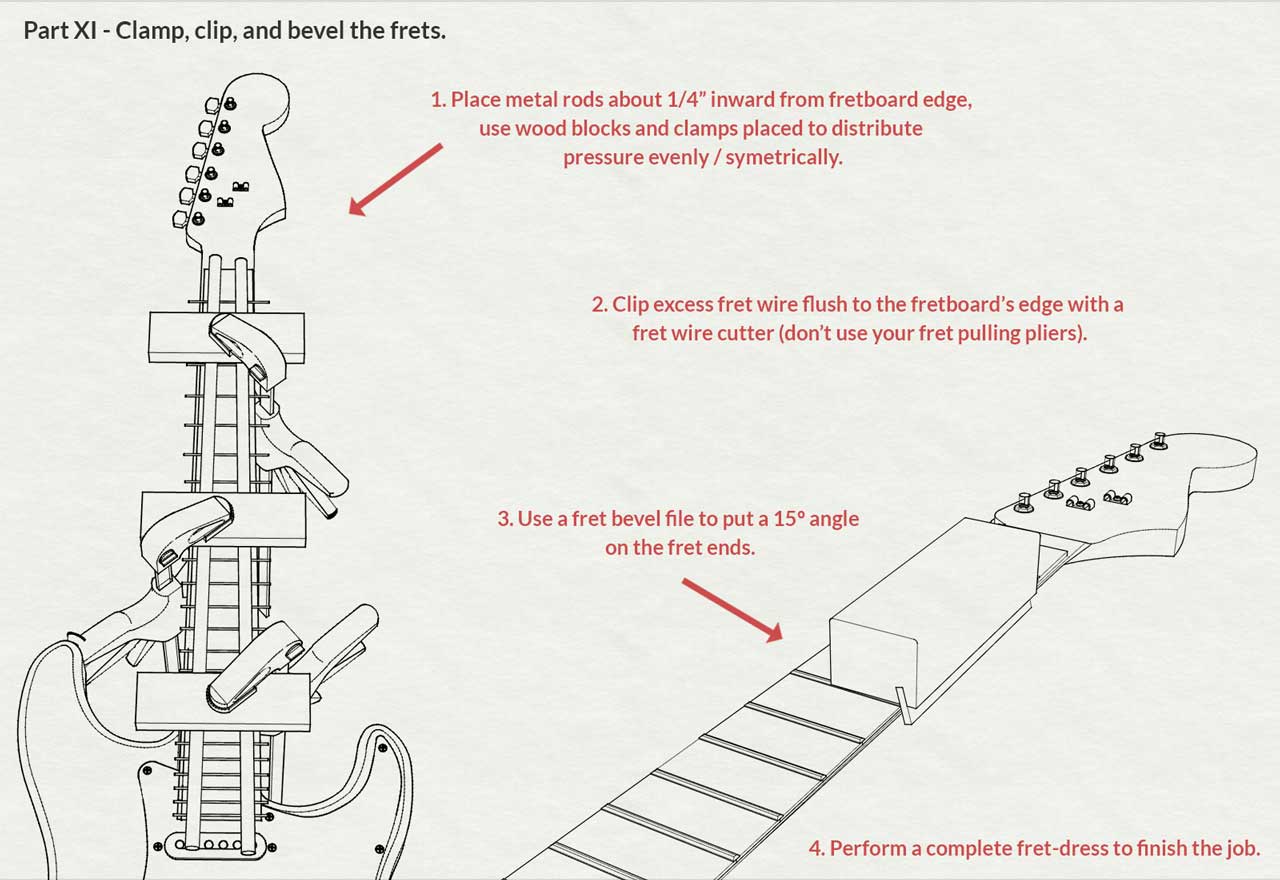
Step 11 – Clamp, clip, and bevel the frets.
- With all frets properly seated, clamp 3/8” steel rod 1/4” from the fretboard edge.
- Use 4” – 6” blocks as clamping cauls. Tape helps keep the rods in the proper place.
- After at least 2 hour drying time, remove the clamps.
- Clip frets flush at the end of the fingerboard with flat ground fret cutters, not the fret pullers.
- If wood strips were not used, the pro-dress can be achieved by filling the fret slot ends with wood dust and glue.
- Let it dry completely then sand or file flush. Try to stay off the finish.
- Bevel fret ends with a bevel file or straight file. I prefer a 15 degree bevel.
- File the sharp corner of the fret ends with a safe-edged flat file or 3-corner file.
- Proceed with normal fret dress procedure starting with 220 grit paper. If everything was done properly the bar will lightly kiss the top of all the frets. Touch up the fretboard edge with wipe-on poly or French polish and pumice.
To complete the fret job, you can head over to the fret dressing article. After that, you’ll definitely want to perform a professional setup. If you’ve done everything right, you should have the most flawless playing experience of your life!